Welcome to Elderfield · Equipment Guide

Best Equipment in Welcome to Elderfield: Weapons, Armor & Accessories

Welcome to Elderfield throws a huge amount of weapons, armor and accessories at you, and early on it is not exactly obvious what is worth crafting, what you should keep, or which pieces can make your life much easier. In this guide we go through the equipment we think is most useful, how to get it, and the materials you need when crafting at the Forge.

Complete Welcome to Elderfield Guide
COMPLETE GUIDE Looking for more help in Elderfield? View all our guides →

Is physical damage or magic better?

Both work well, so choosing one is not going to ruin your run. That said, if you have only just started and are still trying to survive the first fights, physical damage is the easier option to get going. It is simple to build around, normal attacks do not burn MP, and quick swords have some very useful properties when you are fighting several enemies.

Physical damage: easier to start with

Our early pick

If you are only a few hours in, this is where we would start. A good quick sword can hit hard without requiring much setup, and these weapons can come with Piercing, which is especially handy when several enemies show up in the same battle.

The upgrade path is also easy to follow. You can craft stone, copper and iron swords very early, then move into Verdite, Platinum and stronger materials without completely changing the way you play.

What would we use? Aim for the Iron Shortsword +3 early, then move to the Verdite Quickblade +4. From there you can keep the speed and accuracy of quick swords or switch to a greatsword if you want much bigger hits and do not mind losing Agility and accuracy.

Magic: extremely strong, but needs more setup

Rites & MP

Magic can hit ridiculously hard too, but early on you have to pay much more attention to MP and the Rites you are using. Staves become far more attractive once you have a decent MP pool and equipment that pushes Magic Attack.

Some late-game staves also come with powerful bonuses and equally serious drawbacks. The Blacksteel Staff +7, for example, gives a huge amount of Magic Attack but increases Rite MP costs by 75%. With a proper magic setup it can be fantastic; equip it without thinking about MP and you can run dry very quickly.

Want to play magic from the start? You absolutely can. Follow the Wooden Staff → Copper → Iron → Verdite route and keep an eye out for MP and Magic Attack gear.

Physical vs. magic at a glance

PhysicalMagic
Early gameVery comfortableNeeds a little more setup
ResourceNormal attacks do not rely on MPYou need to manage MP
Several enemiesQuick swords with Piercing work very wellDepends heavily on your Rites
EquipmentEasy to put together earlyGets much better with specialized gear
Later onChoose speed/accuracy or raw greatsword damageDedicated staves and gear can push Magic Attack very high
Swipe the table to see more →

You also do not have to commit to one forever. For a good part of the game, simply use the strongest equipment you find. Specializing matters more once armor, accessories and weapons with stronger bonuses and penalties start appearing.

You do not need to craft every weapon: the Forge gives you a reliable upgrade route, but it is not the only source of good gear. Exploration, events and combat rewards can give you something better. If they do, use it instead of wasting materials just to complete a crafting chain.

Swords and physical weapons

There are a lot of weapons in Welcome to Elderfield, but you do not need to craft every new recipe. If you like quick swords, this chain takes you from the early game into some of the strongest versions. Be careful when selling older weapons because several recipes use the previous weapon as an ingredient.
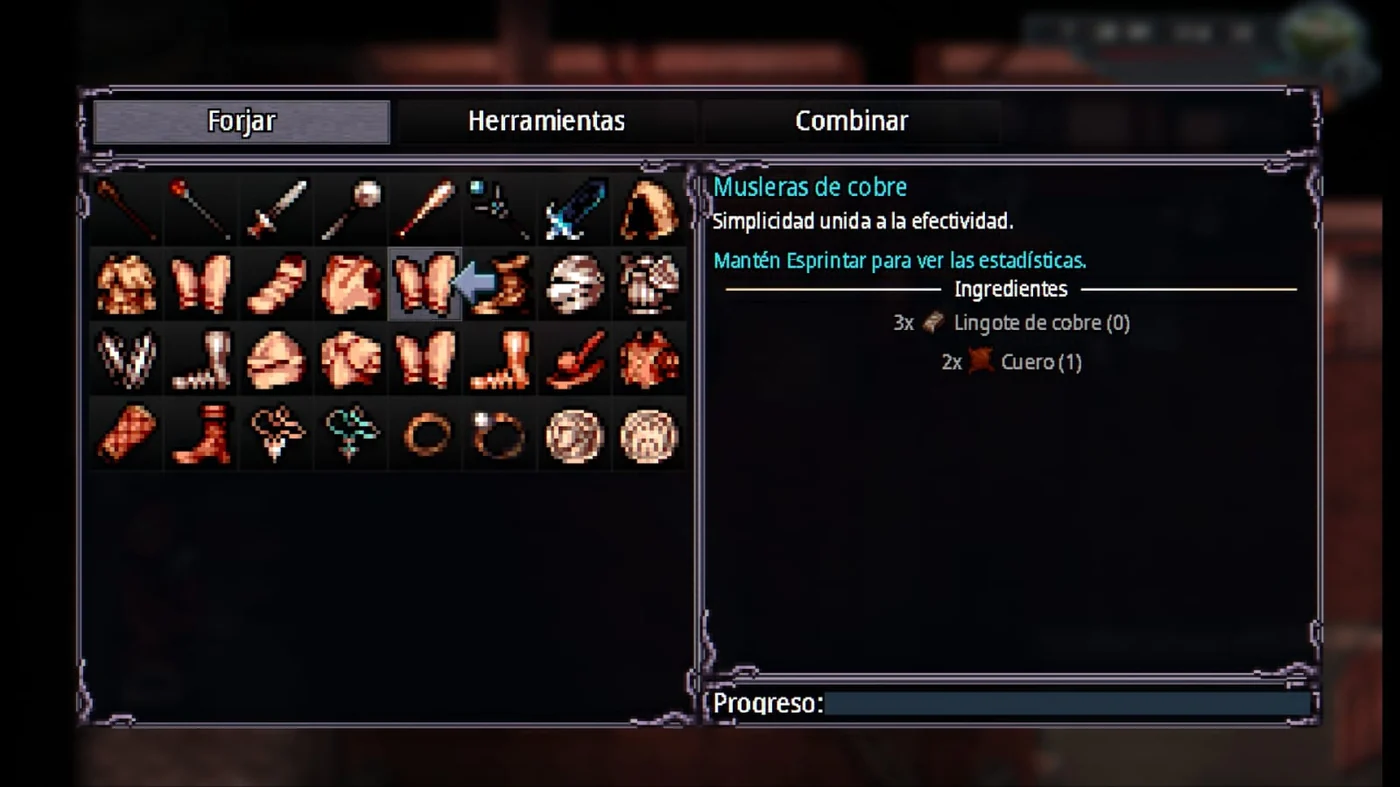
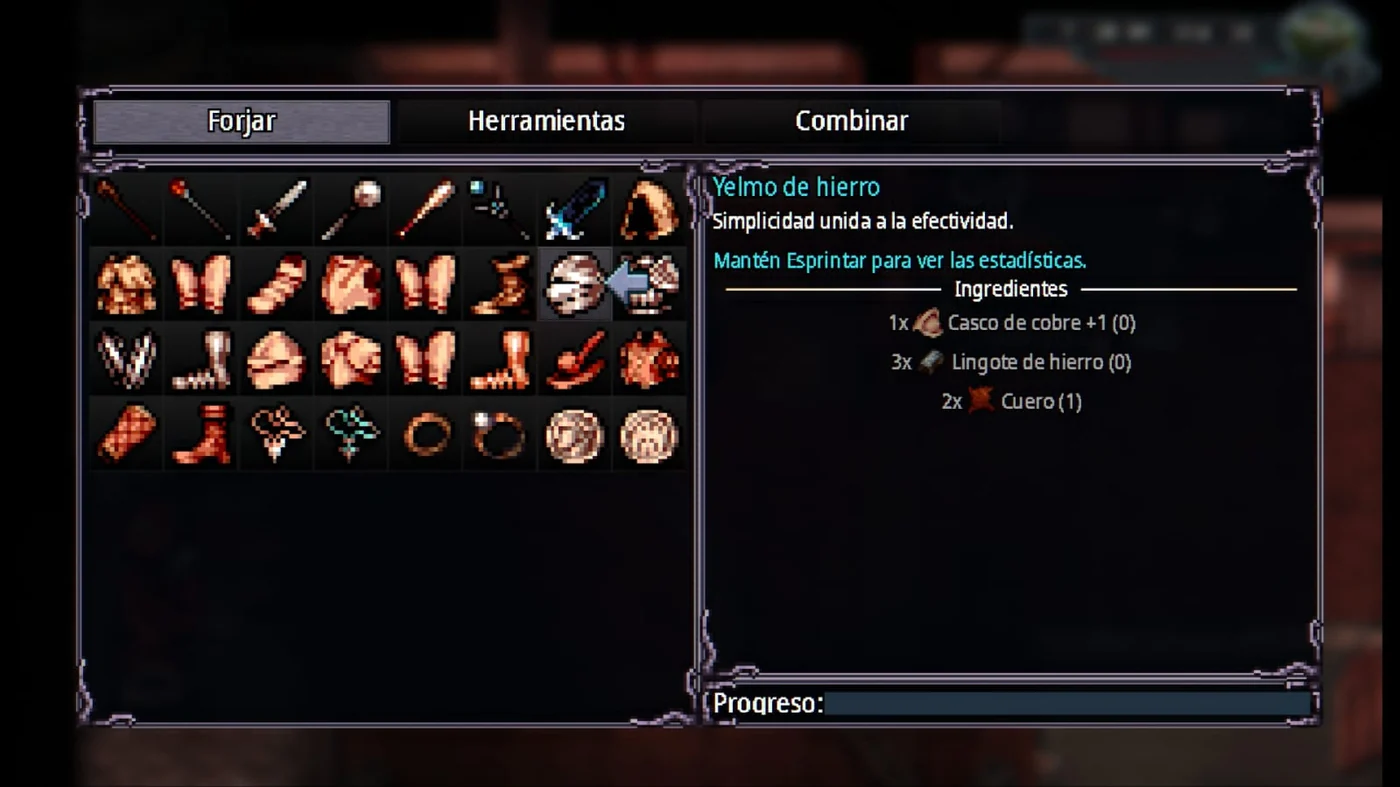
Welcome to Elderfield Forge with weapons and armor available
The Forge contains many of the weapon and armor chains you can improve throughout the game.

Quick sword crafting chain

WeaponMaterialsWhen it is useful
Stone Shortsword +16 Stone + 4 WoodAvailable right from the beginning.
Copper Shortsword +2Stone Shortsword +1 + 3 Copper Bars + 1 Rope + 4 WoodAn easy first upgrade once you are smelting Copper.
Iron Shortsword +3Copper Shortsword +2 + 4 Iron Bars + 2 LeatherExcellent early on. Keep it for the next recipe.
Verdite Quickblade +4Iron Shortsword +3 + 6 Verdite Bars + 4 Green Crystals + 4 Void Crystal Bars + 10 Spiritwood + 8 LeatherA strong step once you can gather Old Woods materials.
Platinum Quickblade +5Verdite Quickblade +4 + 1 Void Orb + 4 Platinum Bars + 6 Green Crystals + 15 Spiritwood + 12 LeatherThe next step before Steel.
Steel Quickblade +64 Steel Bars + 5 Sharp Teeth + 6 Iron Bars + 10 Ancientwood + 5 LeatherDo not sell it: Blacksteel uses it.
Blacksteel Quickblade +7Steel Quickblade +6 + 2 Blacksteel Bars + 5 Sharp Teeth + 2 Steel Bars + 2 Gold Plates + 10 Ancientwood + 5 LeatherOne of the strongest physical options before +10 gear.
Vile Quickblade +10Blacksteel Quickblade +7 + 10 Vile Relics + 20 Vilewood + 10 Vilebloom + 10 VilerootThe final upgrade in this chain.
Swipe the table to see more →

Iron Shortsword +3

Early game
Stats: +5 Max HP, +12 Attack, -3 Magic Defense, +5 Agility, +1 Luck and +5% accuracy. Has Piercing.

The Iron Shortsword +3 is a great early target. Its materials are not especially rare, it hits much harder than the starting weapons and, most importantly, you should not sell it: you will need it later for the Verdite Quickblade +4.

How to craft it: use a Copper Shortsword +2, 4 Iron Bars and 2 Leather. The Copper Shortsword itself uses a Stone Shortsword +1, 3 Copper Bars, 1 Rope and 4 Wood.

How to start the chain from scratch

The Stone Shortsword +1 only needs 6 Stone and 4 Wood, so you can start this chain almost as soon as you have access to the Forge.

Verdite Quickblade +4

Old Woods
Requirement: this weapon belongs to the next Forge tier and requires Forge Level 2. If it is not showing in your list yet, the problem is not your materials.
Stats: +15 Max HP, +22 Attack, +3 Defense, +8 Magic Attack, -5 Magic Defense, +10 Agility and +5% accuracy. Has Piercing.

Once you reach the Old Woods, this is one of the first upgrades we would look at. It is a sizeable Attack increase, keeps good Agility and reuses the Iron Shortsword +3 you were already carrying.

Platinum Quickblade +5

Mid-chain upgrade
Requirement: this recipe needs Forge Level 2. If it is not listed yet, you have not unlocked that Forge tier.
Stats: +15 Max HP, +28 Attack, +3 Defense, +10 Magic Attack, -5 Magic Defense, +12 Agility and +5% accuracy.

When the Verdite version starts falling behind, you can turn it directly into the Platinum version. You do not need to craft another sword from scratch, so keep the one you are already using.

How to craft it: Verdite Quickblade +4, 1 Void Orb, 4 Platinum Bars, 6 Green Crystals, 15 Spiritwood and 12 Leather.

Where to get the materials

Verdite Quickblade +4: the weapon from the previous step. Keep it.
Platinum Bar: mine Platinum Ore on floor 3 of the Old Woods Mine and smelt it in the Furnace.
Green Crystal: can be mined on any floor of the Old Woods Mine.
Spiritwood: gather it in the Old Woods. This recipe needs 15, so do not burn through your stock.
Leather: make Scraped Hide in the Witchcraft Mortar with 1 Bloody Skin, 2 Crushed Bones and 2 Salt, then process the Scraped Hide in the Furnace.
Void Orb: can appear among certain combat rewards. It is not guaranteed, so keep the first one you get if you want this sword.

Blacksteel Quickblade +7

Physical damage
Stats: +20 Max HP, +36 Attack, +4 Defense, +16 Magic Attack, -6 Magic Defense, +25 Agility and +10% accuracy. Has Piercing.

This one hits very, very hard. Better still, it does not only raise Attack: +25 Agility and +10% accuracy keep it fast and reliable. If you have followed the chain from the beginning, this is where keeping all those earlier weapons really pays off.

How to craft it: Steel Quickblade +6, 2 Blacksteel Bars, 5 Sharp Teeth, 2 Steel Bars, 2 Gold Plates, 10 Ancientwood and 5 Leather.

First you need the Steel Quickblade +6

Craft it with 4 Steel Bars, 5 Sharp Teeth, 6 Iron Bars, 10 Ancientwood and 5 Leather. Keep it, because it is the main ingredient for the Blacksteel version.

Where to get the processed materials

Blacksteel Bar: process Blackiron Ore in the Advanced Furnace.
Steel Bar: process Dense Iron Ore in the Advanced Furnace.
Gold Plate: process Dense Gold Ore in the Advanced Furnace.
Iron Bar: mine Iron Ore on any floor of the Mall or Old Woods mines and smelt it in the Furnace. You can also buy the ore at the Workshop.
Sharp Tooth: obtained as a creature material. You need five for Steel and another five for Blacksteel, so keep them when they start dropping.
Ancientwood: gathered from resource nodes in the Catacombs mines.
Leather: make Scraped Hide in the Witchcraft Mortar, then process it in the Furnace.

Vile Quickblade +10

Final upgrade
Stats: +25 Max HP, +40 Attack, +6 Defense, +20 Magic Attack, -8 Magic Defense, +55 Agility and +10% accuracy. Has Piercing, and damaging attacks can inflict Weakness.

This is the end of the chain. The Vile Quickblade +10 uses the Blacksteel Quickblade +7 again, so do not sell it just because you find another weapon on the way. The Agility increase is enormous and its attacks can inflict Weakness.

How to craft it: Blacksteel Quickblade +7, 10 Vile Relics, 20 Vilewood, 10 Vilebloom and 10 Vileroot.

Where to get the materials

Vile Relic: sold at the Lumberjack shop in the Deep Woods for 500. Stock is limited.
Vilewood, Vilebloom and Vileroot: late Woods materials. Start saving them as soon as they appear because this recipe needs 20 wood and 10 of each plant.

Smileslicer +5

Old Woods
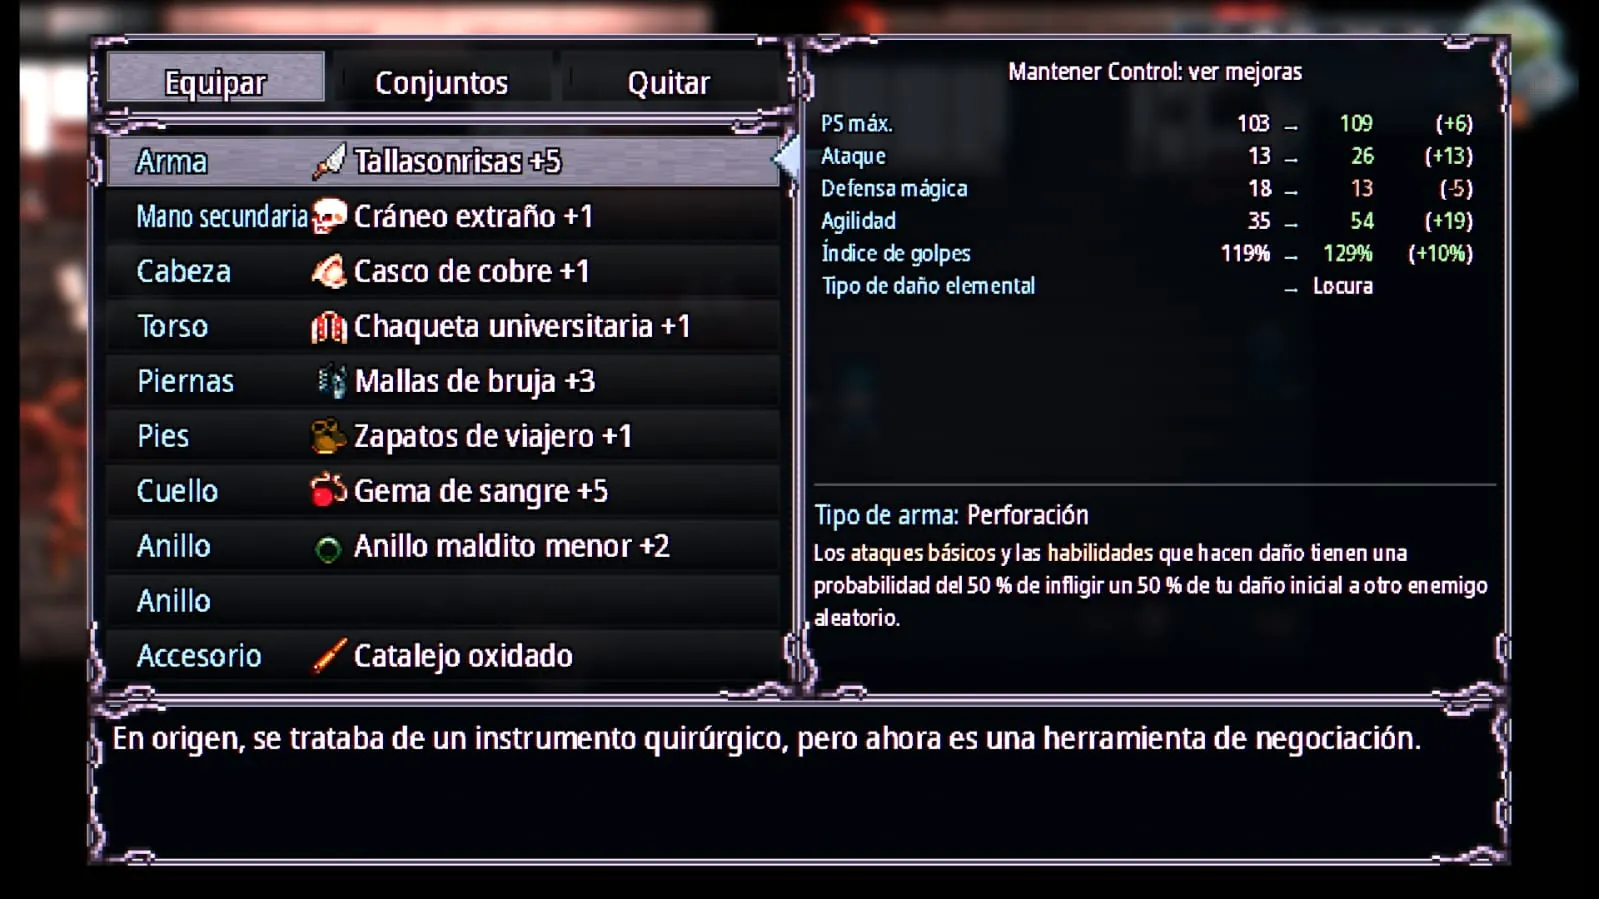
Property: Piercing weapon. Basic attacks and damaging skills have a 50% chance to deal 50% of their initial damage to another random enemy.

Smileslicer is one of the special weapons you can pick up while exploring the Old Woods. You do not need to craft it or rely on a random loot roll.
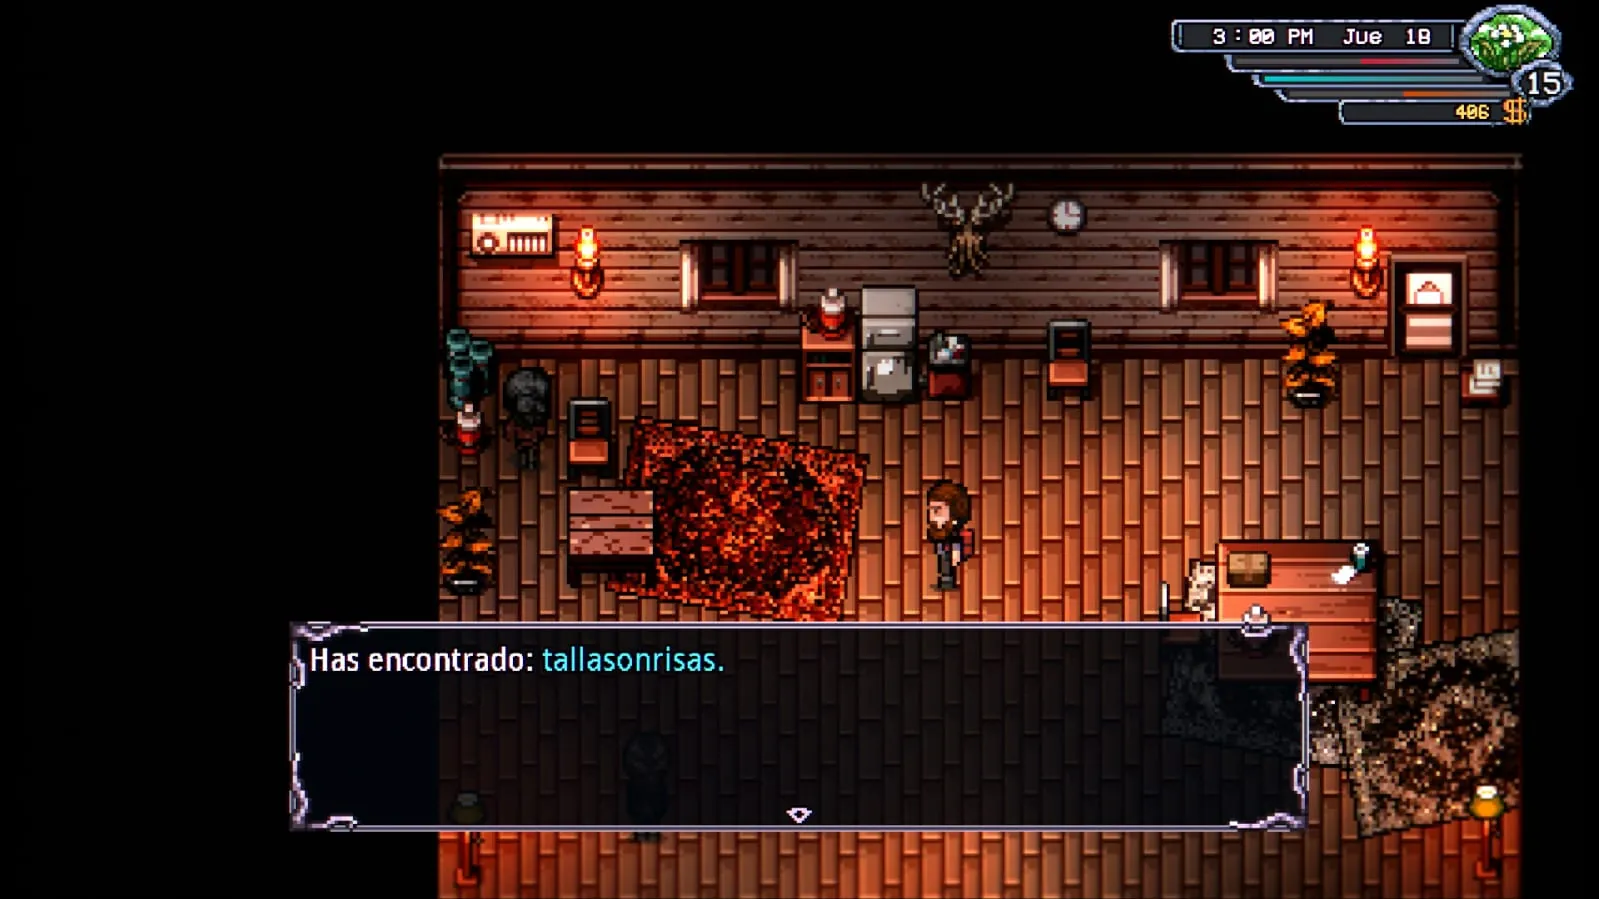
How to get Smileslicer: head deeper into the Old Woods until you reach the camp. Enter the house there and you can pick up Smileslicer +5 inside.
Smileslicer location at the Old Woods camp in Welcome to Elderfield
Smileslicer is found inside one of the houses at the Old Woods camp.
Smileslicer stats and effect in Welcome to Elderfield
Its effect can send part of your damage to another random enemy.

What about greatswords?

More Attack, bigger penalties

If you would rather land one enormous hit and ask questions later, there is also a greatsword chain: Verdite Greatsword +4 → Platinum Greatsword +5 → Steel Greatsword +6 → Blacksteel Greatsword +7 → Vile Greatsword +10.

The catch is the penalties. The Blacksteel Greatsword +7 reaches +55 Attack, but costs 10 Agility and 20% accuracy. It hits absurdly hard when it connects, but feels much clumsier. We prefer quick swords for general use; greatswords are the raw-damage alternative.

Staves and magic weapons
If you are going down the magic route, do not sell every staff the moment you find a replacement. The chain works much like the sword chain and several recipes need the previous staff.
Magic equipment and staff in Welcome to Elderfield
For a Rite-focused character, staves are the natural alternative to physical weapons.

Main staff crafting chain

WeaponMaterials
Wooden Staff +12 Stone + 6 Wood
Copper Staff +2Wooden Staff +1 + 3 Copper Bars + 1 Rope + 4 Wood
Iron Staff +3Copper Staff +2 + 4 Iron Bars + 2 Leather
Verdite Staff +4Iron Staff +3 + 4 Verdite Bars + 2 Green Crystals + 10 Spiritwood + 4 Leather
Platinum Staff +5Verdite Staff +4 + Beating Heart + 4 Platinum Bars + 6 Green Crystals + 15 Spiritwood + 12 Leather
Steel Staff +64 Steel Bars + 5 Sharp Teeth + 6 Iron Bars + 10 Ancientwood + 5 Leather
Blacksteel Staff +7Steel Staff +6 + 2 Blacksteel Bars + 5 Sharp Teeth + 2 Steel Bars + 2 Gold Plates + 10 Ancientwood + 5 Leather
Vile Staff +10Blacksteel Staff +7 + 10 Vile Relics + 20 Vilewood + 10 Vilebloom + 10 Vileroot
Swipe the table to see more →

Iron Staff +3

Early magic

If you want to use magic from the opening hours, this is a sensible early target. The route is straightforward: Wood, then Copper, then Iron. It also leaves you ready for the Verdite Staff once you reach the Old Woods.

Recipe: Copper Staff +2 + 4 Iron Bars + 2 Leather.

Verdite Staff +4

Old Woods
Requirement: this recipe needs Forge Level 2. If it is not in your list yet, you have not unlocked that Forge tier.
How to craft it: Iron Staff +3, 4 Verdite Bars, 2 Green Crystals, 10 Spiritwood and 4 Leather.

Do not sell the Iron Staff +3 if you plan to continue this chain.

Platinum Staff +5

Magic
Requirement: this recipe needs Forge Level 2.
How to craft it: Verdite Staff +4, 1 Beating Heart, 4 Platinum Bars, 6 Green Crystals, 15 Spiritwood and 12 Leather.

This continues directly from the Verdite branch, so keep the previous staff.

Where to get the materials

Platinum Bar: mine Platinum Ore on floor 3 of the Old Woods Mine and smelt it in the Furnace.
Green Crystal: appears while mining on any floor of the Old Woods Mine.
Spiritwood: gather it in the Old Woods.
Leather: make Scraped Hide with Bloody Skin, 2 Crushed Bones and 2 Salt in the Witchcraft Mortar, then process it in the Furnace.
Beating Heart: can appear among certain combat rewards. It is not guaranteed, so keep one if you plan to follow the staff chain.

Blacksteel Staff +7

Advanced magic
Stats: +20 Max MP, -11 Defense, +36 Magic Attack, +3 Magic Defense and +15 Agility. Rites cost 75% more MP.

This staff hits extremely hard with magic, but the downside is serious: Rites cost 75% more MP. If you have plenty of MP or want to burst down a difficult fight, great. For casual spellcasting while exploring, it can drain you very quickly.

How to craft it: Steel Staff +6, 2 Blacksteel Bars, 5 Sharp Teeth, 2 Steel Bars, 2 Gold Plates, 10 Ancientwood and 5 Leather.

First you need the Steel Staff +6

Craft it with 4 Steel Bars, 5 Sharp Teeth, 6 Iron Bars, 10 Ancientwood and 5 Leather.

Where to get the materials

Blacksteel Bar: process Blackiron Ore from the Catacombs mines in the Advanced Furnace.
Steel Bar: process Dense Iron Ore from the Catacombs mines in the Advanced Furnace.
Gold Plate: process Dense Gold Ore from the Catacombs mines in the Advanced Furnace.
Ancientwood: gather it from resource nodes in the Catacombs mines.
Iron Bar: smelt Iron Ore from the Mall or Old Woods mines. The ore is also sold at the Workshop.
Sharp Tooth: obtained as a creature material. Keep them because this chain uses several.
Leather: make Scraped Hide in the Witchcraft Mortar and process it in the Furnace.

Vile Staff +10

Final upgrade
How to craft it: Blacksteel Staff +7 + 10 Vile Relics + 20 Vilewood + 10 Vilebloom + 10 Vileroot.

This is the final upgrade in the chain, so keep your Blacksteel Staff even if you temporarily replace it.

Where to get the materials

Vile Relic: sold at the Lumberjack shop in the Deep Woods for 500. Stock is limited.
Vilewood, Vilebloom and Vileroot: save them once they start appearing in the later Woods areas. You need 20 wood and 10 of each plant.

Armor

Armor follows the same basic idea: some useful pieces are simply found in the world, while others sit at the end of long crafting chains. Below are the pieces we think are worth knowing about, including the earlier gear you should keep for later recipes.
Before looking for the equipment deeper in the Old Woods: first defeat the Mall Administrator. Afterwards, Adrian gives you a basic axe. Take it to Molly to improve it. With the upgraded axe, you can push farther into the Old Woods and reach the areas containing the pieces below.

Unlock new armor when you reach the Catacombs

Catacombs · Forge

Once you gain access to the Catacombs, do not just focus on exploring and pushing deeper into the area. You will find an NPC there who unlocks new equipment recipes at the Forge.
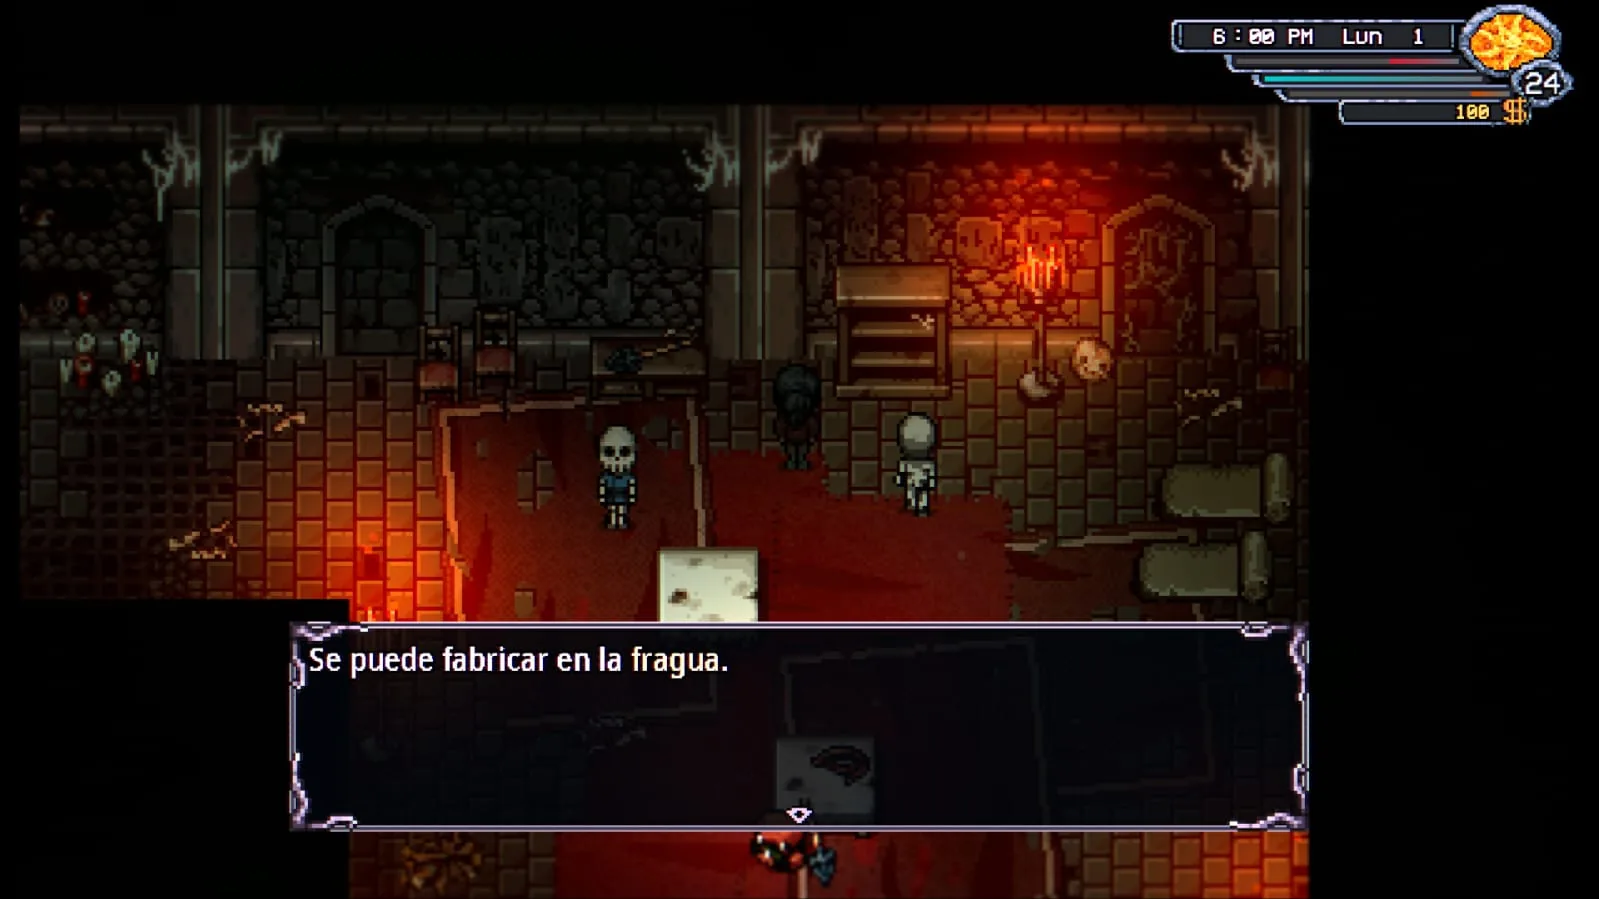
How to unlock it: talk to this NPC when you reach the Catacombs. After the conversation, new armor recipes will become available at Molly’s Forge.
NPC who unlocks new equipment in the Catacombs in Welcome to Elderfield
Talk to this NPC in the Catacombs to expand the equipment available at the Forge.

Bone equipment

Among the new recipes is the Bone equipment, with armor pieces for different parts of the body. Once you have unlocked them, return to Molly and check the Forge again.
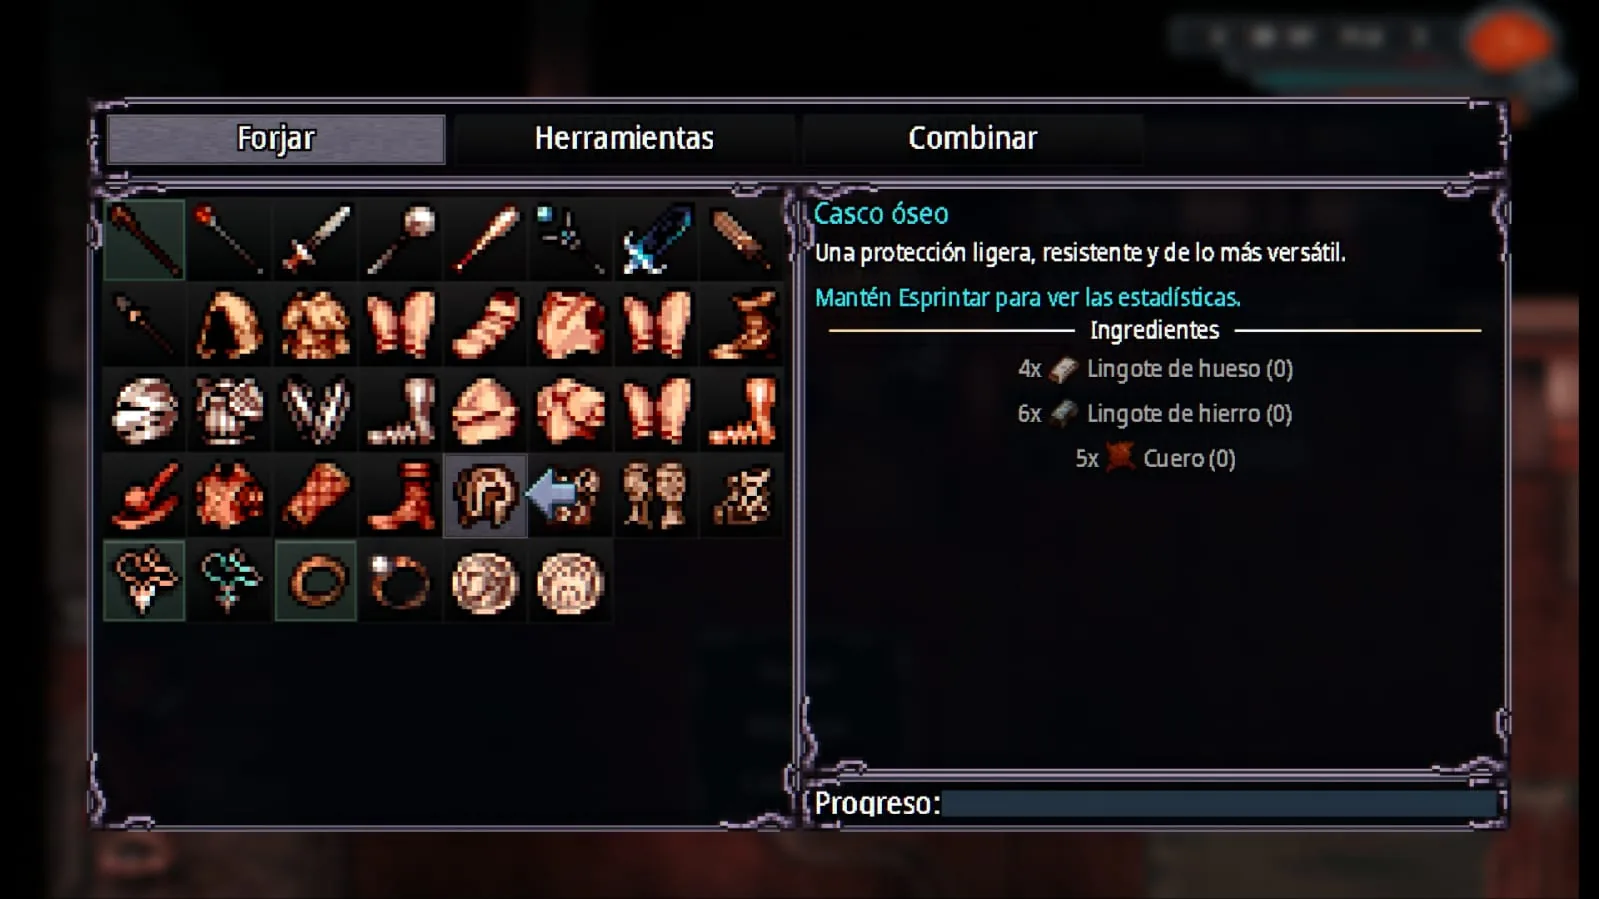
Bone equipment available at the Forge in Welcome to Elderfield
Bone equipment becomes available to craft at the Forge after this unlock.
PieceMaterials
Bone Helmet4 Bone Bars + 6 Iron Bars + 5 Leather
If these recipes are not showing up, it is not because you are missing materials: first reach the Catacombs and talk to the NPC who unlocks them.

Witch Shoes +3

Feet · Old Woods

The Witch Shoes +3 are found while exploring the Old Woods. They are a useful light-armor piece for a magic-oriented setup and increase Max HP, Max MP, Magic Attack and Magic Defense.
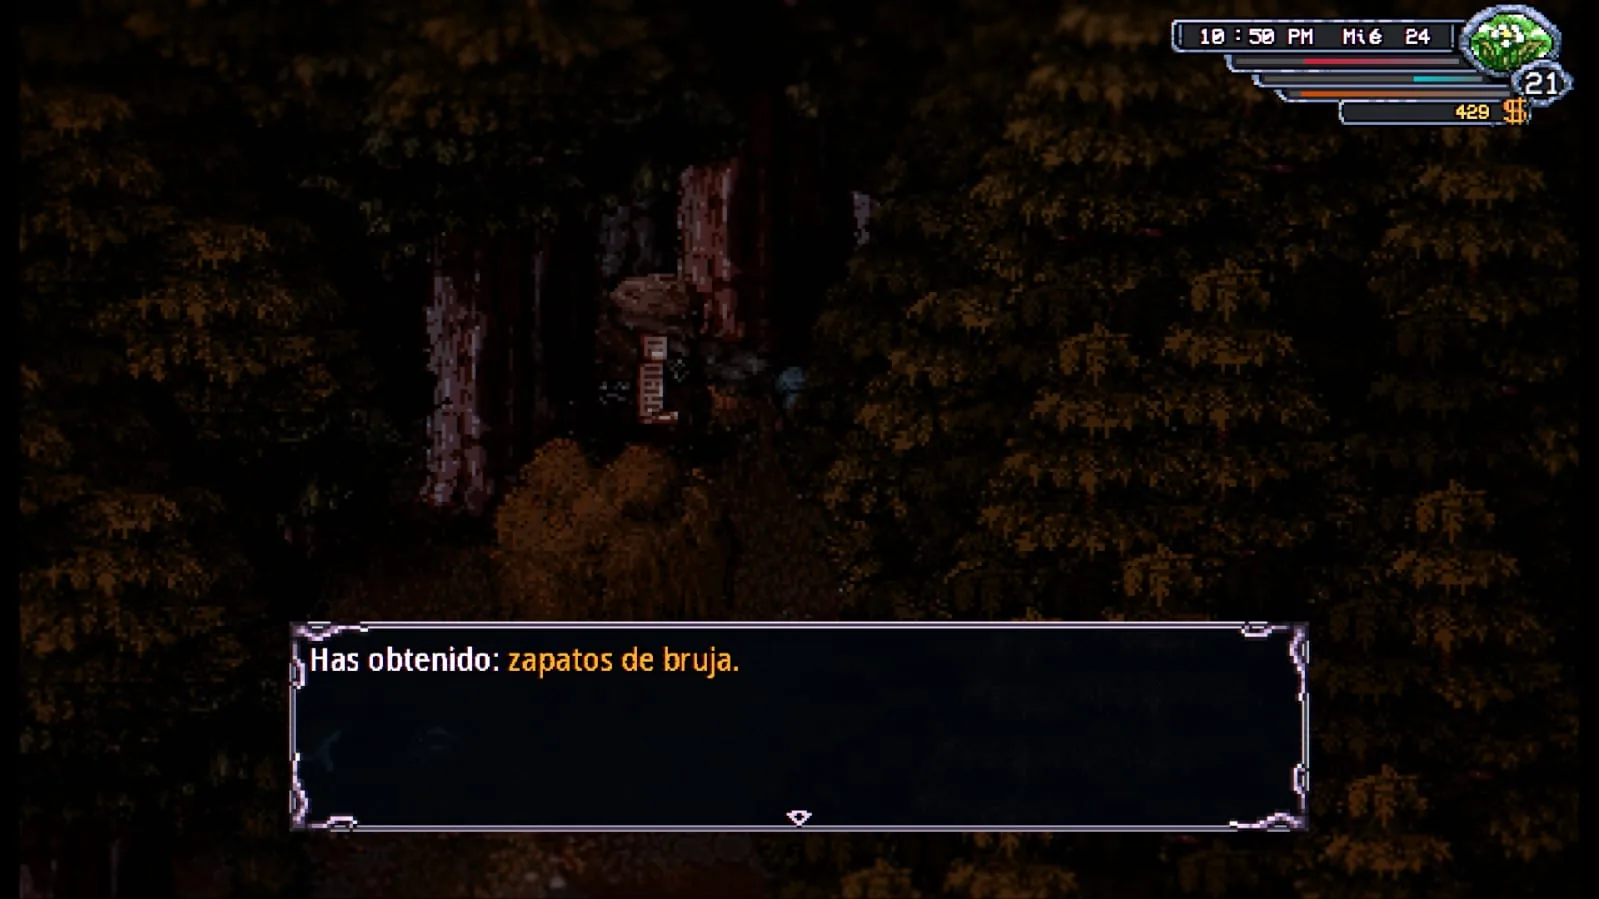
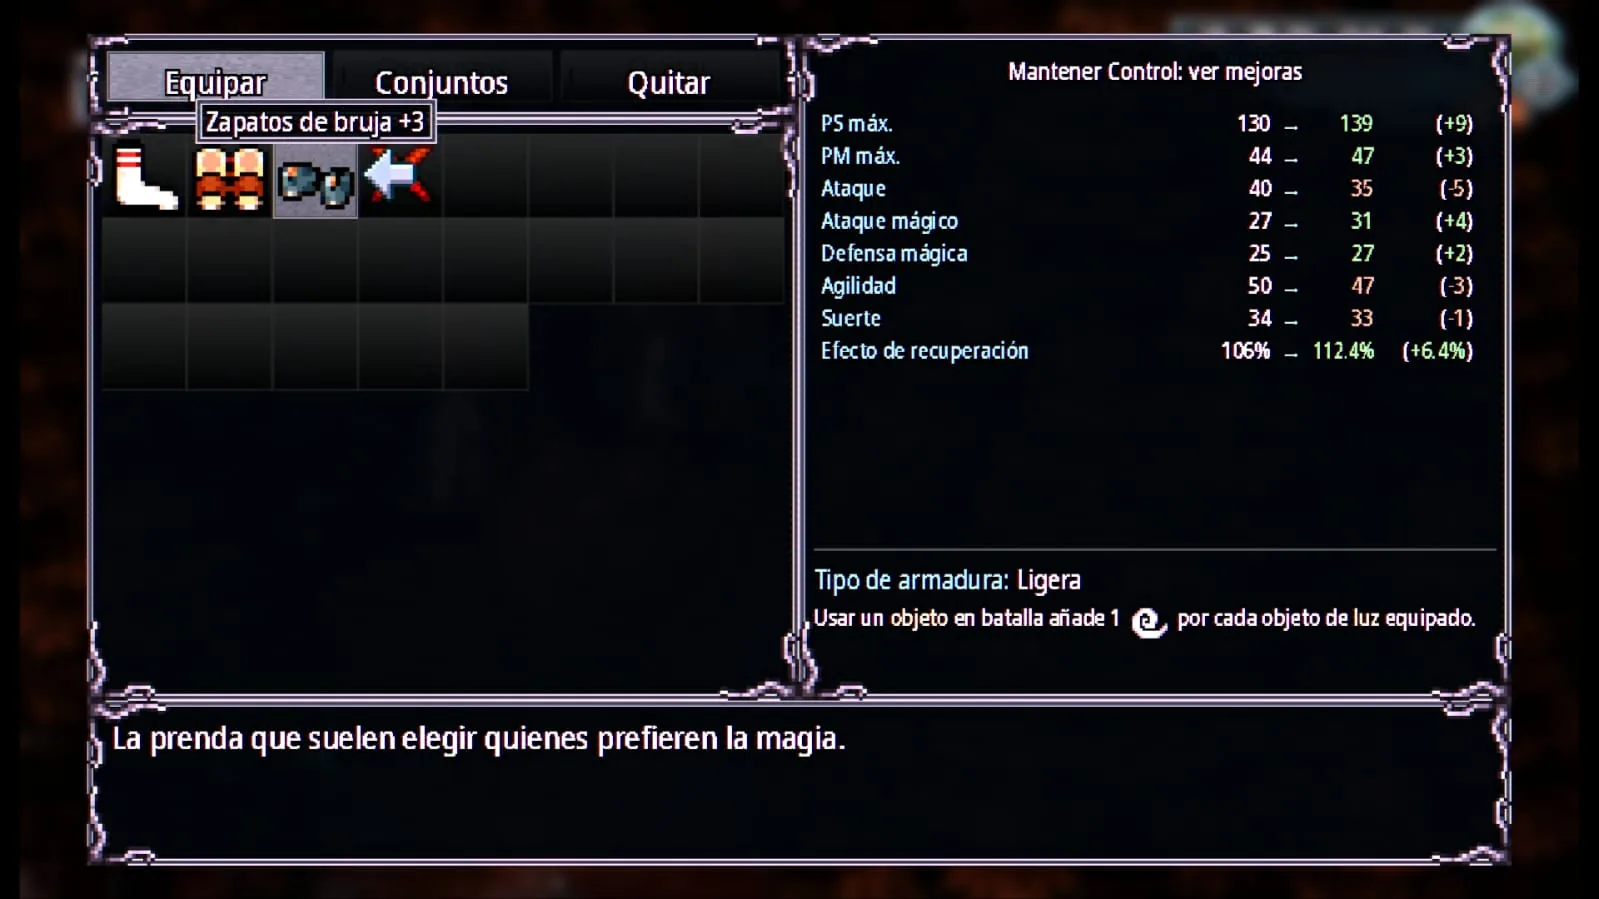
How to get the Witch Shoes: explore the Old Woods and check the loot points around the Witch’s Cabin area. This is a fixed exploration find rather than a Forge recipe.
Witch Shoes location in the Old Woods in Welcome to Elderfield
The Witch Shoes +3 can be picked up while exploring the Old Woods.
Witch Shoes +3 stats in Welcome to Elderfield
Witch Shoes +3.

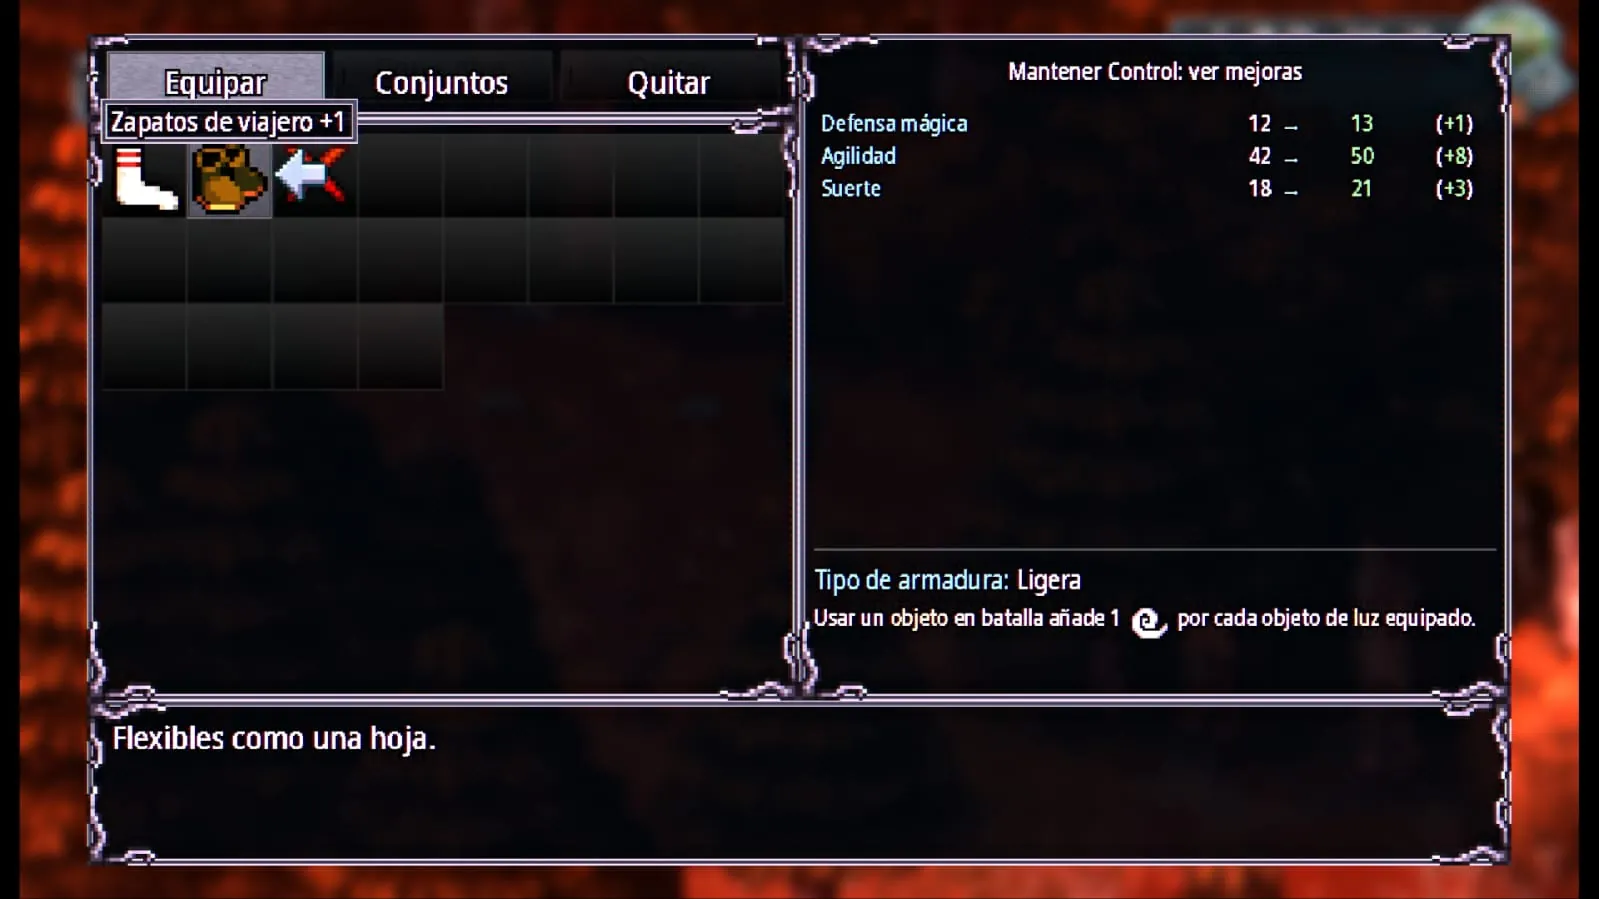
Traveler Shoes +1

Feet · Old Woods

The Traveler Shoes also come from the Old Woods, but this one is completely dependent on luck.
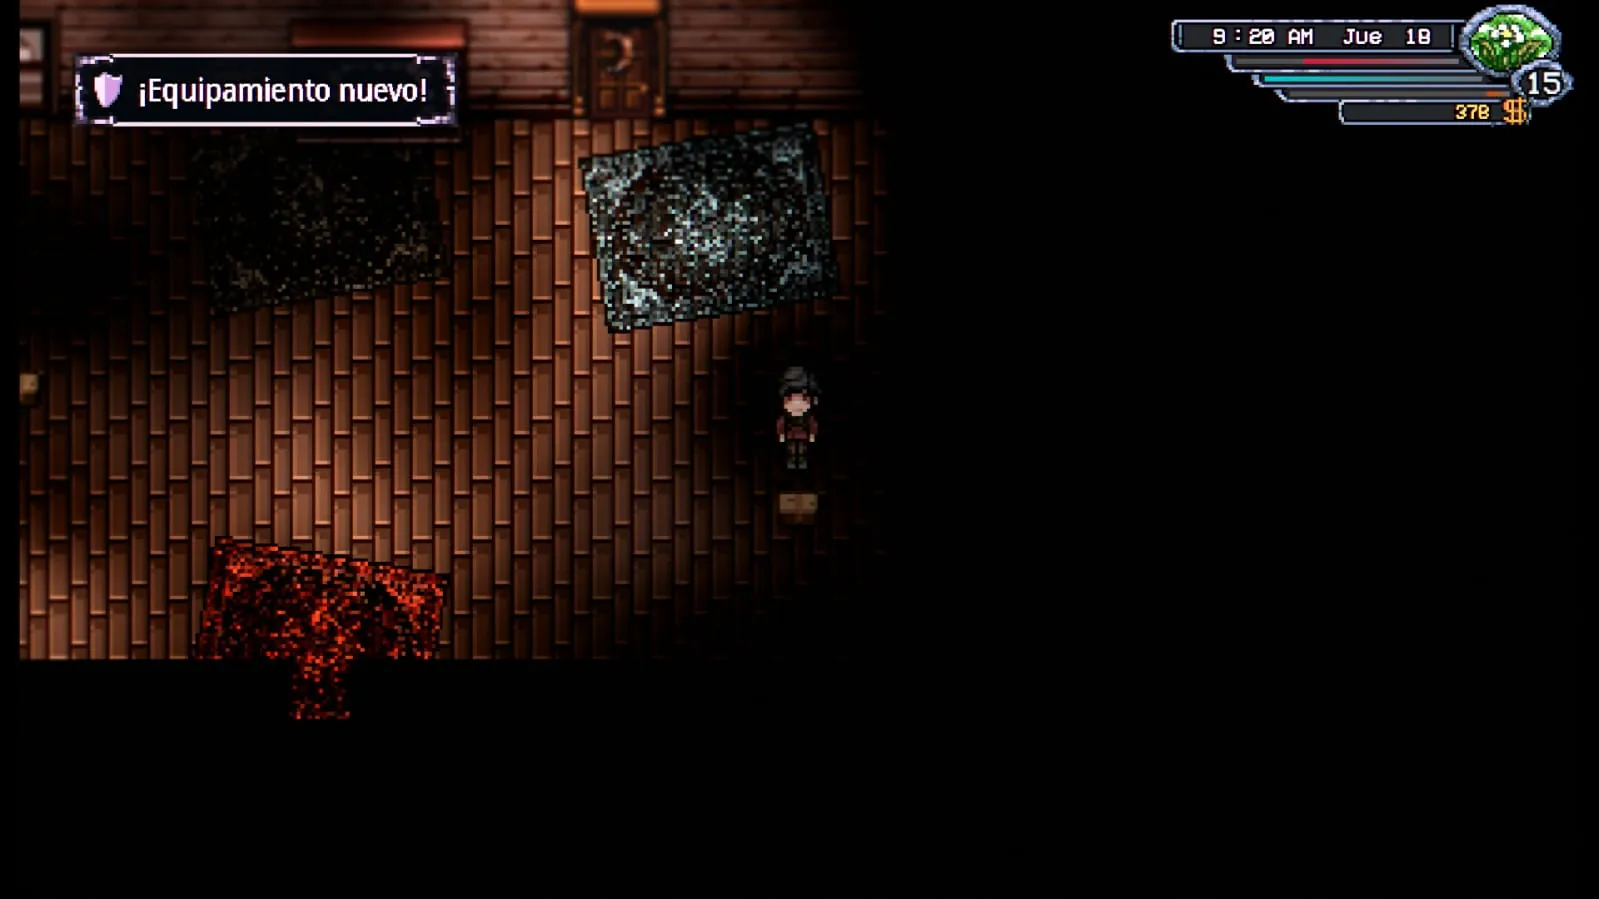
How to get the Traveler Shoes: defeat a Living Log. If its body is not destroyed when the fight ends, your character automatically investigates the corpse. A dice roll then takes place, and you need a good roll to receive the Traveler Shoes.
It can take several attempts: this is RNG. If the corpse is destroyed, the investigation will not happen. Even if the body survives, you still need a favorable dice roll.
How to get the Traveler Shoes in Welcome to Elderfield
If the Living Log’s body survives, it is investigated automatically and the result depends on the dice roll.
Traveler Shoes in Welcome to Elderfield
Traveler Shoes +1.

Light Hood +1

Light armor · Mall

The Light Hood +1 can appear as loot from the special fights triggered through a combat offering.
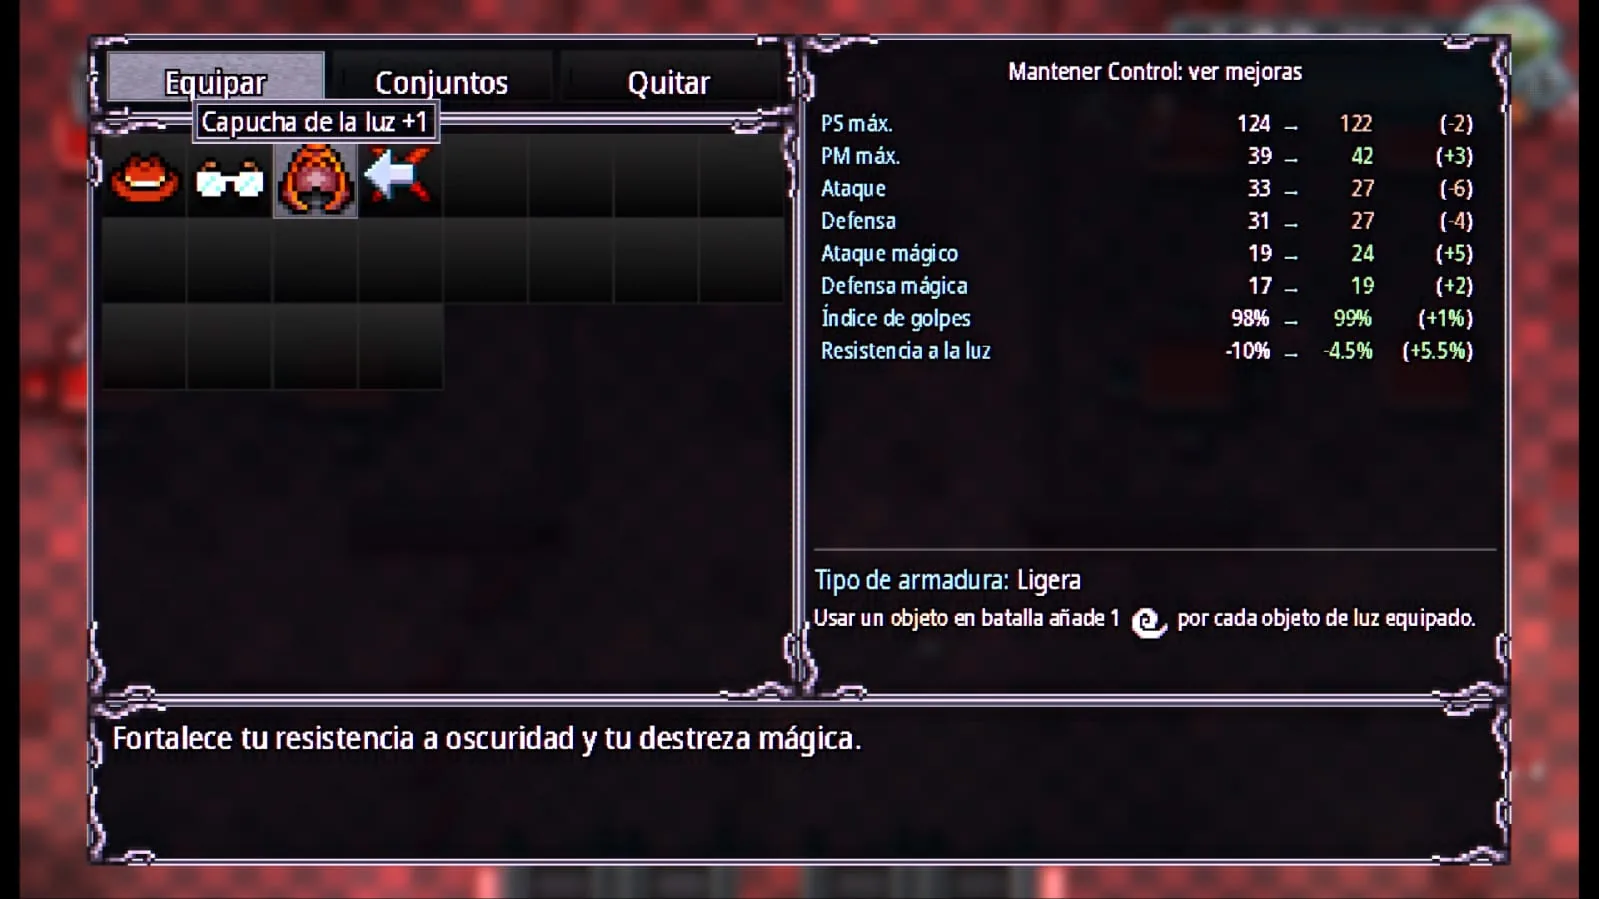
How to get the Light Hood: make a combat offering at a shrine and defeat the enemies that appear. In our run, the Light Hood +1 dropped from a rat-like enemy in the Mall. The drop is not guaranteed, so you may need to repeat these fights.
Effect: using an item in battle adds 1 for each Light item equipped.
Light Hood +1 in Welcome to Elderfield
Light Hood +1.

Dark Cloak +2

Light armor · Mall

The Dark Cloak +2 is another piece we obtained from the special shrine fights.
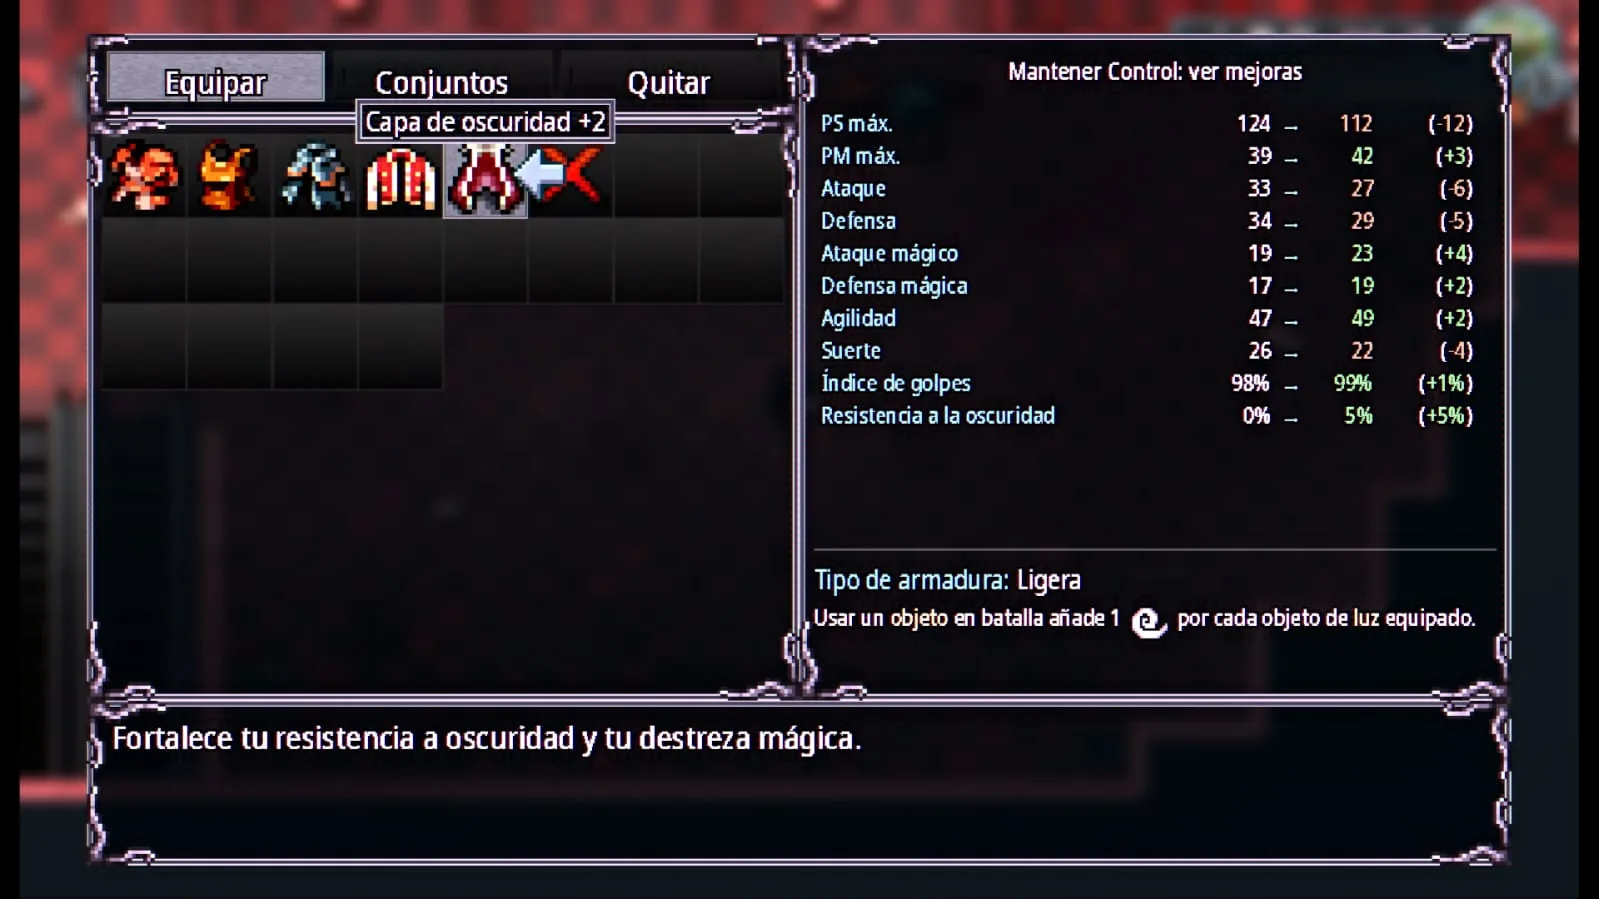
How to get the Dark Cloak: make a combat offering and defeat the enemies that appear. In our run, this piece dropped from a rat-like enemy in the Mall. As with this kind of loot, the drop is not guaranteed.
Dark Cloak +2 in Welcome to Elderfield
Dark Cloak +2.

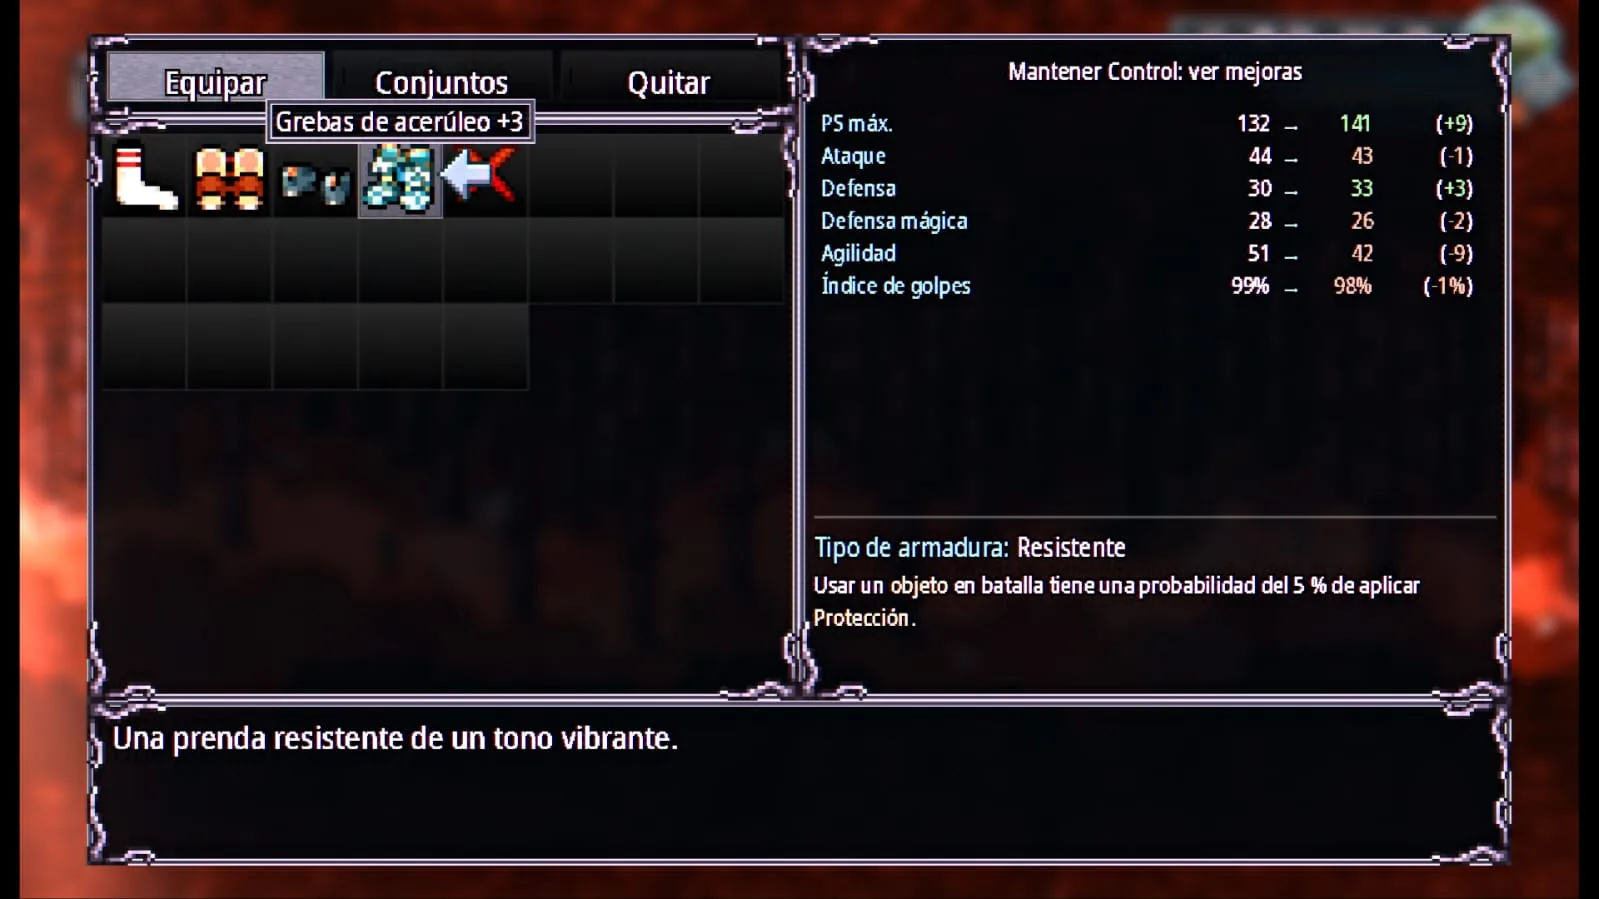
Azure Helmet +3 and Azure Greaves +3

Heavy armor · Old Woods

The Azure set has more pieces hidden around the Old Woods. The Azure Helmet +3 is inside the Witch’s Cabin, in a room that requires a Basic Skeleton Key. The Azure Greaves +3 are another Old Woods exploration find.
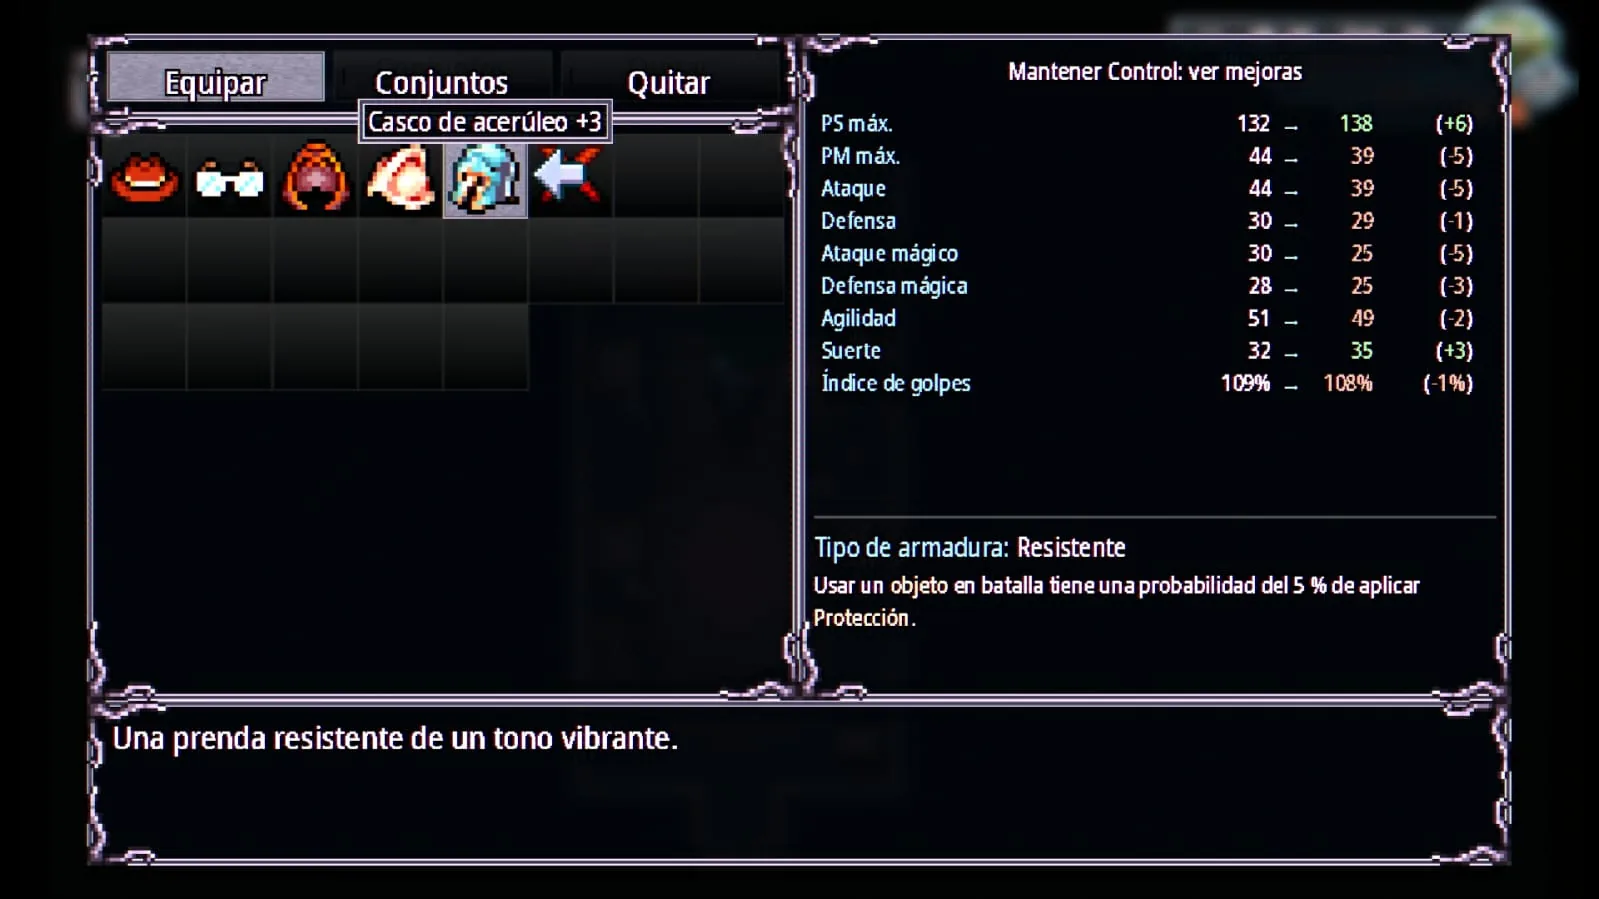
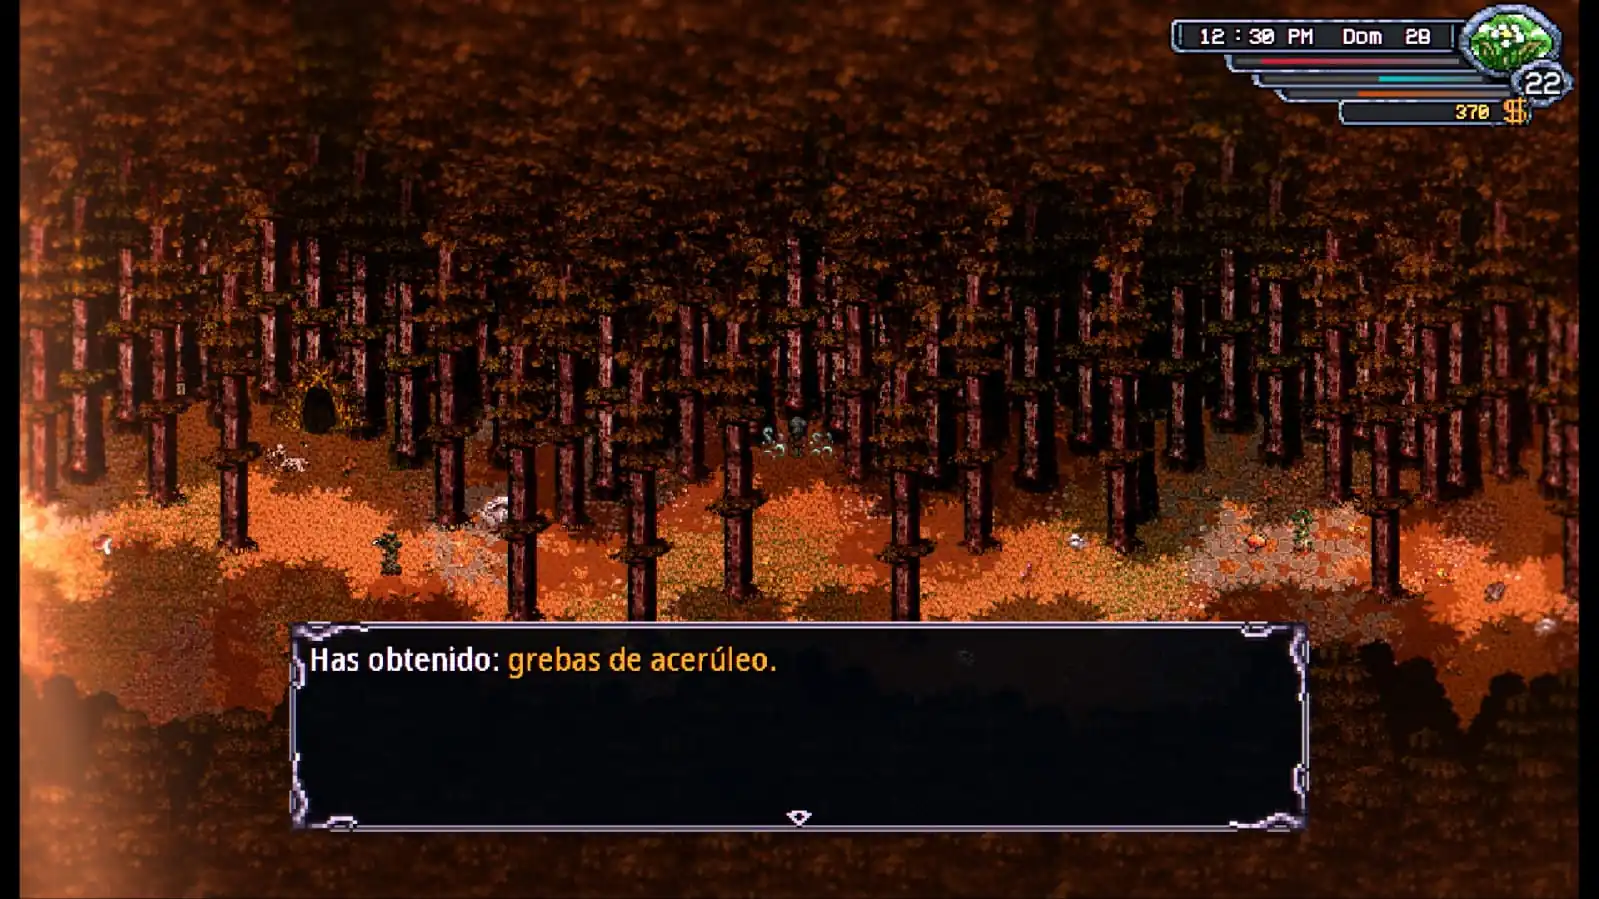
Azure Helmet +3: enter the Witch’s Cabin and open the locked room with a Basic Skeleton Key. Search the room to collect the helmet.
Azure Greaves +3: keep exploring the Old Woods and check the side paths and loot points. They are found in the forest rather than crafted at the Forge.
Azure Helmet +3 stats in Welcome to Elderfield
Azure Helmet +3, found in a locked room inside the Witch’s Cabin.
Azure Greaves found in the Old Woods in Welcome to Elderfield
The Azure Greaves +3 are another piece hidden in the Old Woods.
Azure Greaves +3 stats in Welcome to Elderfield
Azure Greaves +3.

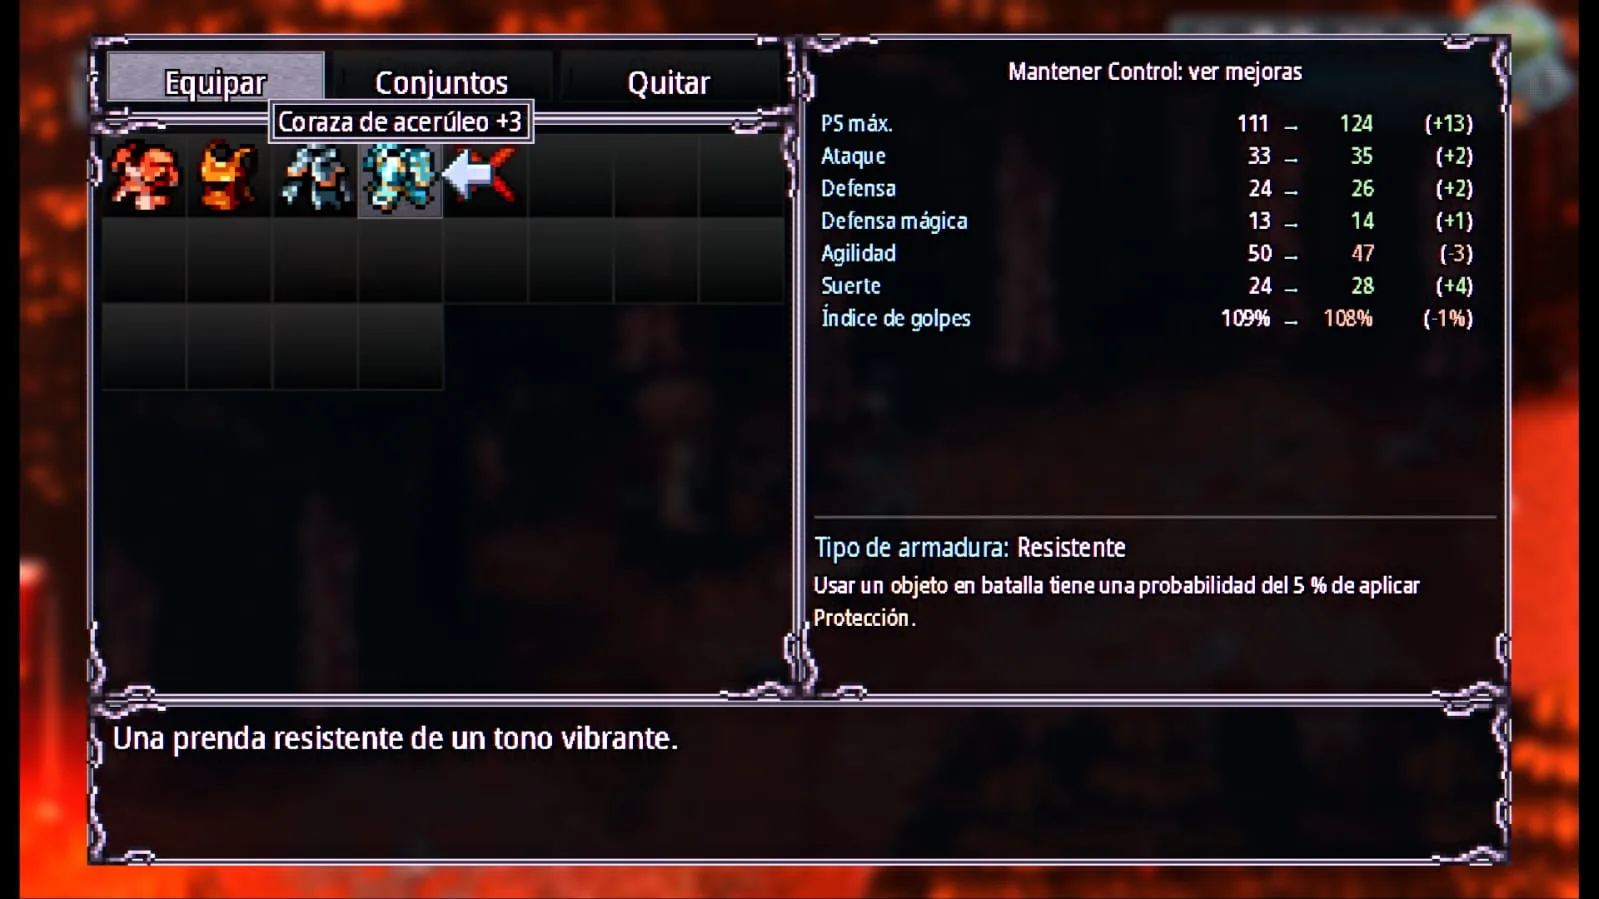
Azure Breastplate +3

Heavy armor · Old Woods

You need Purifying Balm to reach this breastplate because weeds block the chest.
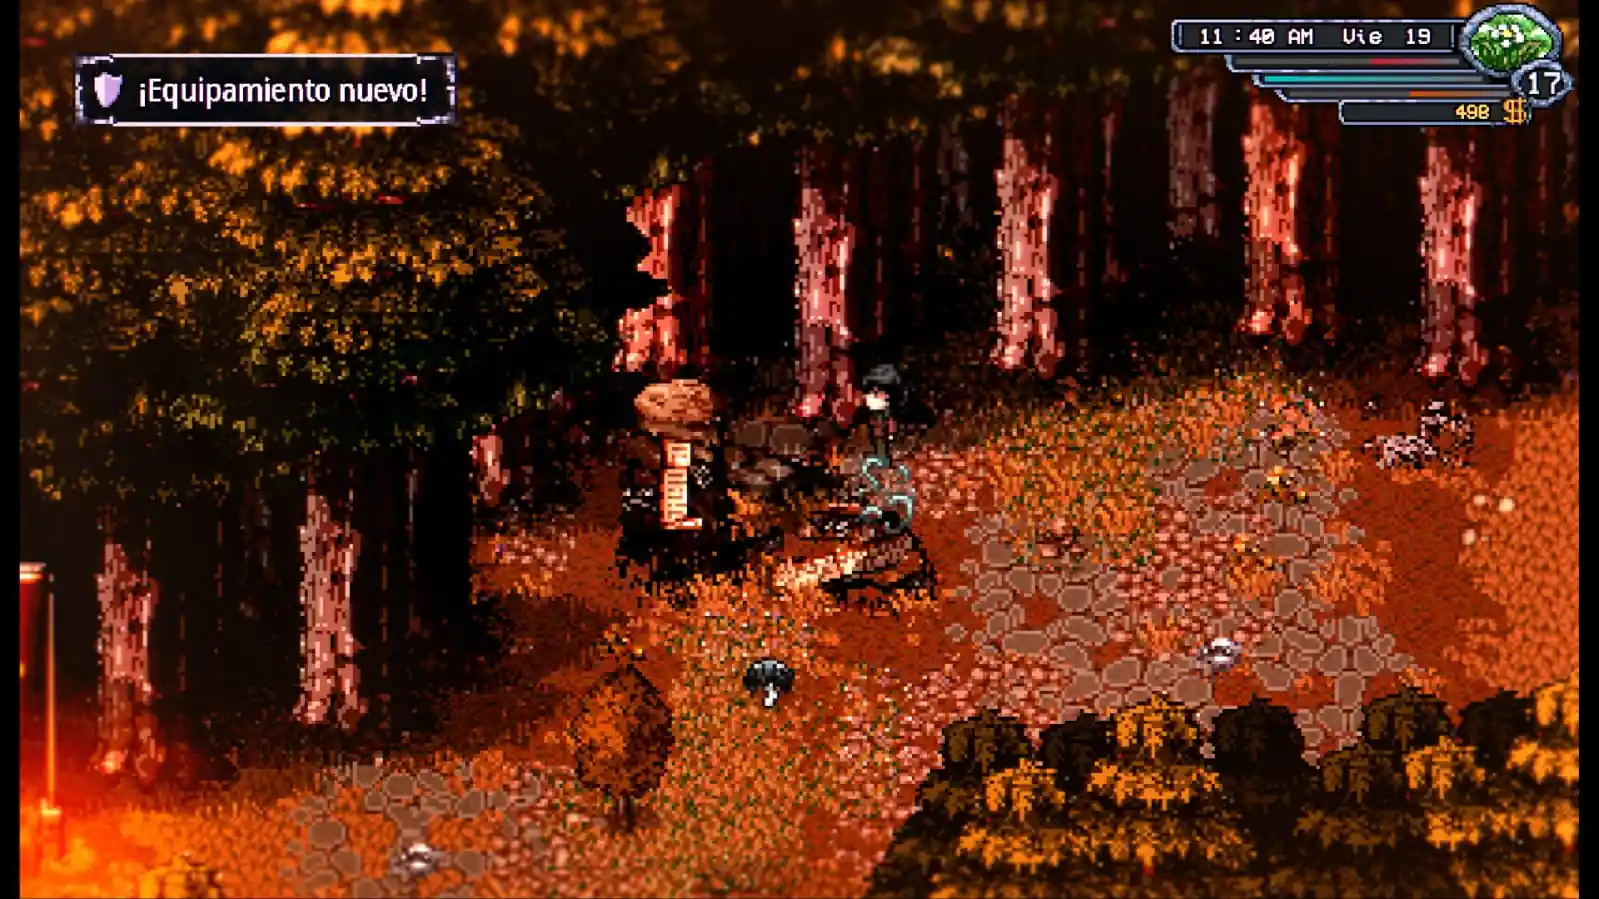
How to get the Azure Breastplate: in the Old Woods, go to the bus stop and head to the right. You will find weeds blocking the way; use Purifying Balm to remove them. The chest is directly behind the weeds and contains the Azure Breastplate +3.
Effect: using an item in battle has a 5% chance to apply Protection.
Azure Breastplate chest in the Old Woods in Welcome to Elderfield
The chest is directly behind the weeds, to the right of the bus stop.
Azure Breastplate +3 in Welcome to Elderfield
Azure Breastplate +3.

Police Set +3

Police Station · Basic Skeleton Key

The police equipment is inside the police station, but the useful pieces are kept in the rooms you have to open with a Basic Skeleton Key. Do not expect to walk in and pick the whole set up for free.
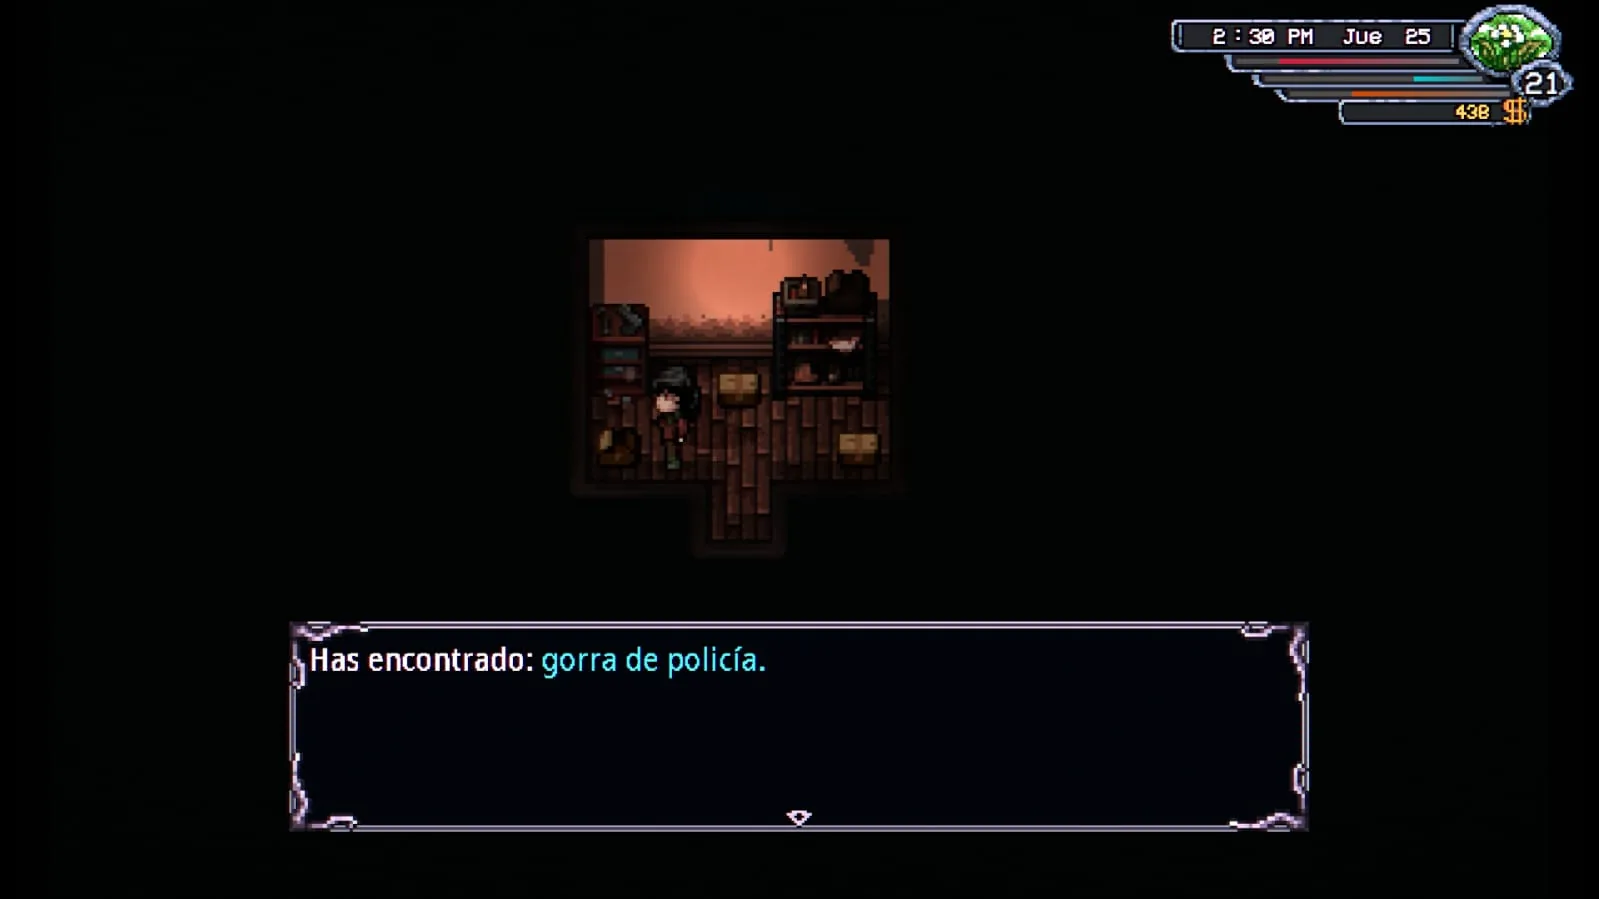
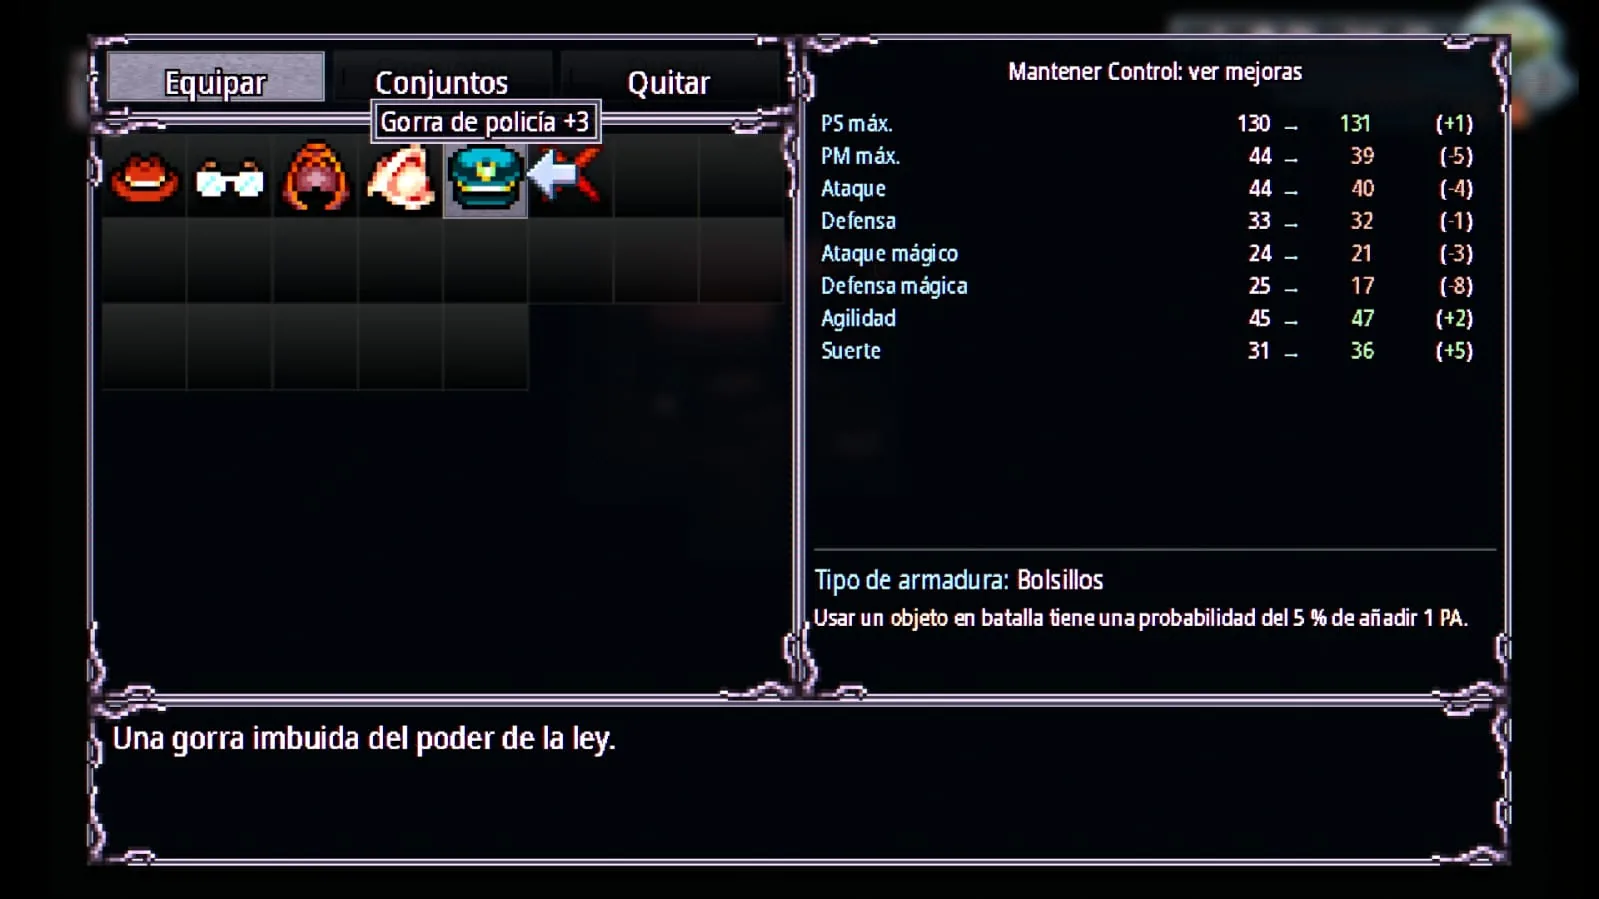
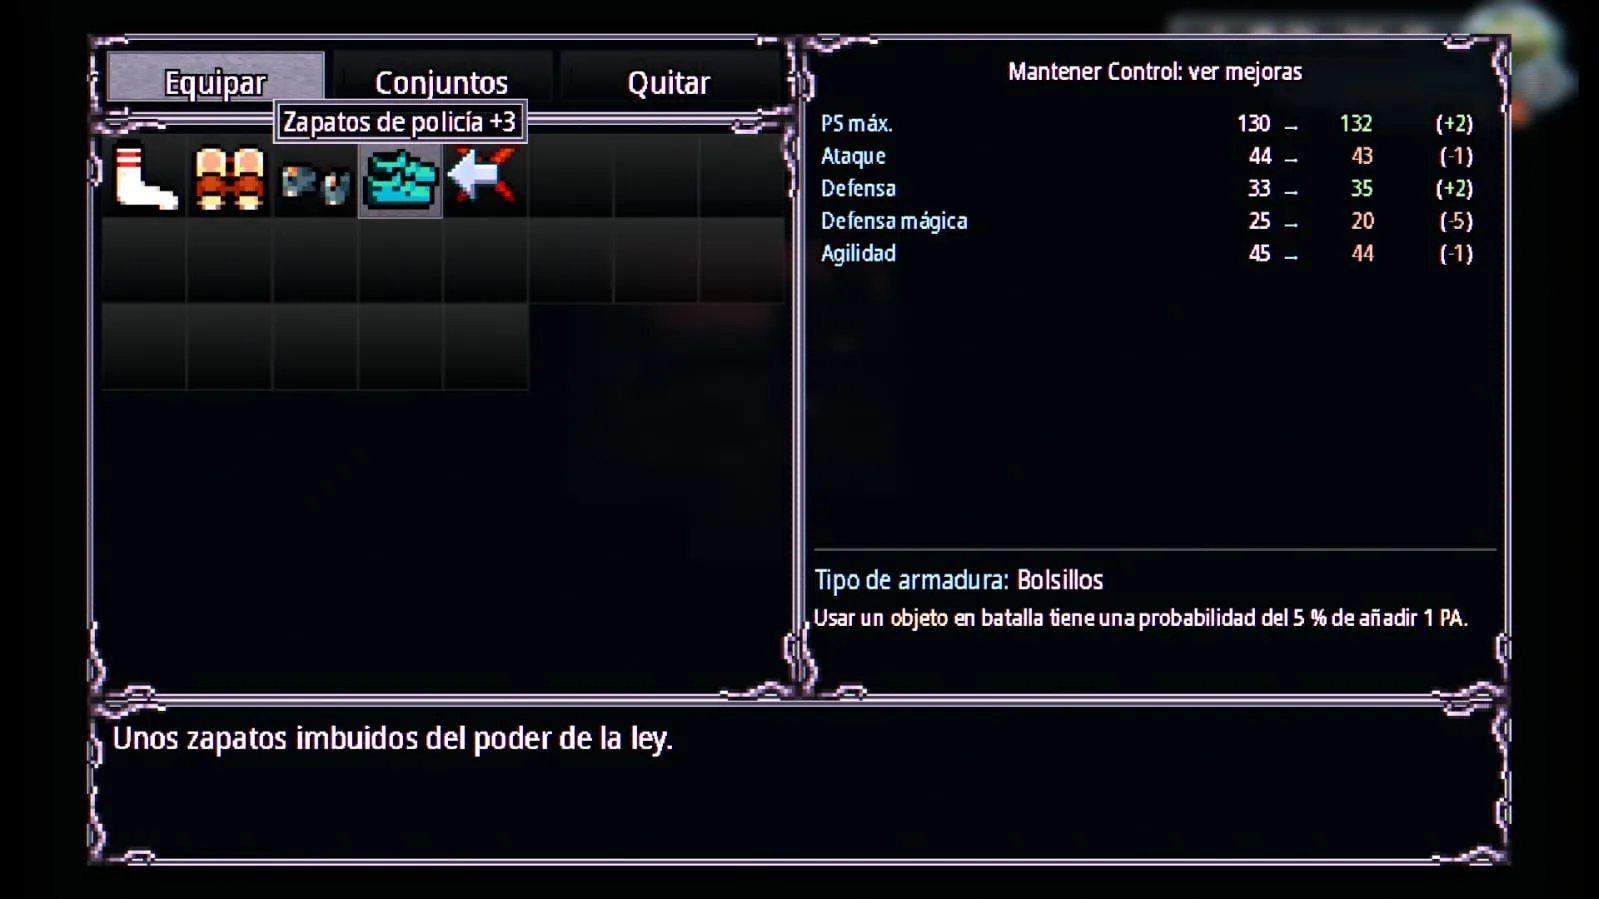
How to get the police equipment: enter the police station and use a Basic Skeleton Key on the locked rooms. Search the rooms carefully: this is where you can find pieces such as the Police Cap +3, Police Shoes +3 and Police Trousers +3.
Worth checking: the police pieces use the Pockets armor property, which can give you 1 AP when you use an item in battle.
Police equipment found inside the police station in Welcome to Elderfield
The police equipment is inside the locked rooms of the police station.
Police Cap +3 stats in Welcome to Elderfield
Police Cap +3.
Police Shoes +3 stats in Welcome to Elderfield
Police Shoes +3.

Champion Set +8

Physical defense

The Champion set is built around taking hits more comfortably. The body piece, for example, adds HP and a large amount of Defense and can give you a Defensive point when you are attacked.

Champion Armor +8

How to craft it: Blacksteel Armor +7, Gladiator Armor +5, 1 Crafting Pattern, 3 Blacksteel Bars, 3 Gold Plates, 6 Bone Bars, 10 Ancientwood and Radiant Scales.

Materials to keep

Crafting Pattern: craft it at the Tinkering Table with 10 Paper, 10 Charcoal and 2 Wax.
Bone Bar: made in the Advanced Furnace from Hard Bones.
Blacksteel Armor +7: crafted at the Forge from Steel Armor +6, Blacksteel Bars, a Steel Bar, Gold Plate, Ancientwood and Radiant Scales.

Archmage Set +8

Magic

If you are building around magic, this set makes much more sense than Champion. The Archmage Robe +8 gives MP, Magic Attack, Magic Defense and Agility, while also increasing healing received.

Archmage Robe +8

How to craft it: Cultist Robe +7, Explorer Vest +5, 1 Crafting Pattern, 2 Blacksteel Bars, 2 Bone Bars, 2 Gold Plates, 5 Ancientwood and 2 Radiant Scales.

Hat and boots

The other pieces follow the same idea. Archmage Hat +8 needs Cultist Mask +7 and Explorer Hat +5. Archmage Boots +8 needs Cultist Boots +7 and Explorer Boots +5.

Where to find the Explorer gear: Explorer Hat +5 and Explorer Boots +5 are in the Sealed Chamber in the Catacombs.
Important with shrines: shrine rewards are random, so a specific piece of equipment is never guaranteed.

Rings and accessories

Rings can look minor at first, but some give exactly the stat your setup is missing. With two slots available, they are an easy way to add Attack, Magic Attack, Agility or Luck without changing the rest of your gear.
Do not underestimate Luck: it affects many rolls throughout the game, and a few extra points can be enough to push you into the next favorable result.

Platinum Star +5

Catacombs · Loot
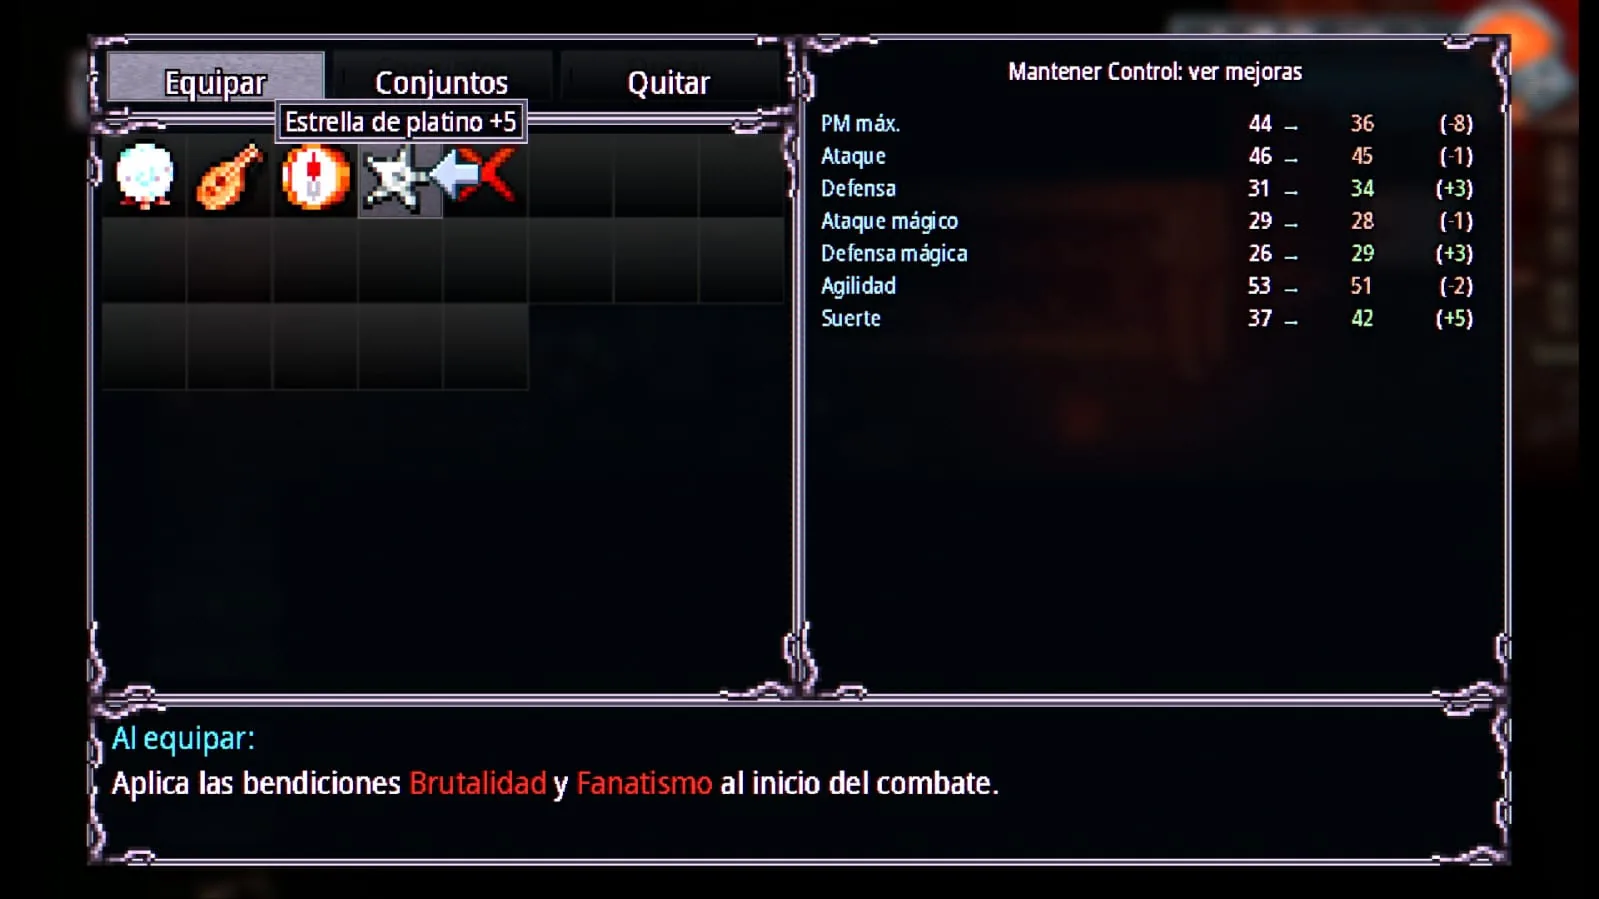
Effect: applies the Brutality and Fanaticism blessings at the start of battle.

The Platinum Star +5 is one of the special accessories you can obtain while exploring the Catacombs. You do not need to craft it at the Forge, as it can drop from one of the enemies found in this area.
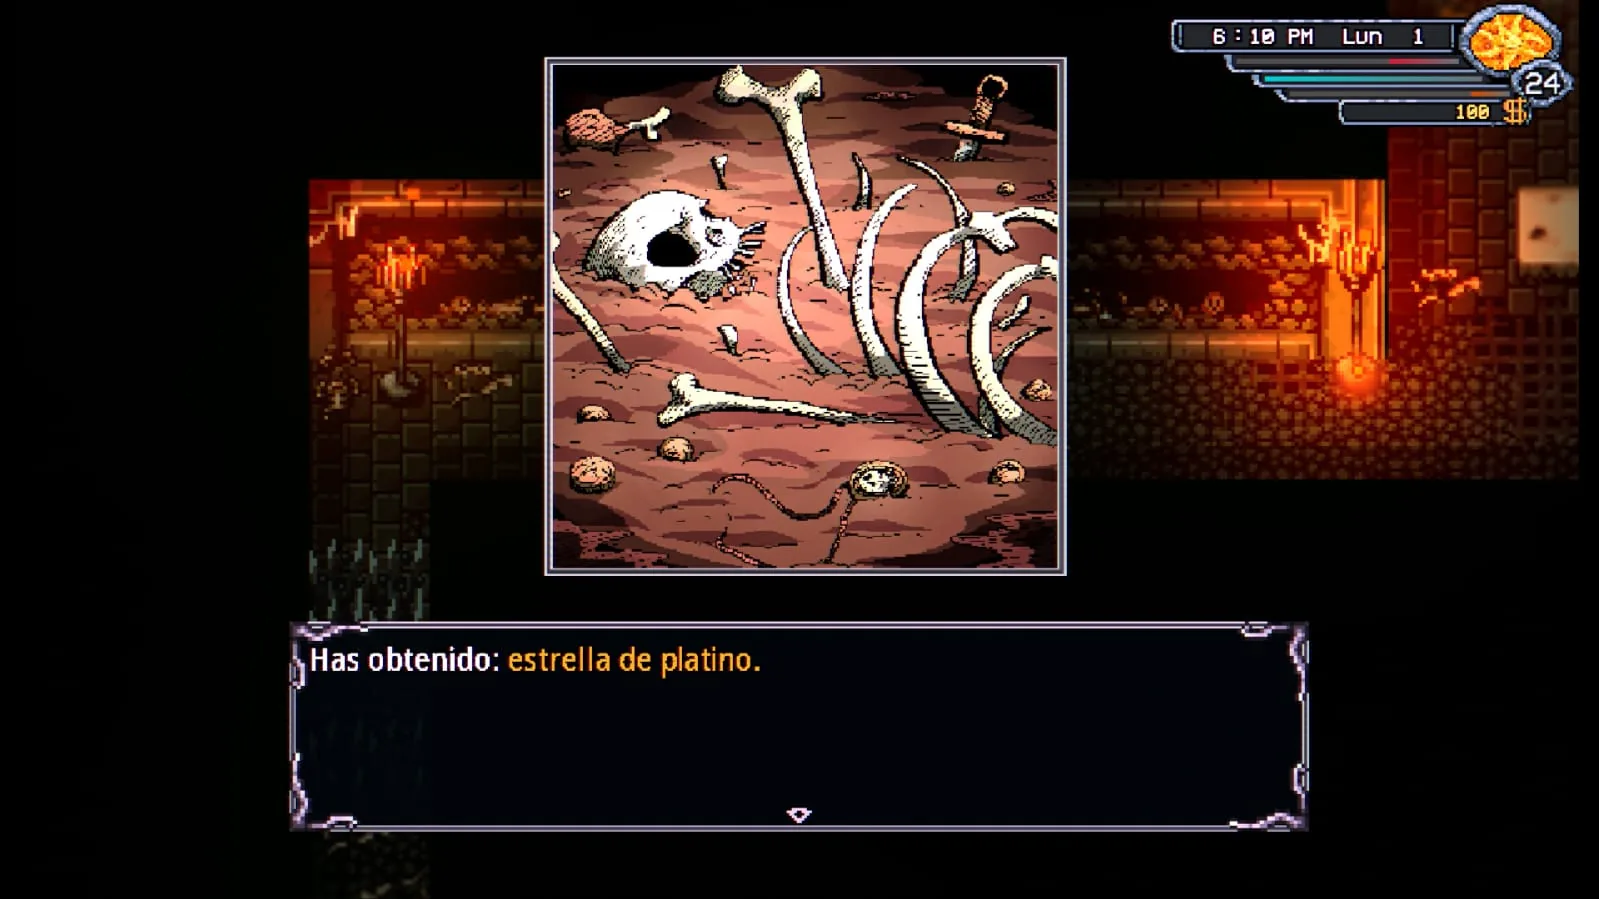
How to get the Platinum Star +5: defeat the Insectoids in the Catacombs. The Platinum Star can appear among the loot obtained after battle.
How to get the Platinum Star in the Catacombs in Welcome to Elderfield
We obtained the Platinum Star as loot from an Insectoid in the Catacombs.
Platinum Star +5 in Welcome to Elderfield
The Platinum Star +5 applies Brutality and Fanaticism at the start of battle.
Its effect is the interesting part: you start each battle with Brutality and Fanaticism already applied, so it is worth trying even if another accessory looks stronger based on stats alone.

Xxarteck’s Crown +6

Bighead · Loot

Xxarteck’s Crown +6 is another special piece of equipment that does not need to be crafted. We obtained it as loot after defeating Bighead.
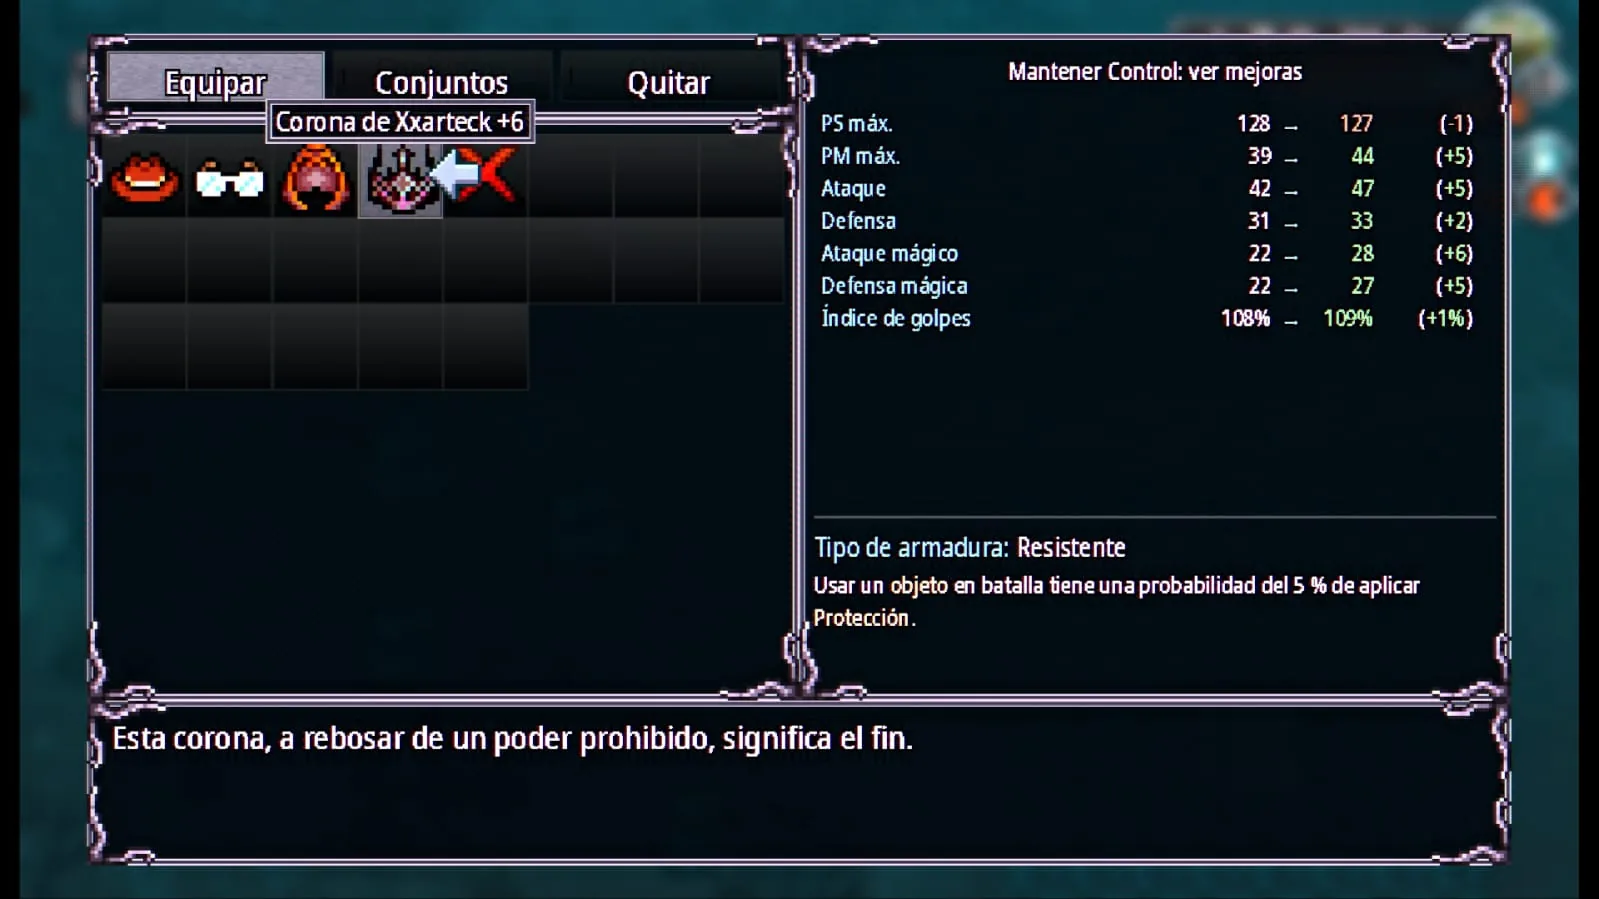
How to get Xxarteck’s Crown +6: defeat Bighead and check the loot you receive after the battle. The crown can appear among its rewards.
Xxarteck's Crown +6 obtained from Bighead in Welcome to Elderfield
We obtained Xxarteck’s Crown +6 as loot from Bighead.
Effect: Resistant armor. Using an item in battle has a 5% chance to apply Protection.

It also improves several offensive and defensive stats, making it a useful piece of equipment once you are strong enough to defeat Bighead.

Lightning Pendant +1

Neck · Old Woods

This pendant is very close to the Witch’s Cabin, but you do not need to enter the cabin to get it.
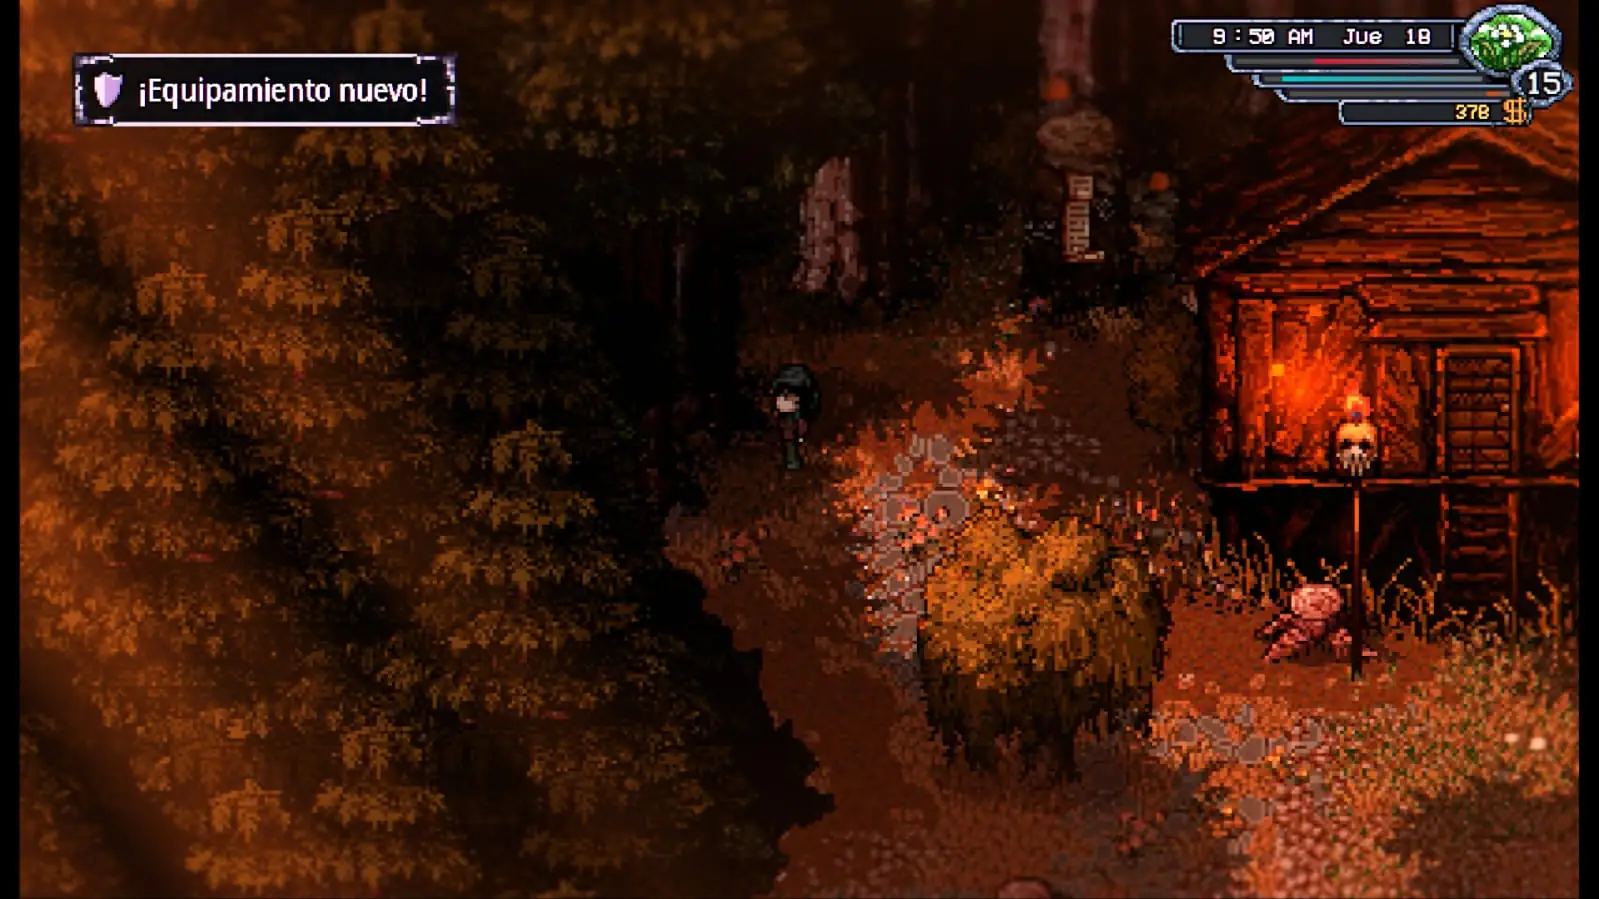
How to get the Lightning Pendant: reach the Witch’s Cabin in the Old Woods and, while still outside, go to the left of the cabin. You will find the chest containing the Lightning Pendant there.
Lightning Pendant location beside the Witch's Cabin in Welcome to Elderfield
The Lightning Pendant is in a chest to the left of the Witch’s Cabin.
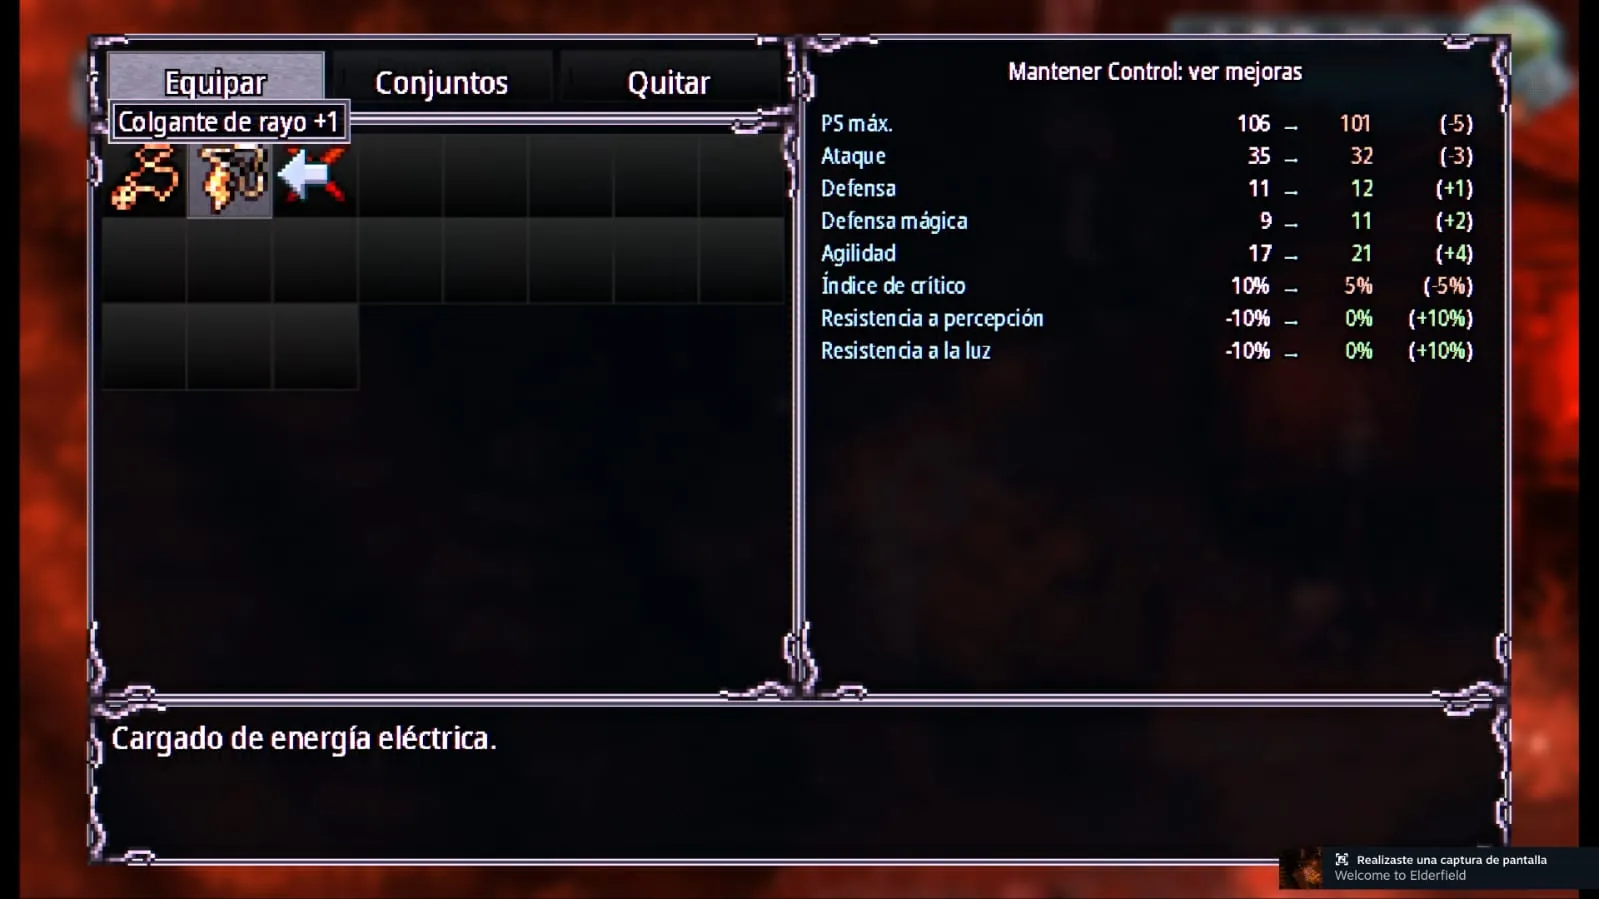
Lightning Pendant in Welcome to Elderfield
Lightning Pendant +1.

Sharp Ring +2

Pale Clearing

The Pale Clearing is part of the Old Woods. Once you find the angel in this area, you can also grab this ring nearby.

How to get the Sharp Ring: from the angel in the Pale Clearing, head southeast. The chest is slightly hidden, so check that side of the clearing carefully. The Sharp Ring is inside.
Sharp Ring location in the Pale Clearing in Welcome to Elderfield
Look for the chest southeast of the angel in the Pale Clearing.
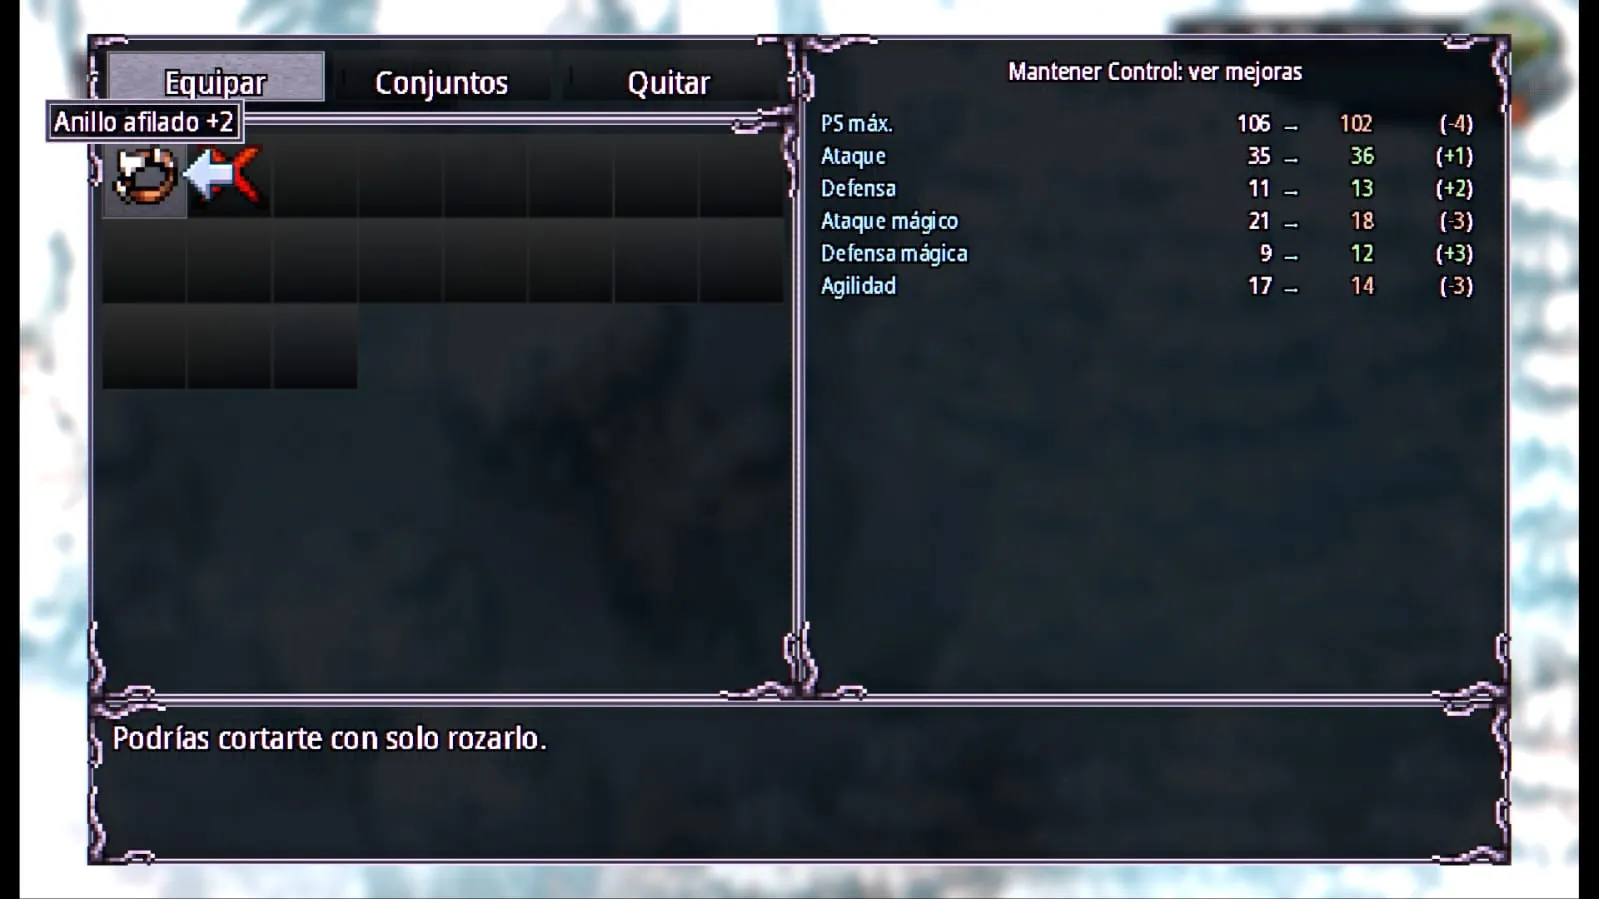
Sharp Ring in Welcome to Elderfield
Sharp Ring +2.

Opal Ring +2

Greystone rooftop

The Opal Ring +2 is easy to miss because you have to go up to the rooftop. We found it naturally while progressing through Childhood Fear, the side quest that takes you back through Greystone.
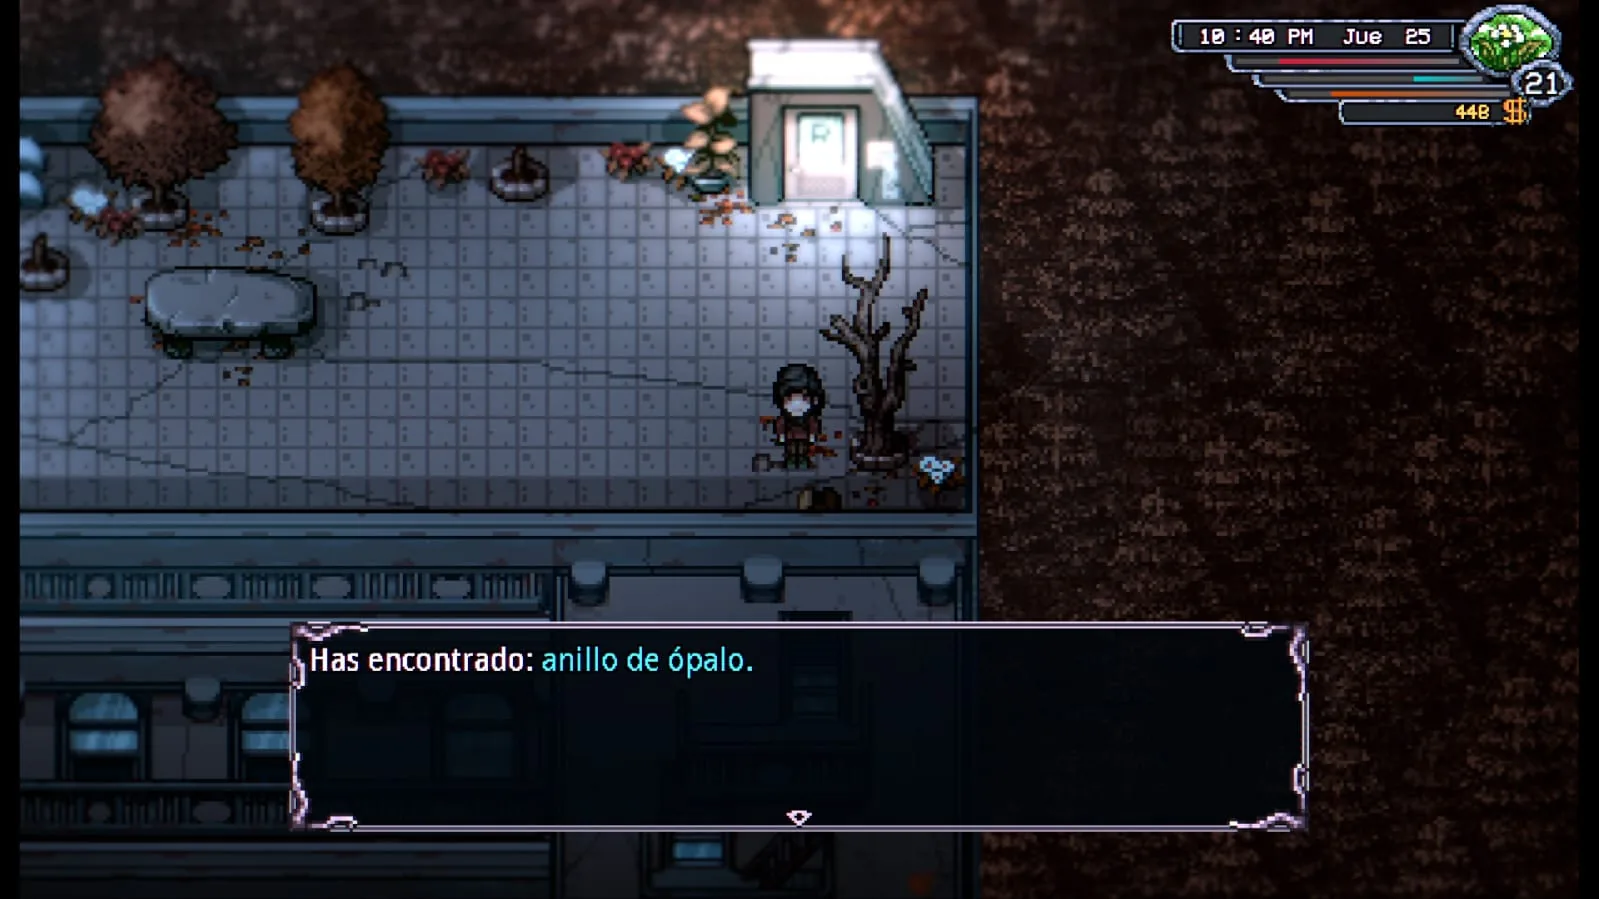
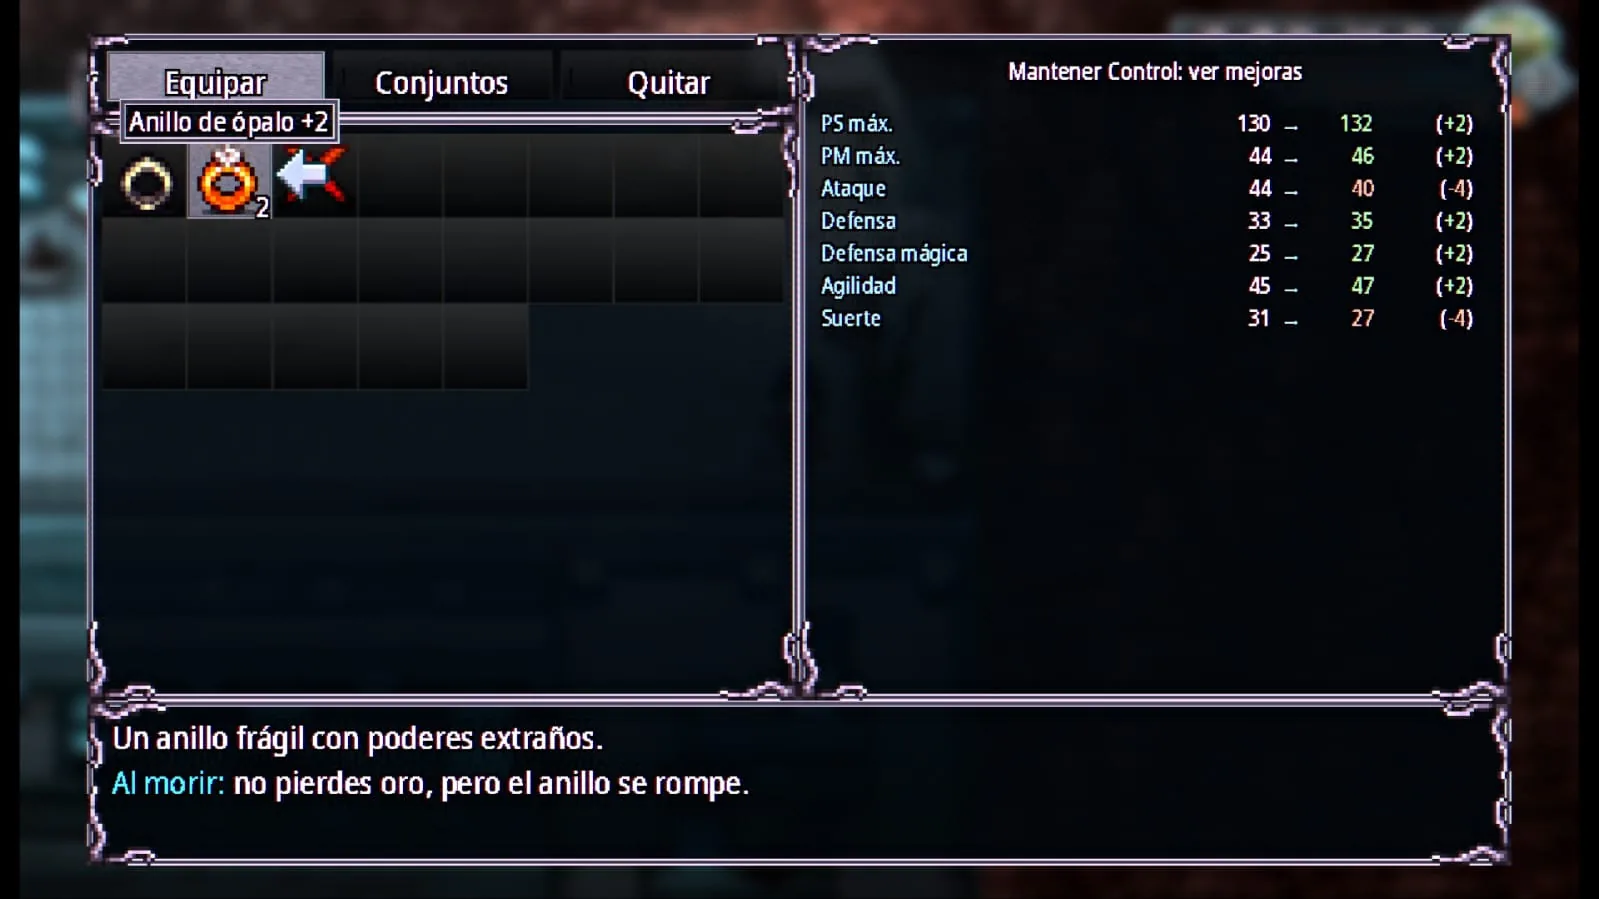
How to get the Opal Ring: reach the Greystone rooftop and open the chest there. If you are doing Childhood Fear, you can grab it during the same visit.
Effect: if you die, you do not lose gold, but the ring breaks.
Opal Ring found on the Greystone rooftop in Welcome to Elderfield
The Opal Ring +2 is inside a chest on the rooftop.
Opal Ring +2 stats in Welcome to Elderfield
Opal Ring +2 prevents you from losing gold when you die, but it breaks afterwards.

Delvek’s Eye +3

Old Woods

Delvek’s Eye +3 has a particularly useful effect: it applies a random blessing at the start of every battle.
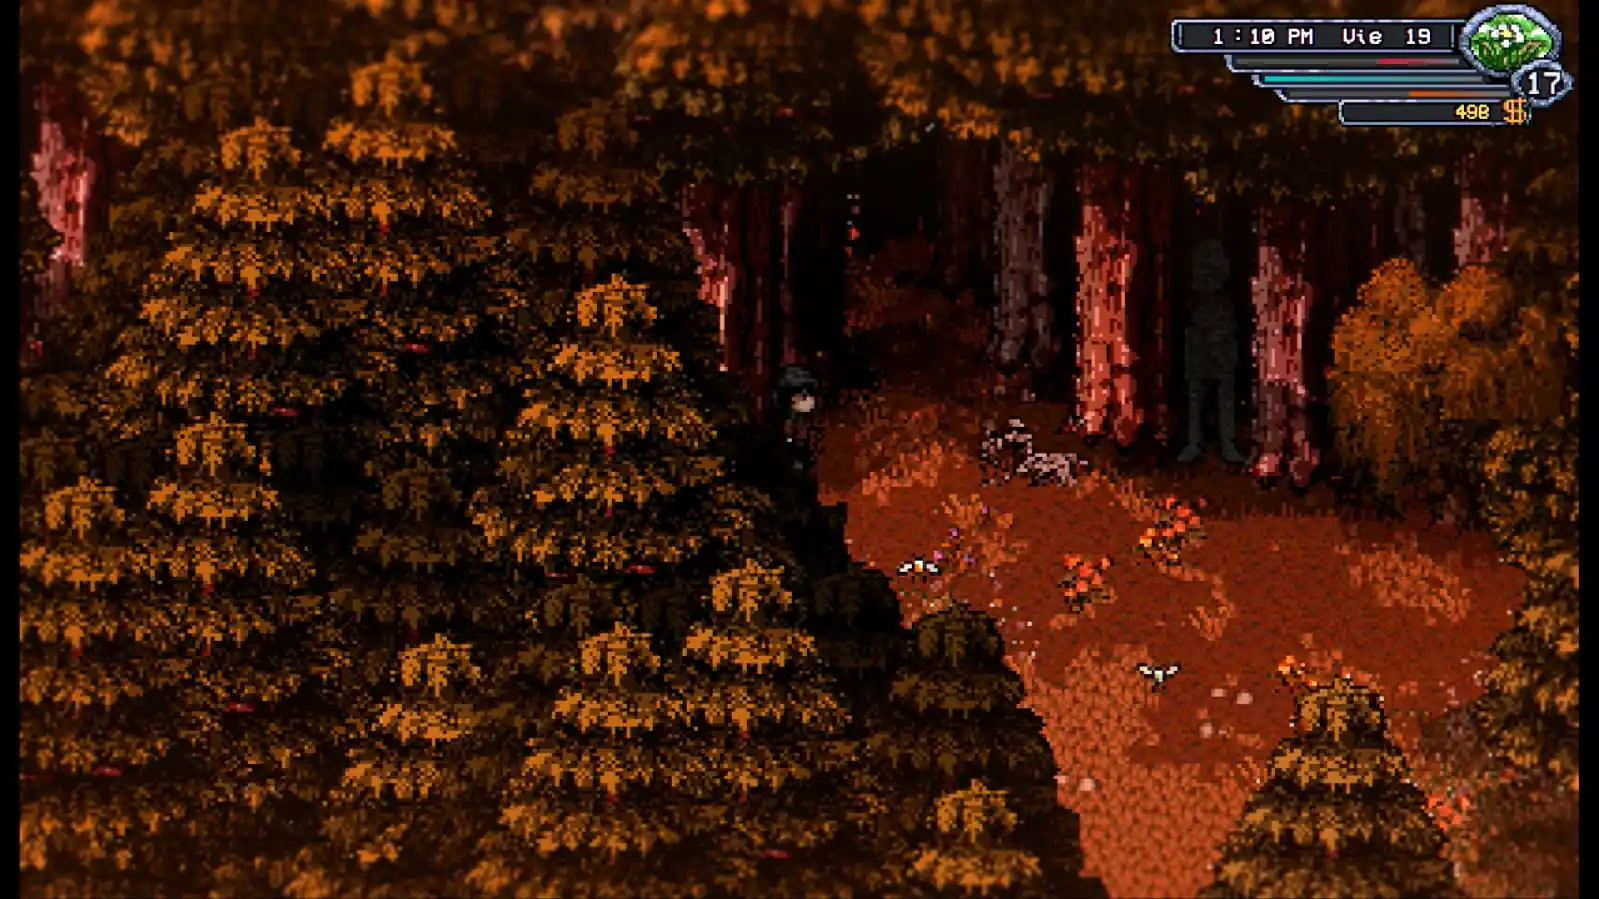
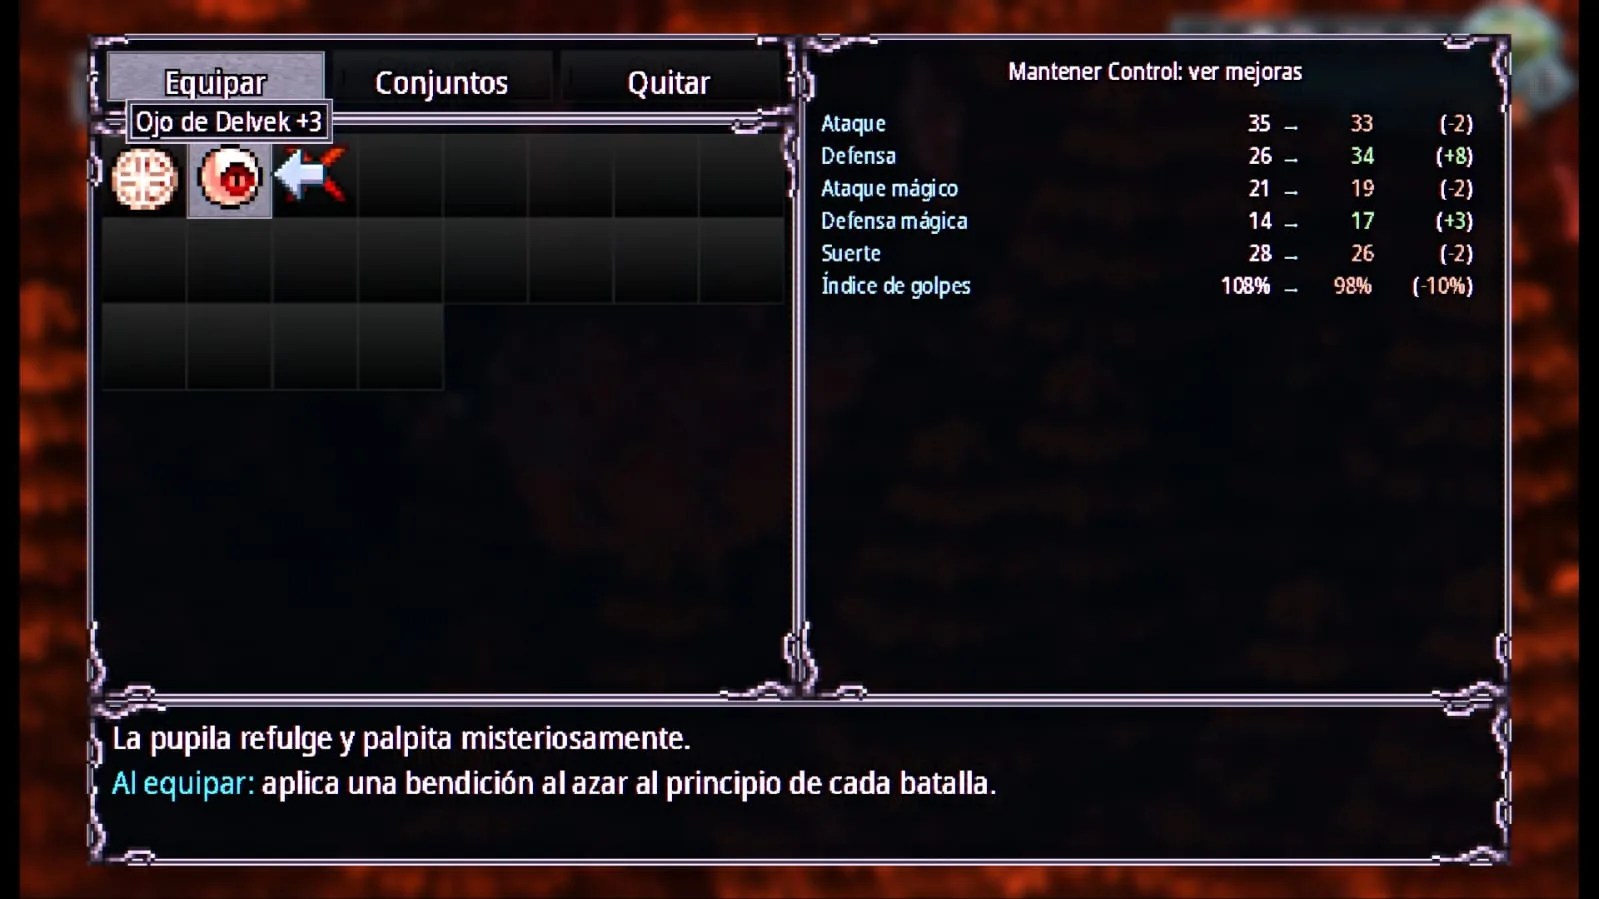
How to get Delvek’s Eye: in the Old Woods, you will find weeds blocking access to a chest. Use Purifying Balm to remove them, then open the chest beyond them to get Delvek’s Eye +3.
Old Woods weeds removed with Purifying Balm in Welcome to Elderfield
Use Purifying Balm to remove the weeds blocking the way.
Delvek's Eye +3 in Welcome to Elderfield
Delvek’s Eye +3 applies a random blessing at the start of every battle.

Unholy Ring +2

Mall · RNG

You can get this ring fairly early if the Luck roll goes your way.
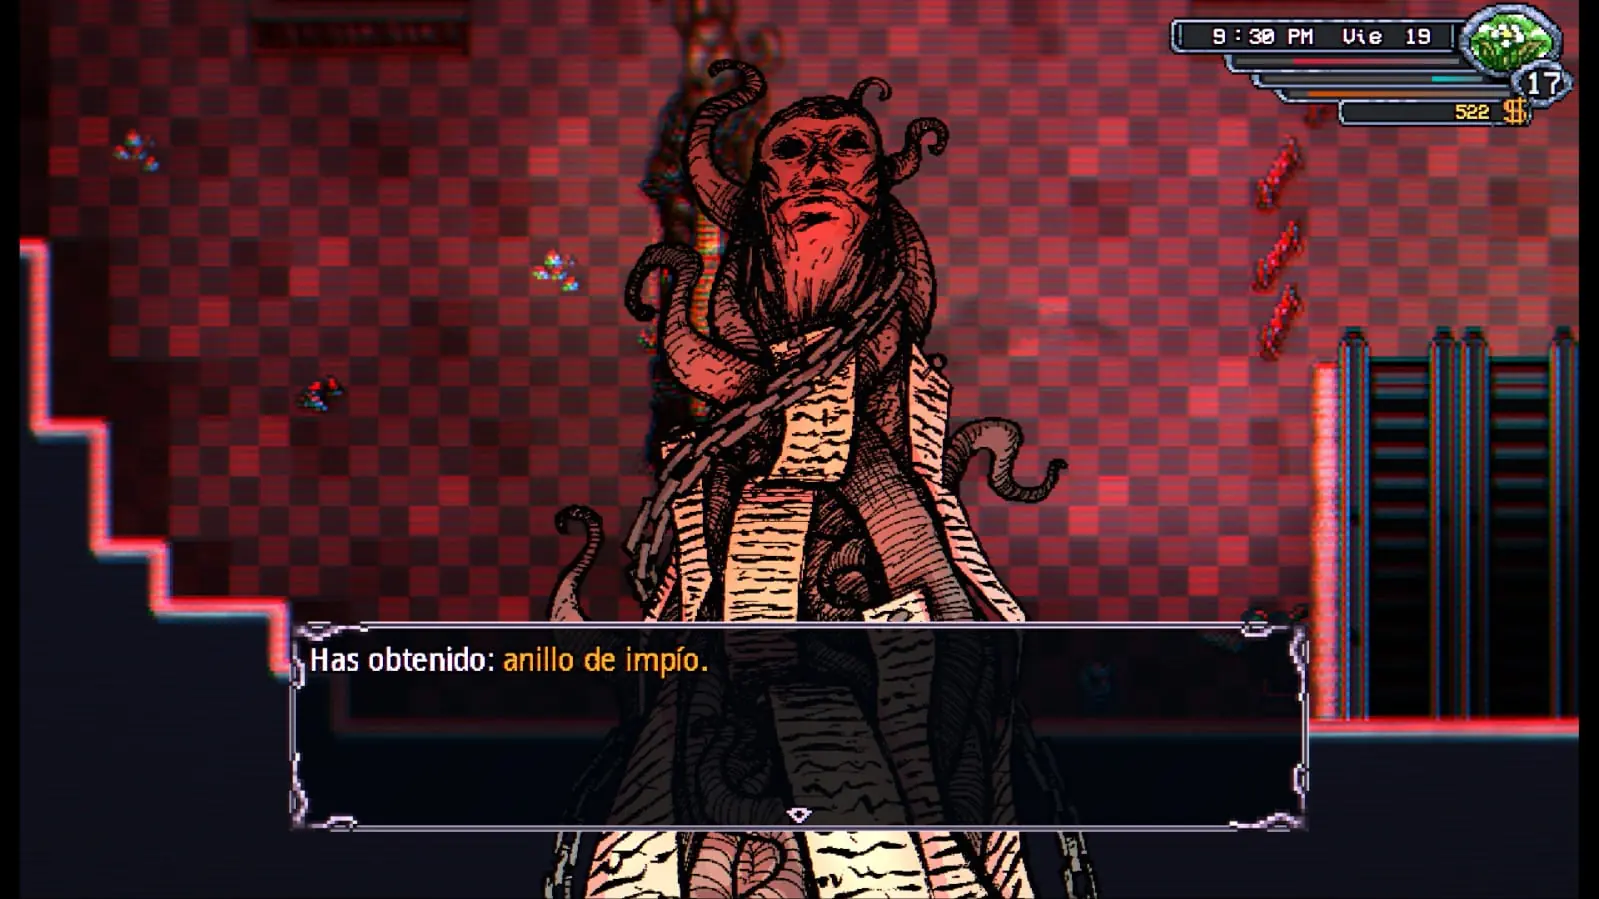
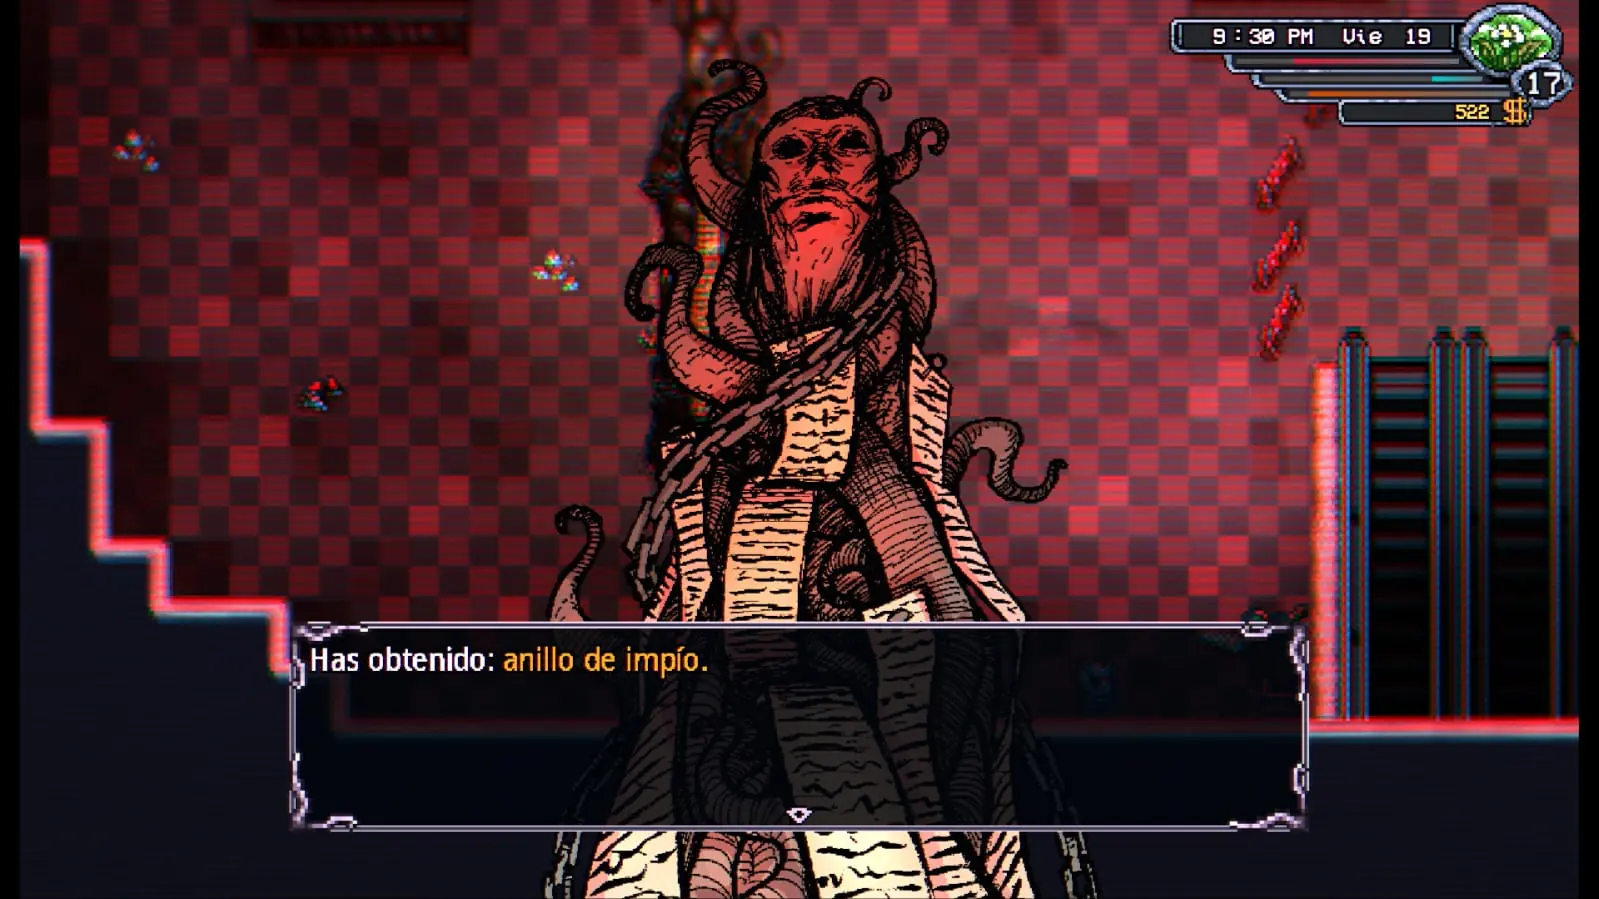
How to get the Unholy Ring: go to the statue in the Mall near the food stalls and interact with it. If you get a favorable Luck roll, you can receive the Unholy Ring +2.
It depends on RNG: the ring is not guaranteed, so you need the roll to go your way.
Mall statue where you can get the Unholy Ring in Welcome to Elderfield
The statue is near the food stalls in the Mall.
Unholy Ring obtained in Welcome to Elderfield
A favorable roll can reward the Unholy Ring +2.
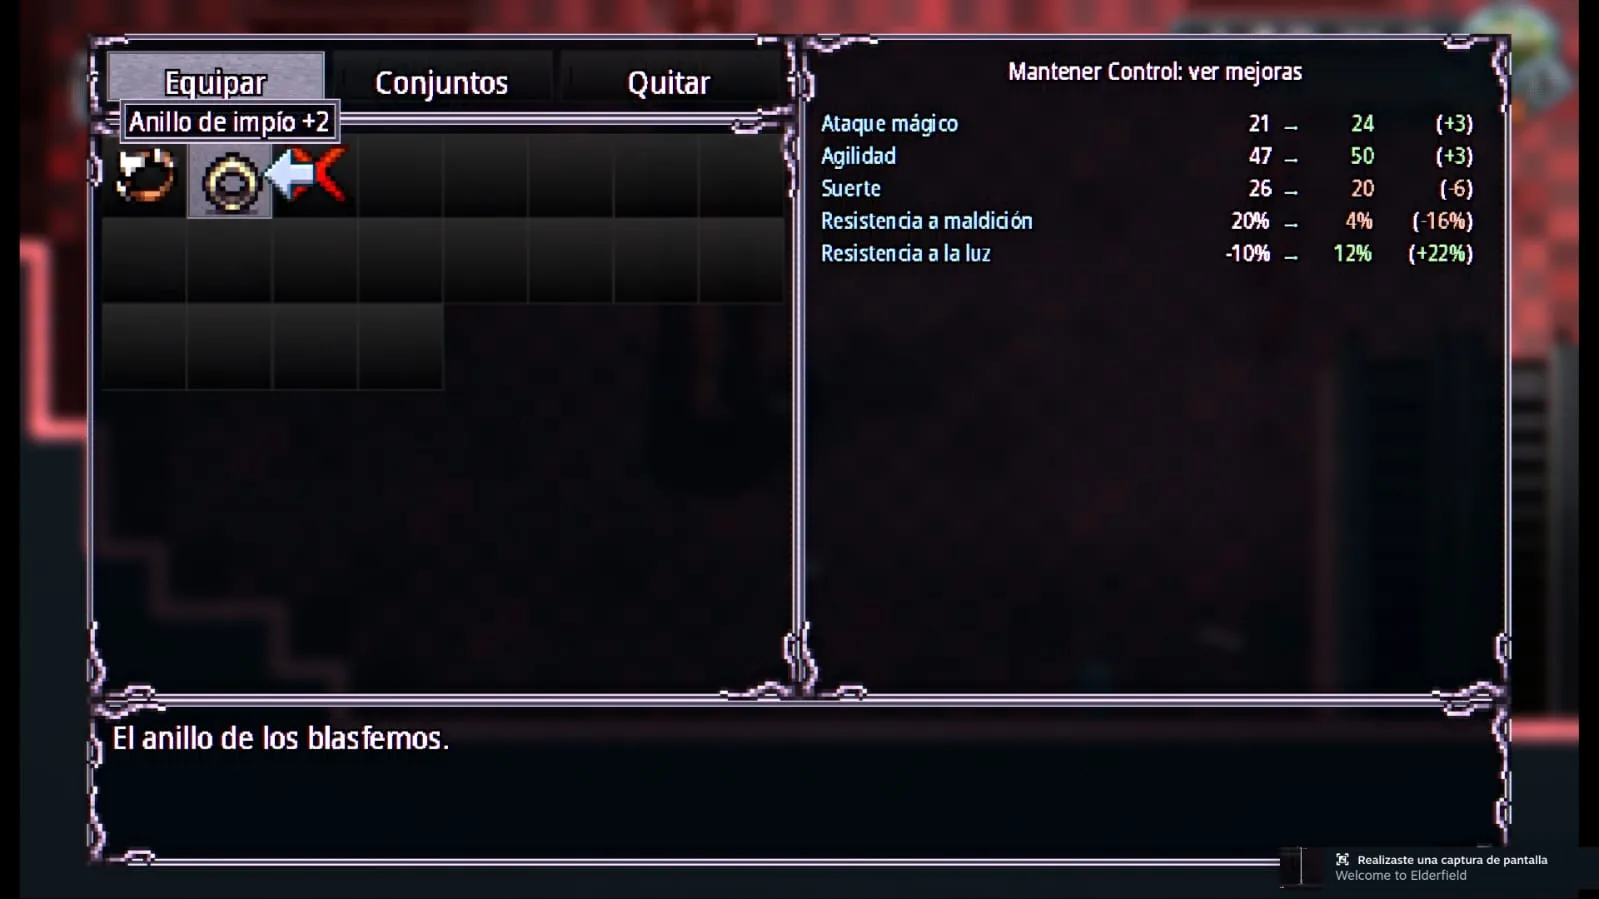
Unholy Ring +2 in Welcome to Elderfield
Unholy Ring +2.

Lucky Horseshoe

Sewers · RNG

The Lucky Horseshoe is another piece you can get relatively early if the roll goes your way.

How to get the Lucky Horseshoe: interact with the shrine in the Sewers. If you get a favorable Luck roll, you can receive the Lucky Horseshoe.
It depends on RNG: the reward is not guaranteed on every attempt.
Lucky Horseshoe obtained at the Sewer shrine in Welcome to Elderfield
A favorable roll at the Sewer shrine can reward the Lucky Horseshoe.

Ring of Immortality +2

Saves you once

This ring has one very specific use: if you are about to die in battle, it prevents that death. The ring breaks afterwards. It is not something we would casually wear while exploring, but it can be extremely useful before a difficult fight.
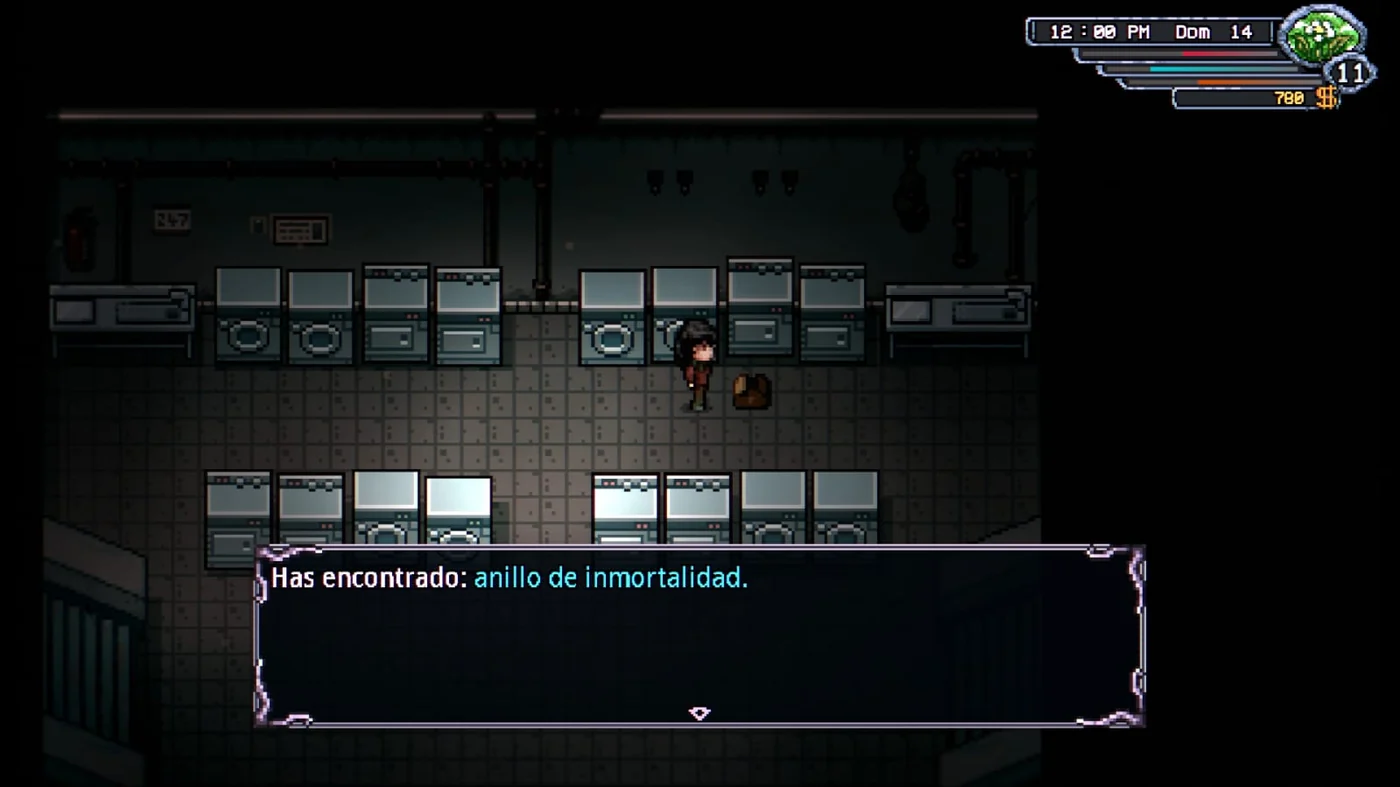
How to get it: start the ghost’s quest to rescue his daughter on the second floor. The quest eventually sends you into a fairly tough boss fight. Once it is complete, you can collect the Ring of Immortality in the laundry area.
Ring of Immortality location in the Welcome to Elderfield laundry
After completing the ghost’s quest and rescuing his daughter, the Ring of Immortality appears beside the washing machines.

Strange Skull +1

Early MP
Main benefit: +8 Max MP. It lowers some offensive stats and Agility, so it makes more sense when you want extra Rite casts than when you are focused on physical attacks.

It is not for every setup, but you can get it fairly early and you do not need to craft it. Those extra MP are noticeable if you are starting to lean into magic.
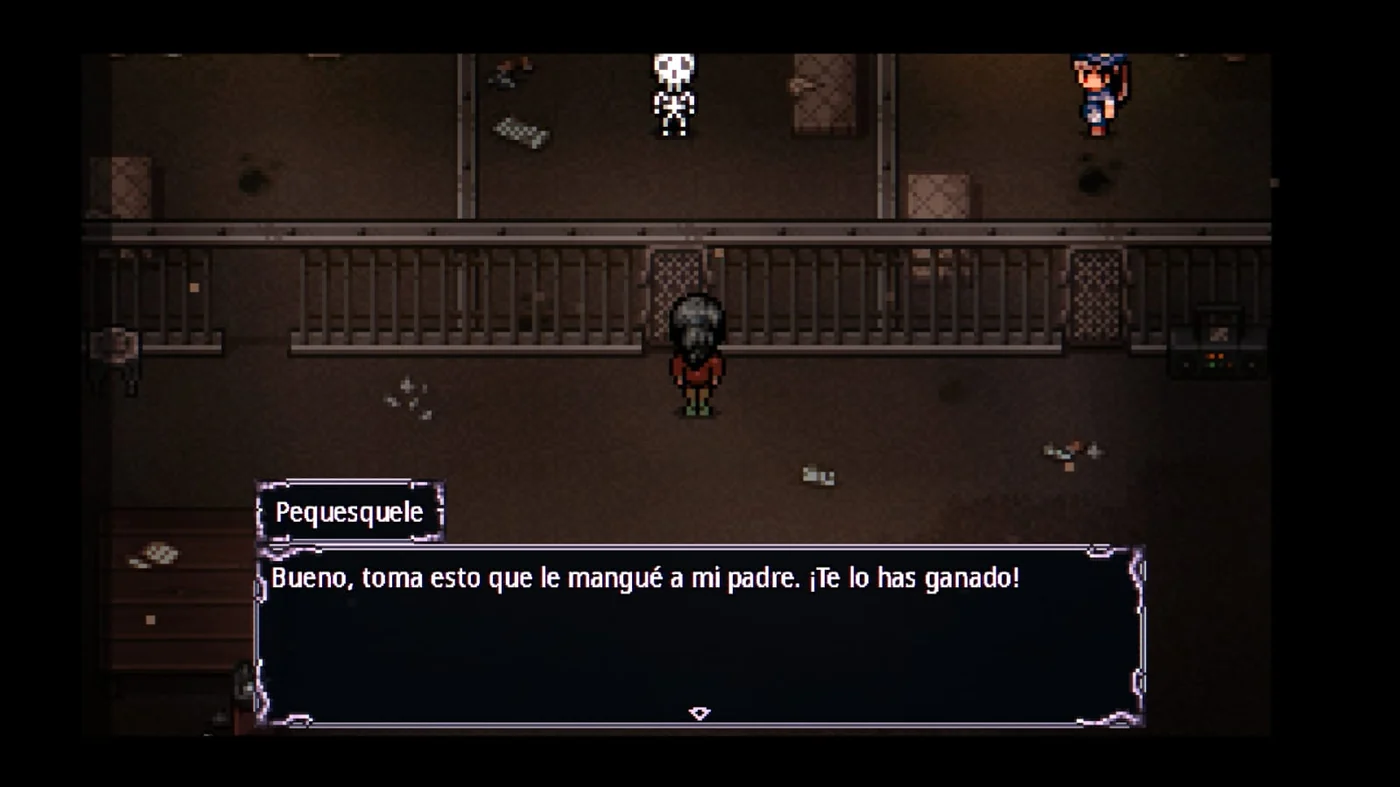
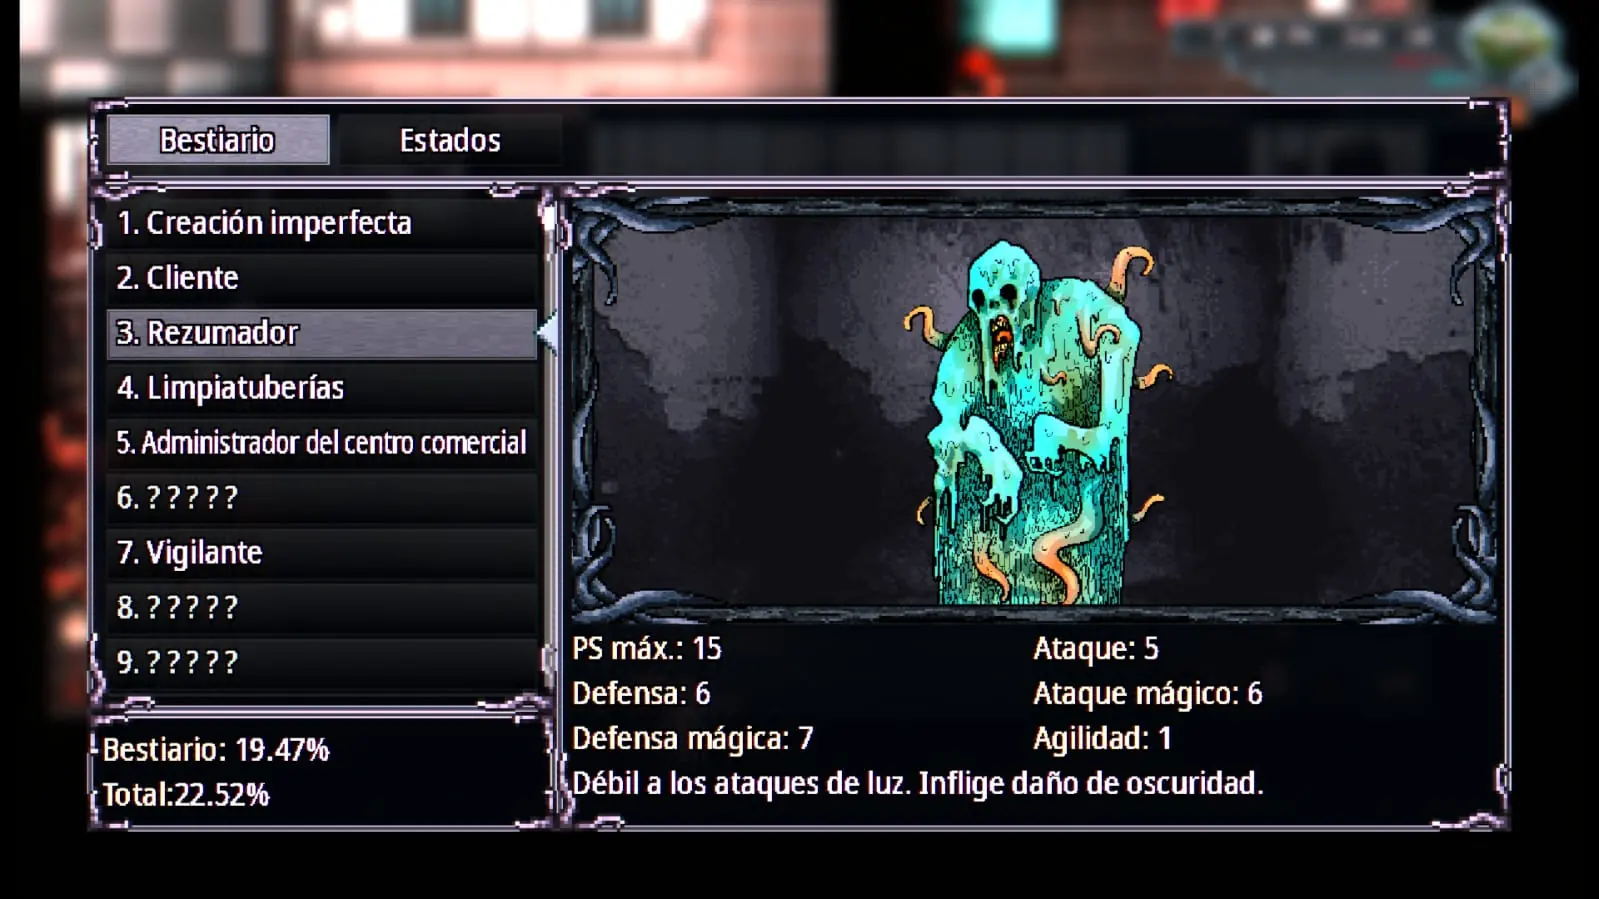
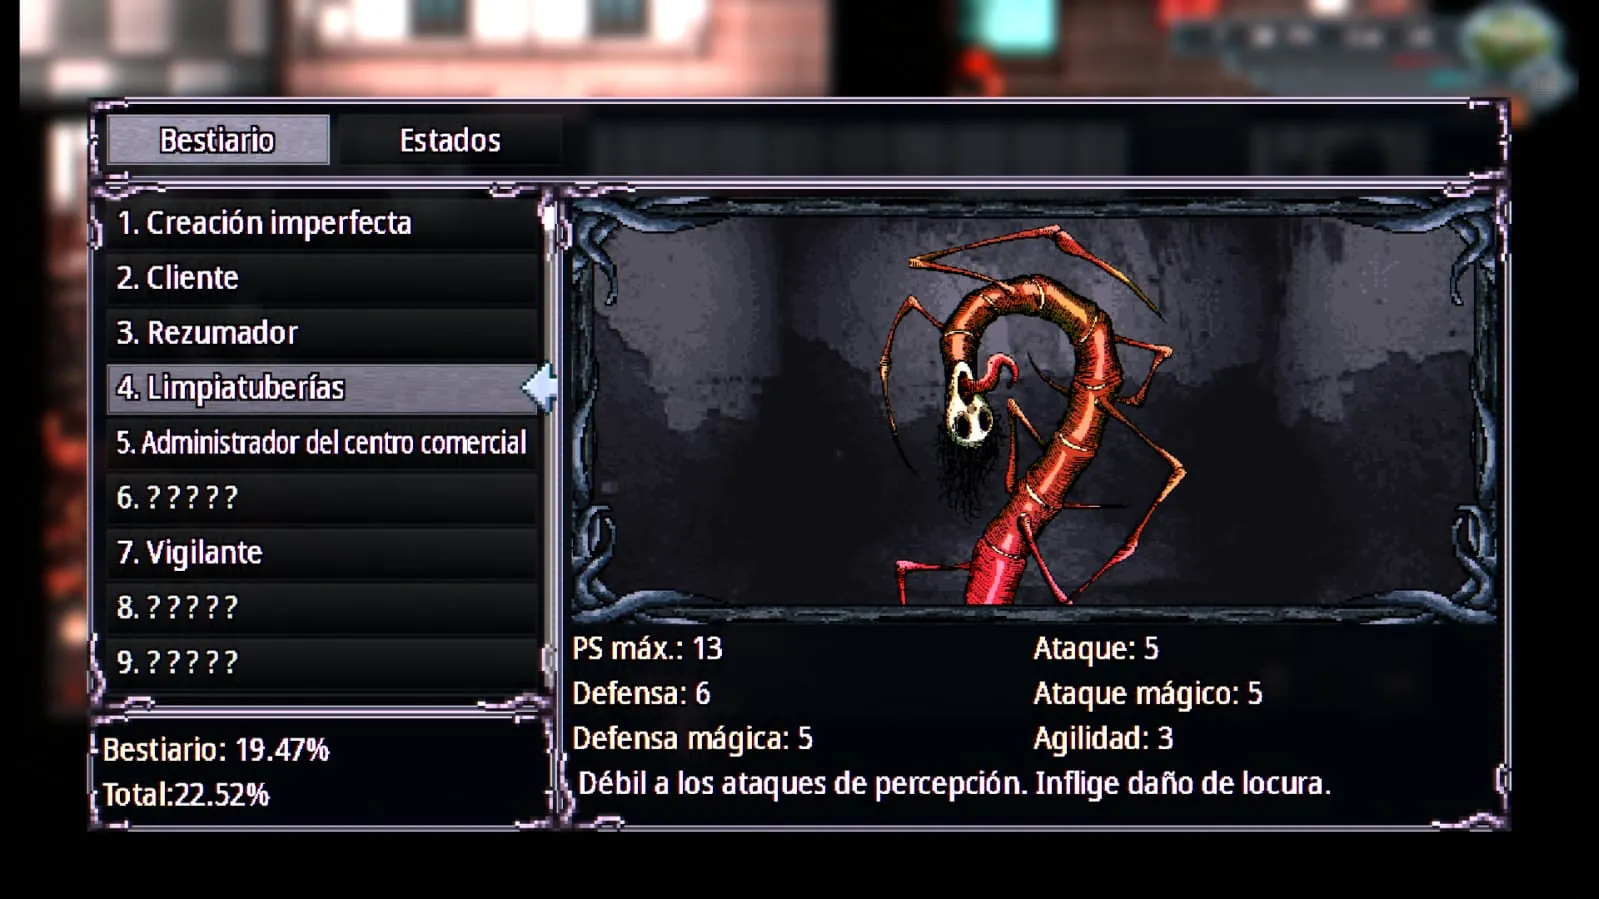
How to get it: it is part of Skelekid’s quest chain, the kid in the basement. To reach him, first get the slime in the Mall and put it in the parents’ drink so they give you the basement key. His first task is to defeat 5 Sludgers. Return to Skelekid afterwards and continue the chain. His second task asks you to defeat 5 Pipe Cleaners. Completing this second task rewards you with the Strange Skull +1. Skelekid’s quest chain continues after you receive this reward.
Skelekid rewards the Strange Skull in Welcome to Elderfield
Skelekid gives you the Strange Skull +1 after you complete the second task in his quest chain.
Sludger in Welcome to Elderfield
Skelekid’s first task asks you to defeat 5 Sludgers.
Pipe Cleaner in Welcome to Elderfield
The second task asks you to defeat 5 Pipe Cleaners and rewards the Strange Skull +1.

Equipment hidden in the Catacombs

The Catacombs hide much more equipment than it first appears. Some pieces come from enemy loot, while others are hidden behind breakable walls and blocked passages. For the latter, keep a Stone Hammer whenever one drops from the monsters in this area, as you will need it to open several routes containing equipment.

Ancient Tablet +2

Skeleton Mage · Luck

The Ancient Tablet +2 can be obtained from the Skeleton Mages found in the Catacombs.
How to get the Ancient Tablet +2: defeat a Skeleton Mage and examine its corpse when possible. You will need a favorable Luck roll for the Ancient Tablet +2 to appear as loot.
It is not guaranteed: even when you can examine the corpse, the Ancient Tablet +2 depends on the result of the Luck roll, so you may need to defeat several Skeleton Mages.
Ancient Tablet +2 obtained from a Skeleton Mage in the Catacombs in Welcome to Elderfield
The Ancient Tablet +2 can appear after successfully examining a Skeleton Mage corpse.

Explorer Boots +5

Catacombs · Stone Hammer

The Explorer Boots +5 are hidden behind one of the blocked sections of the Catacombs. To reach them, you will first need a Stone Hammer, which can sometimes be dropped by enemies in this area.
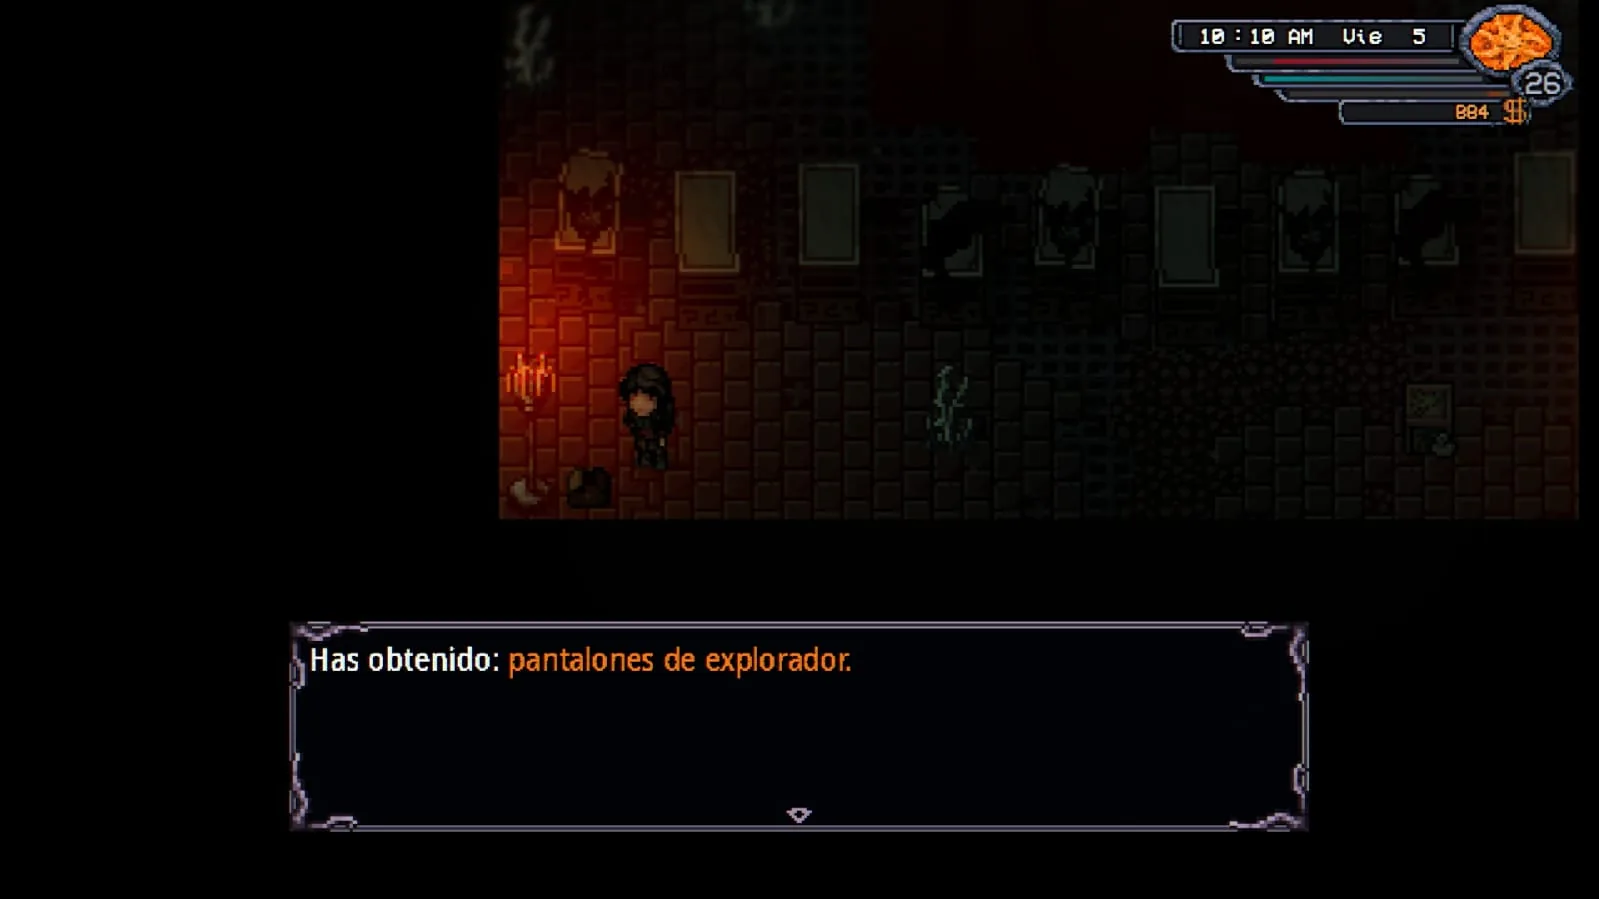
How to get the Explorer Boots +5: from the beginning of the Catacombs, enter the first corridor on the right and continue to the last door. Use a Stone Hammer to break through the blocked passage and open the chest inside.
Effect: the Explorer Boots have the Pockets property. Using an item in battle has a 5% chance to add +1 AP.
Explorer Boots +5 location in the Catacombs in Welcome to Elderfield
Use a Stone Hammer to reach the chest containing the Explorer Boots +5.

Rectangular Shield

Catacombs · Mimic

The Rectangular Shield is another piece of equipment hidden behind one of the passages that can be opened with a Stone Hammer.

How to get the Rectangular Shield: use a Stone Hammer to open the blocked passage containing the chest. Be ready before interacting with it, as reaching the equipment triggers a fight against a large Mimic.
Watch out for the Mimic: unlike some of the other Catacombs equipment chests, you will have to win a fight before you can safely claim this piece.

Explorer Pants

Catacombs · Stone Hammer

The Explorer Pants can also be obtained very early during your exploration of the Catacombs, provided you have already found a Stone Hammer.
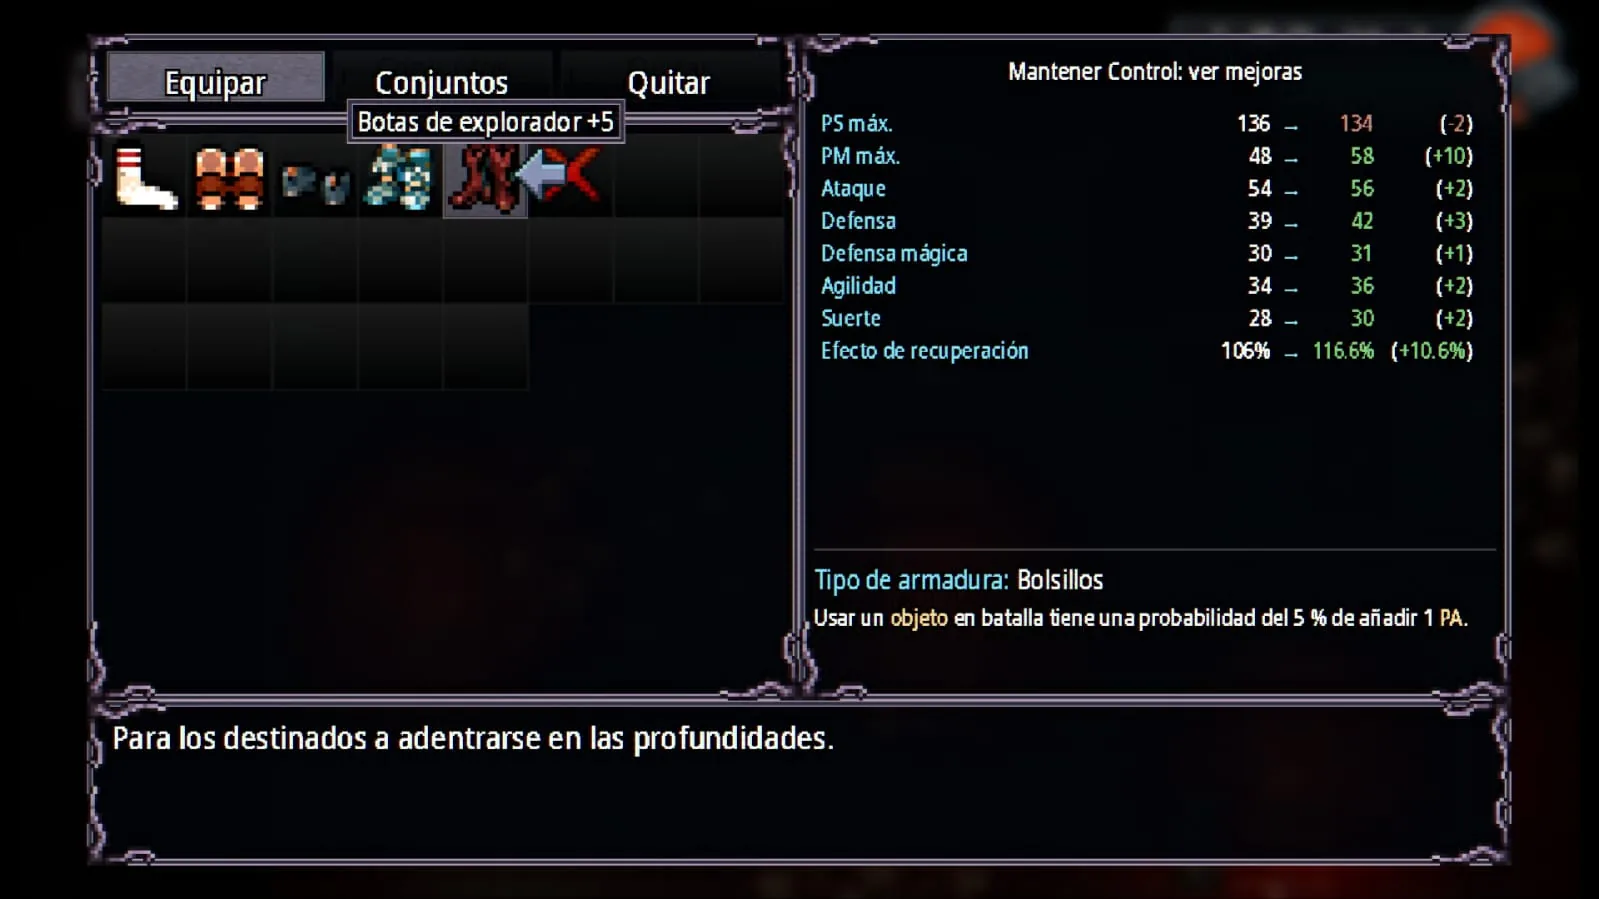
How to get the Explorer Pants: check the walls near the beginning of the Catacombs. One of them can be broken with a Stone Hammer, revealing the area containing the Explorer Pants.
Explorer Pants hidden behind a breakable wall in the Catacombs in Welcome to Elderfield
The Explorer Pants are hidden behind one of the breakable walls near the beginning of the Catacombs.

Gladiator Sandals +5

Catacombs · Stone Hammer

The Gladiator Sandals +5 are another reward hidden behind the breakable sections of the Catacombs. As with the Explorer equipment, keep at least one Stone Hammer while exploring instead of discarding it.
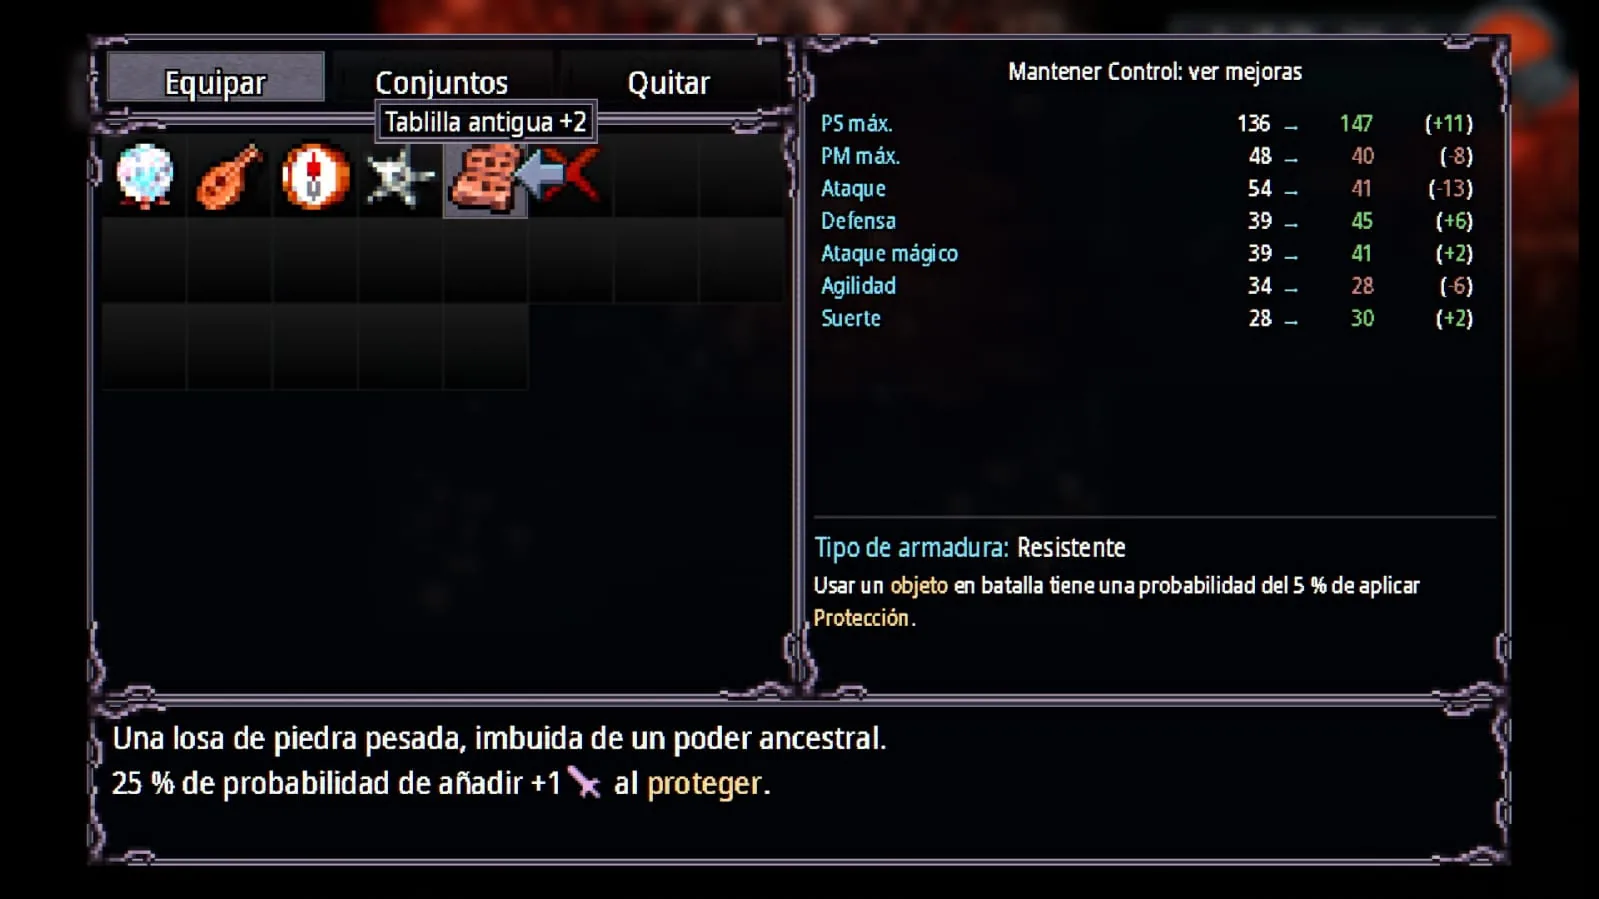
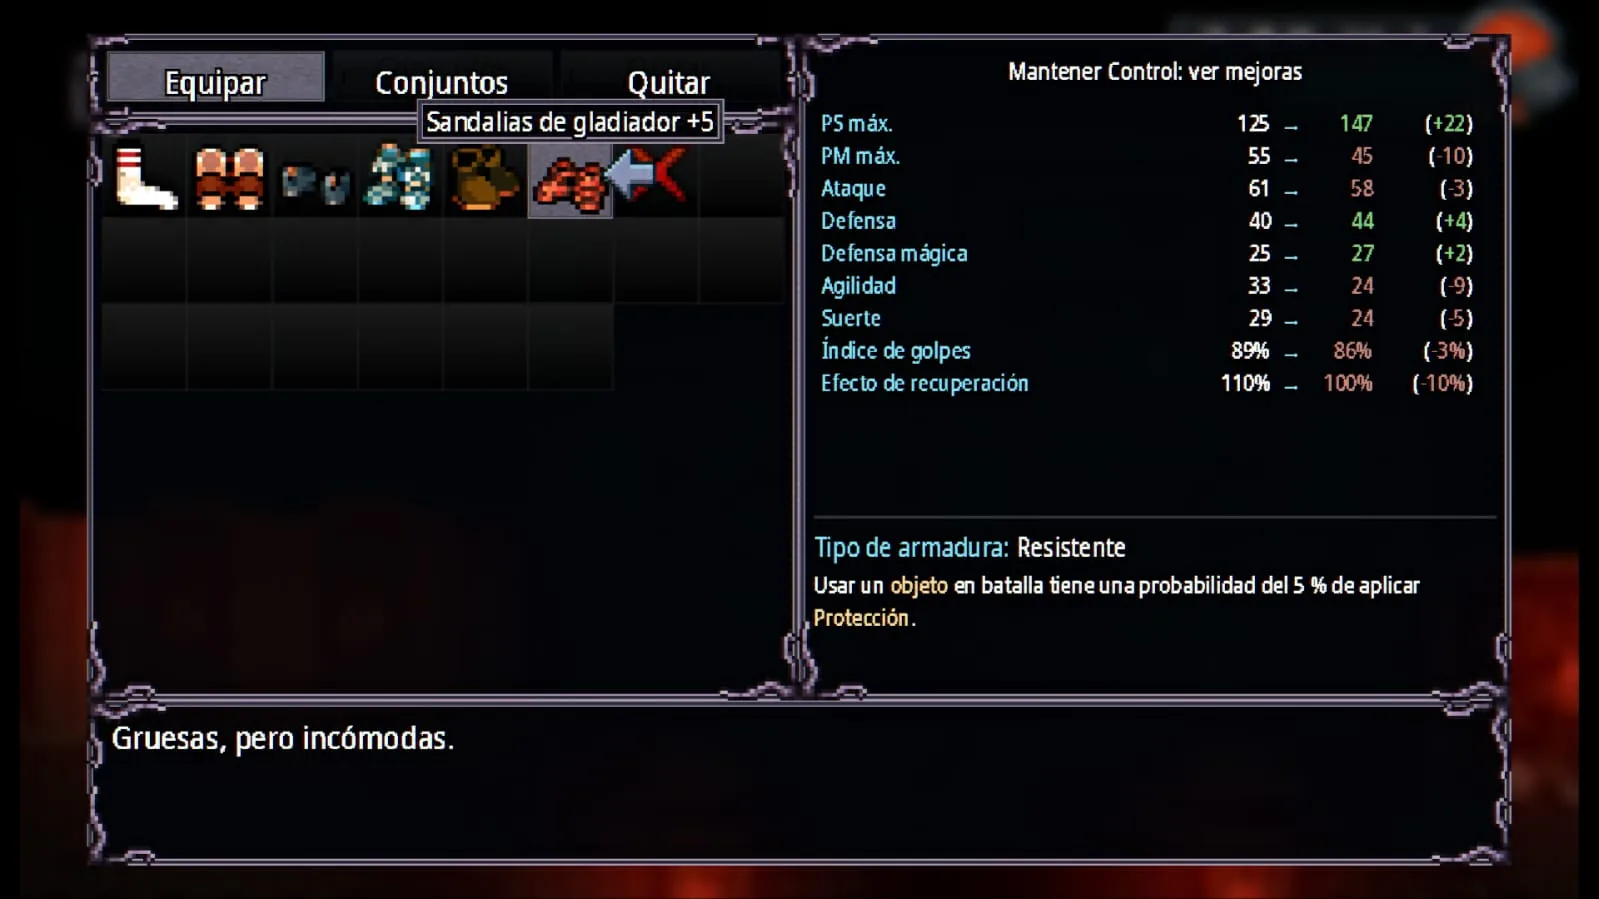
How to get the Gladiator Sandals +5: explore the optional Catacombs passages that can be opened with a Stone Hammer and check the rooms behind the breakable sections.
Armor type: Resistant. Using an item in battle has a 5% chance to apply Protection.
Gladiator Sandals +5 found in the Catacombs in Welcome to Elderfield
The Gladiator Sandals +5 are one of the equipment rewards hidden in the breakable areas of the Catacombs.

Painted Buckler +5

Catacombs · Combat

The Painted Buckler +5 is another piece worth collecting while opening the hidden areas of the Catacombs with the Stone Hammer. This time, however, the game makes you work for the reward.
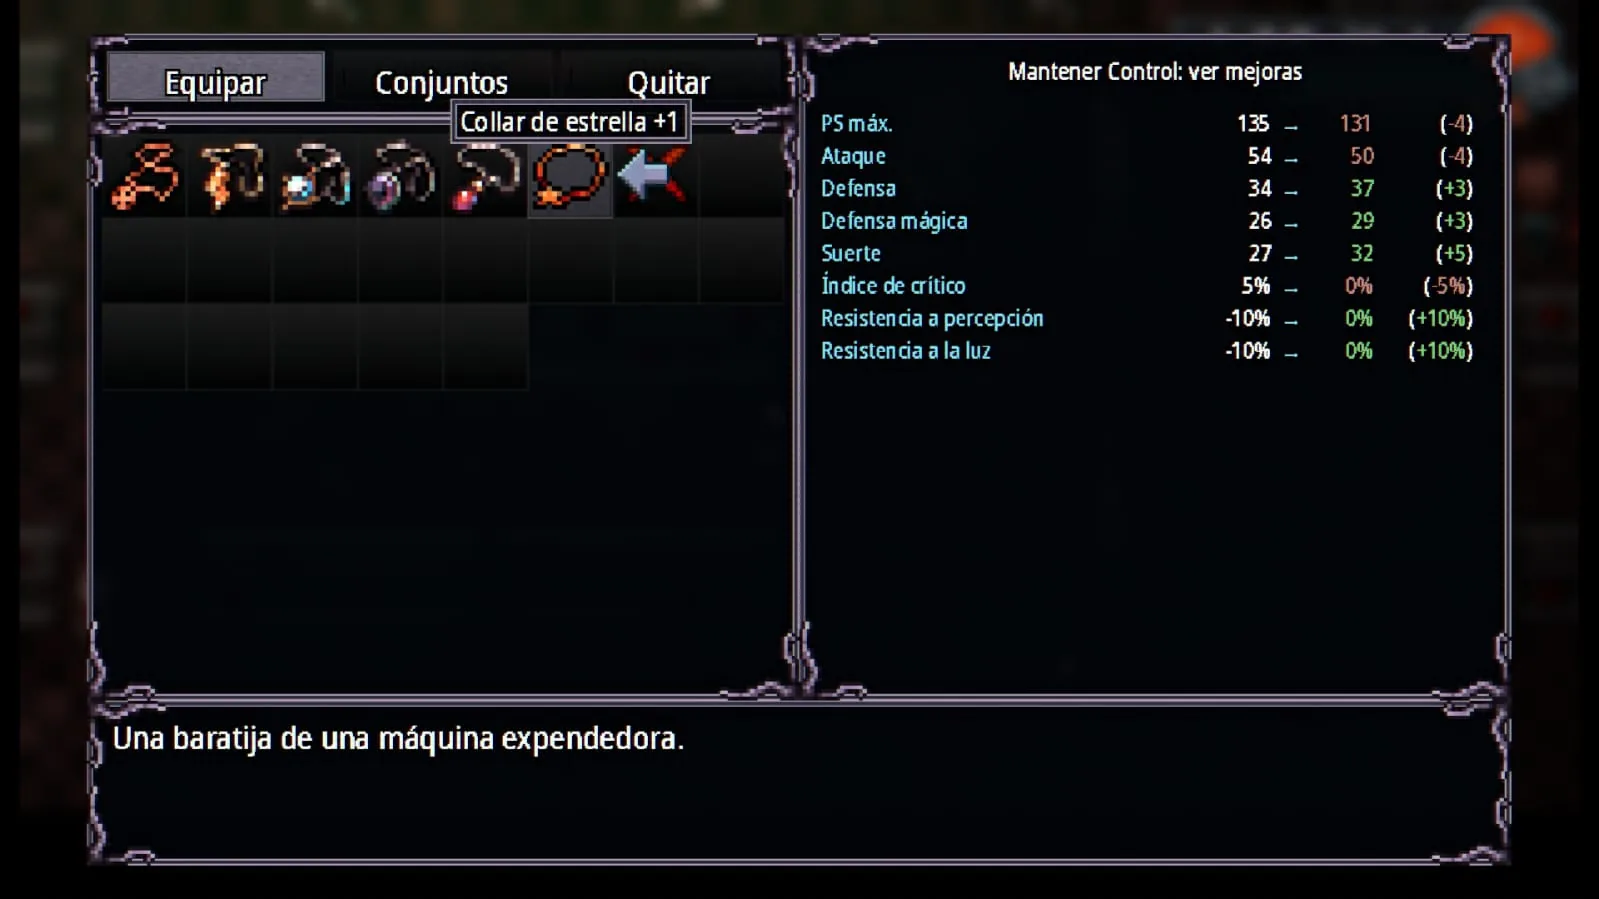
How to get the Painted Buckler +5: open the corresponding Catacombs passage with a Stone Hammer. Inside, you will have to fight five enemies before you can safely collect the equipment.
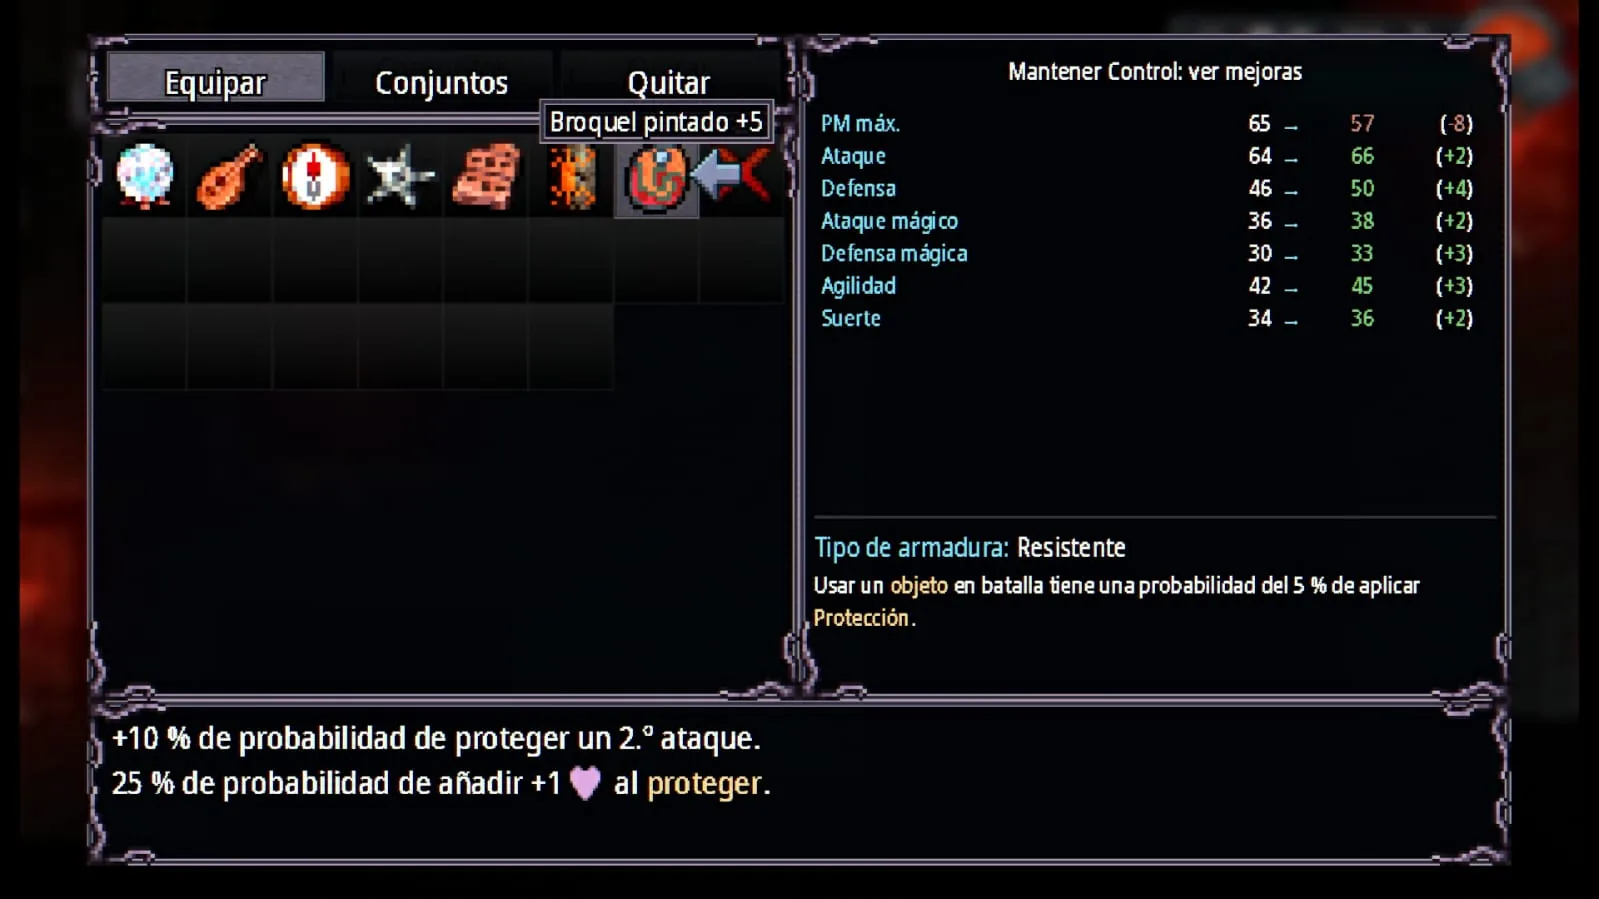
Armor type: Resistant. Using an item in battle has a 5% chance to apply Protection. The buckler also has a +10% chance to guard a second attack and a 25% chance to add +1 heart when guarding.
Prepare before entering: you have to deal with five enemies here, so heal and recover MP before triggering the encounter if you are already worn down from exploring the Catacombs.
Painted Buckler +5 obtained after fighting five enemies in the Catacombs in Welcome to Elderfield
Defeat the five enemies guarding this area to obtain the Painted Buckler +5.

Exploration finds and special loot

A surprising amount of good equipment does not come from the Forge at all. Some pieces are hidden in the Old Woods or its mine, some are locked behind a Basic Skeleton Key, and a few depend entirely on RNG or on getting the right dialogue from an NPC.

Esoteric Ring +2

Old Woods

The Esoteric Ring +2 is another piece you can simply find while exploring the Old Woods.
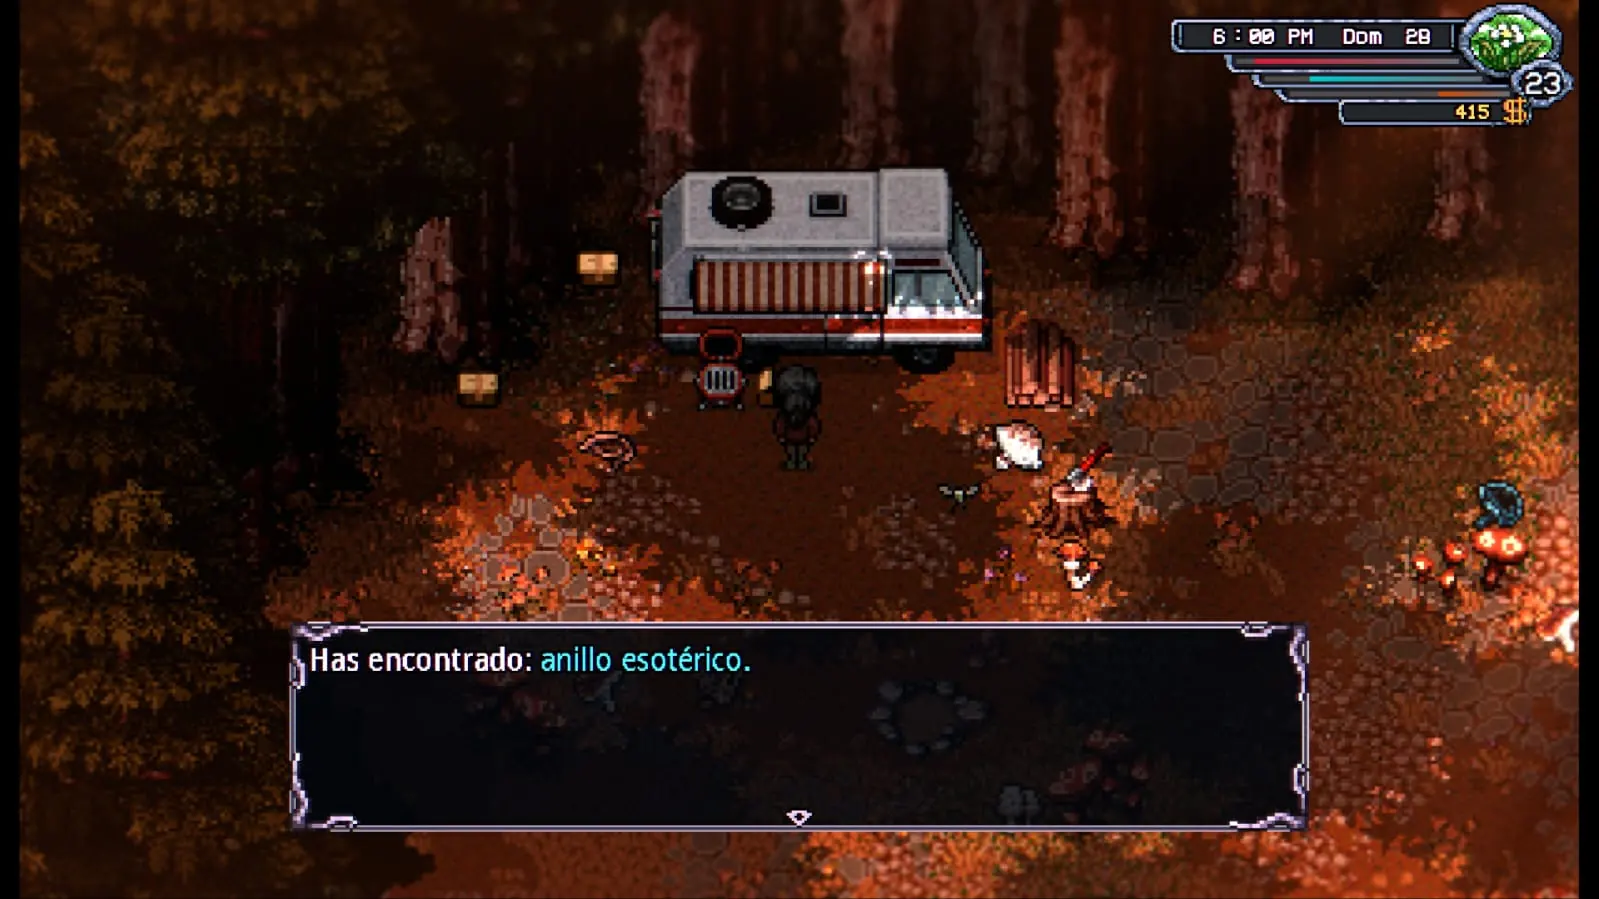
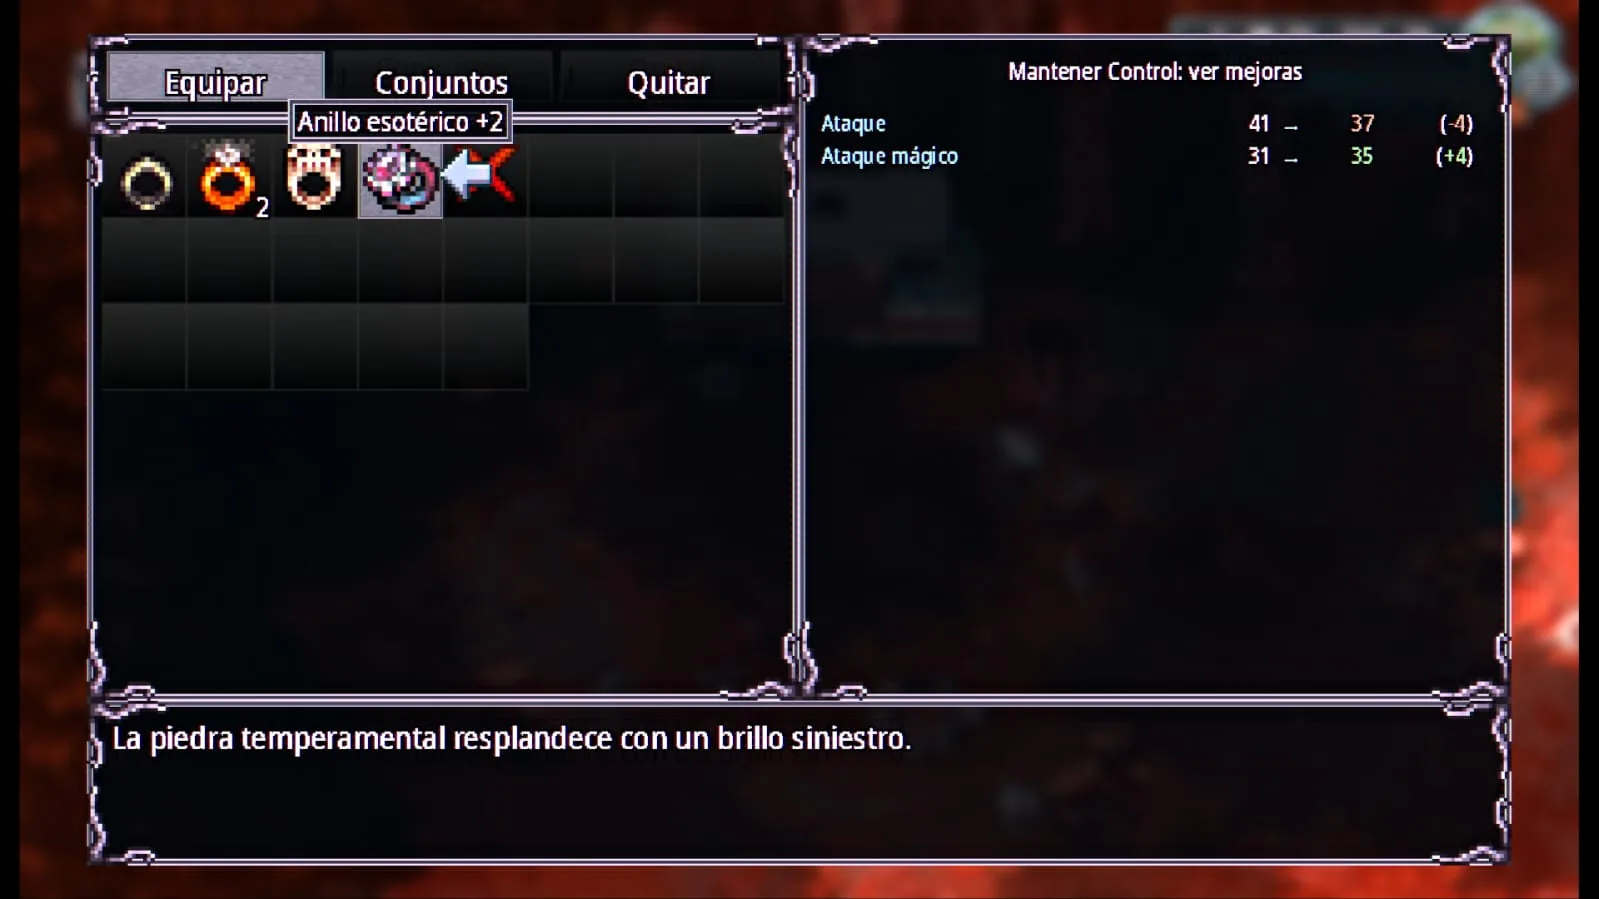
Main trade-off: it sacrifices some Attack in exchange for more Magic Attack, making it much more interesting for a magic-oriented setup.
Esoteric Ring found in the Old Woods in Welcome to Elderfield
The Esoteric Ring can be picked up while exploring the Old Woods.
Esoteric Ring +2 stats in Welcome to Elderfield
Esoteric Ring +2.

Syringe

Mall Mine · RNG

The Syringe is hidden in the Mall Mine, but finding the right room is only half the battle. The item itself depends on RNG.
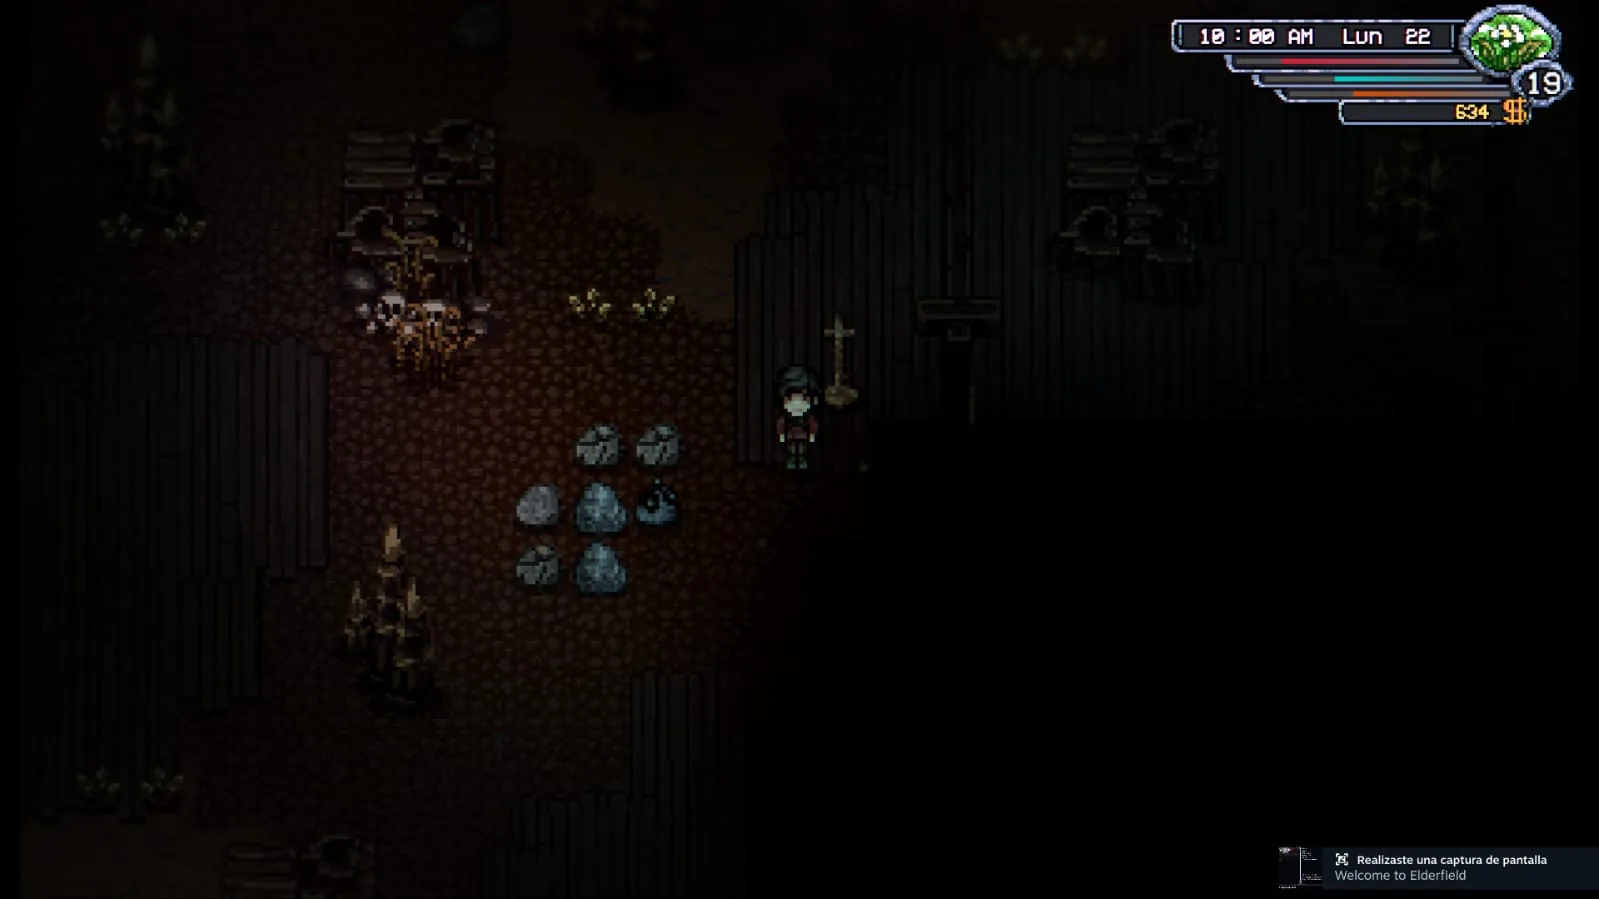
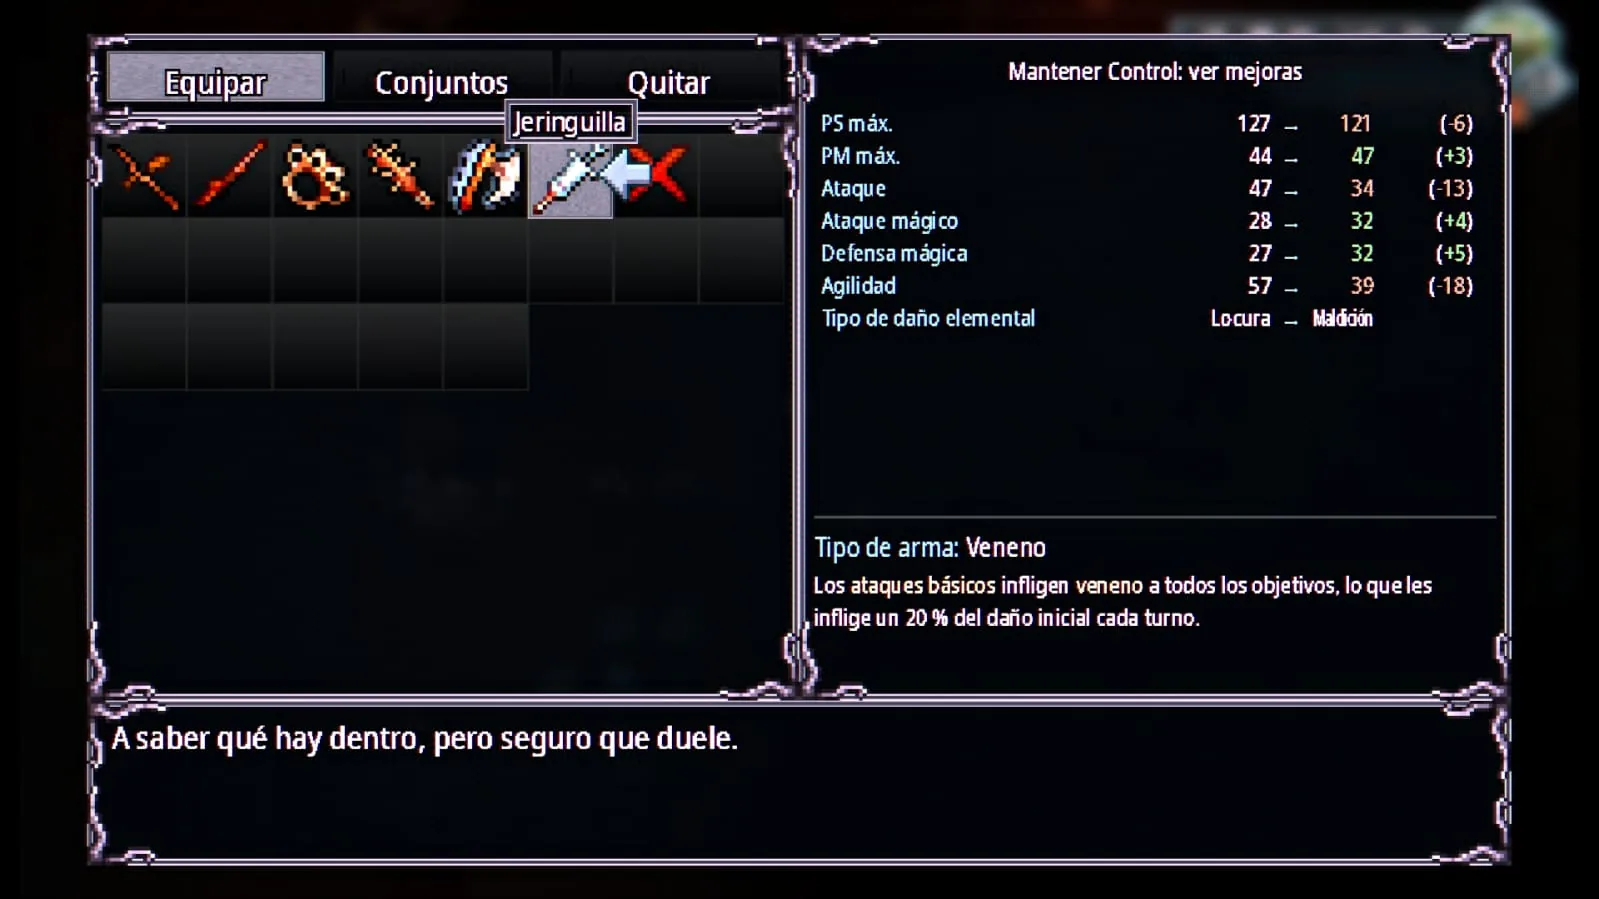
How to get the Syringe: while exploring the Mall Mine, investigate the coat racks whenever the game lets you search them. The Syringe can appear as the result of that investigation, but you need a favorable roll.
Pure RNG: reaching the correct investigation point does not guarantee the Syringe. If the roll does not go your way, you simply will not get it from that attempt.
Area in the Mall Mine where the Syringe can be found in Welcome to Elderfield
Search the coat racks in the Mall Mine and hope the roll goes your way.
Syringe weapon stats in Welcome to Elderfield
The Syringe inflicts Poison with its basic attacks.

Sharp Pendant +1

Old Woods

The Sharp Pendant +1 is another accessory found directly while exploring the Old Woods. It is worth checking the side paths rather than rushing straight through the main route.
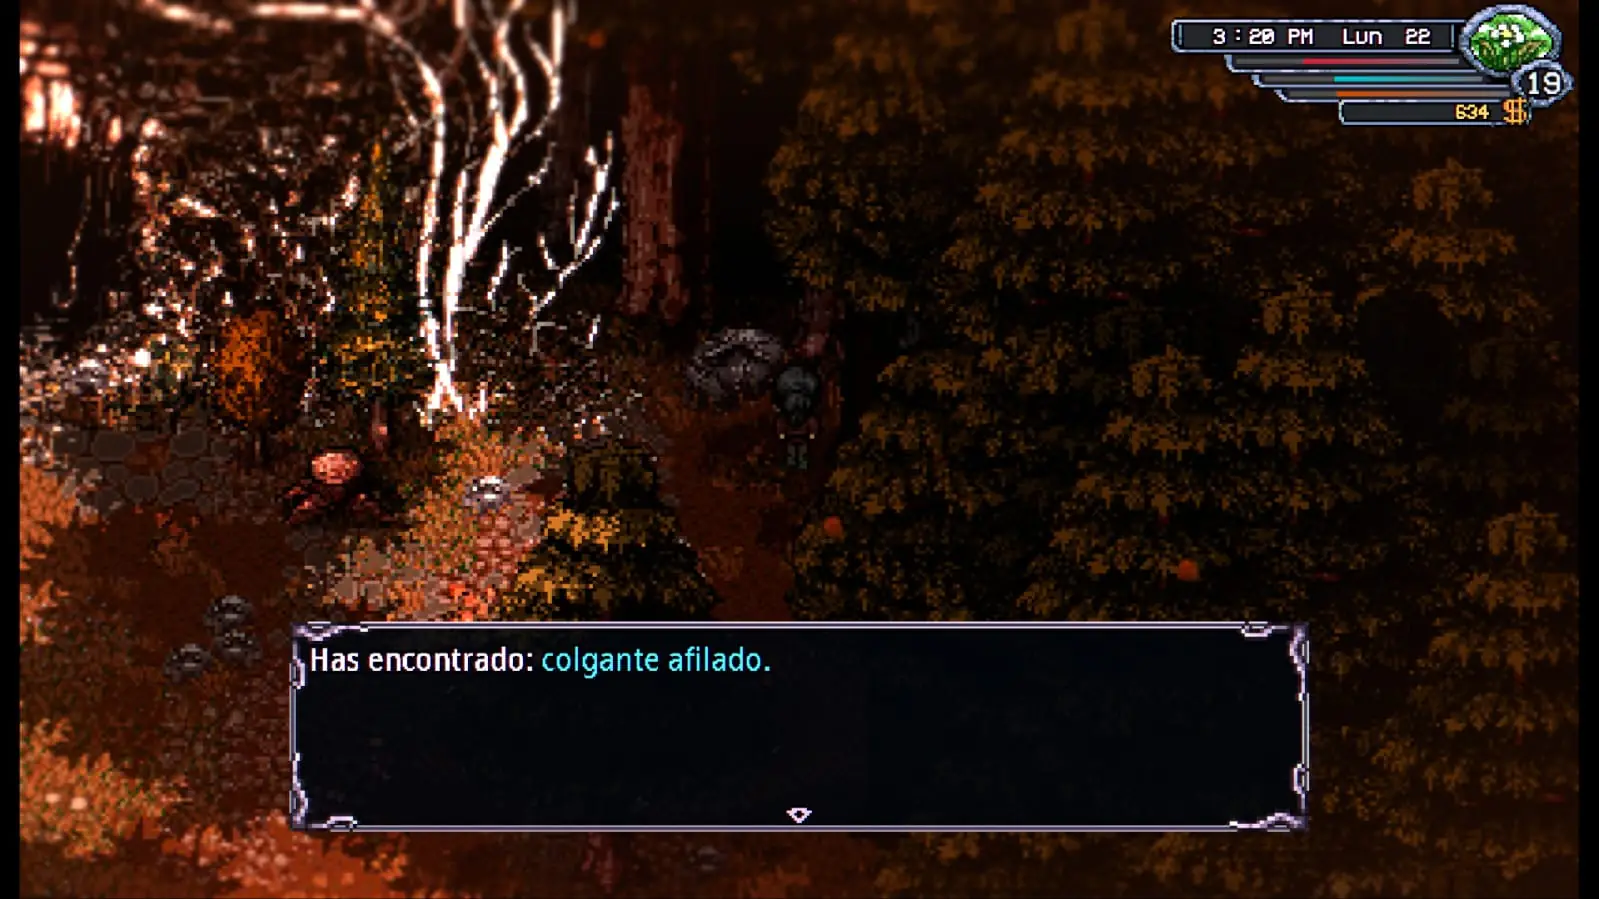
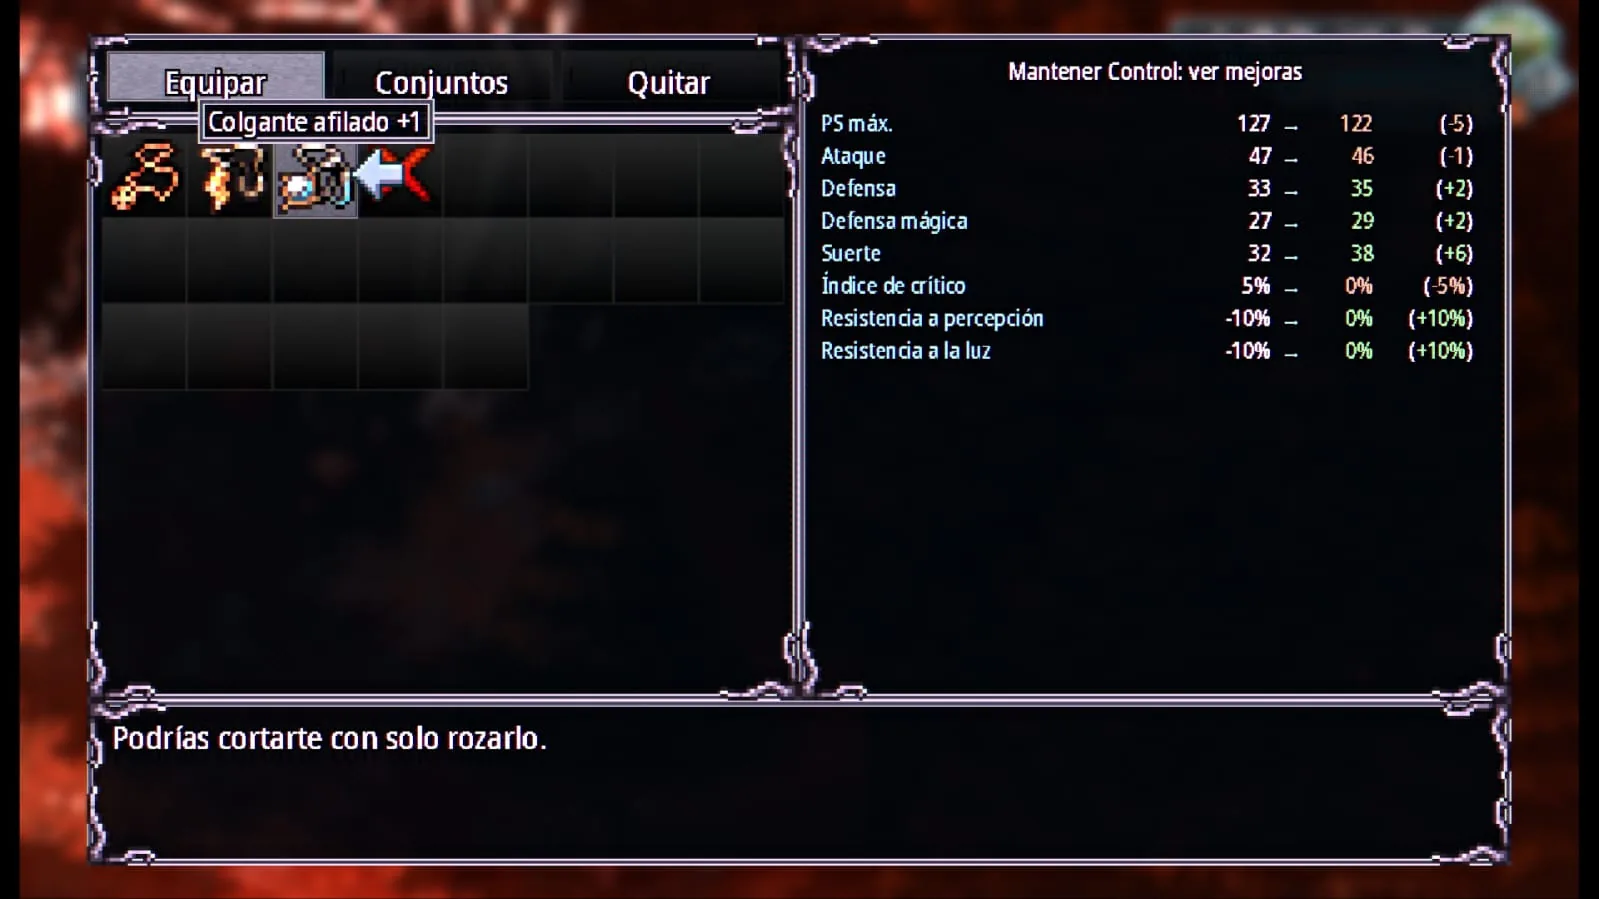
Sharp Pendant found in the Old Woods in Welcome to Elderfield
The Sharp Pendant +1 is an exploration pickup in the Old Woods.
Sharp Pendant +1 stats in Welcome to Elderfield
Sharp Pendant +1.

Blood Pendant +1

Old Woods

The Blood Pendant +1 is also found while exploring the Old Woods. It is another reason to check the optional paths and investigation points instead of sticking only to the main route.
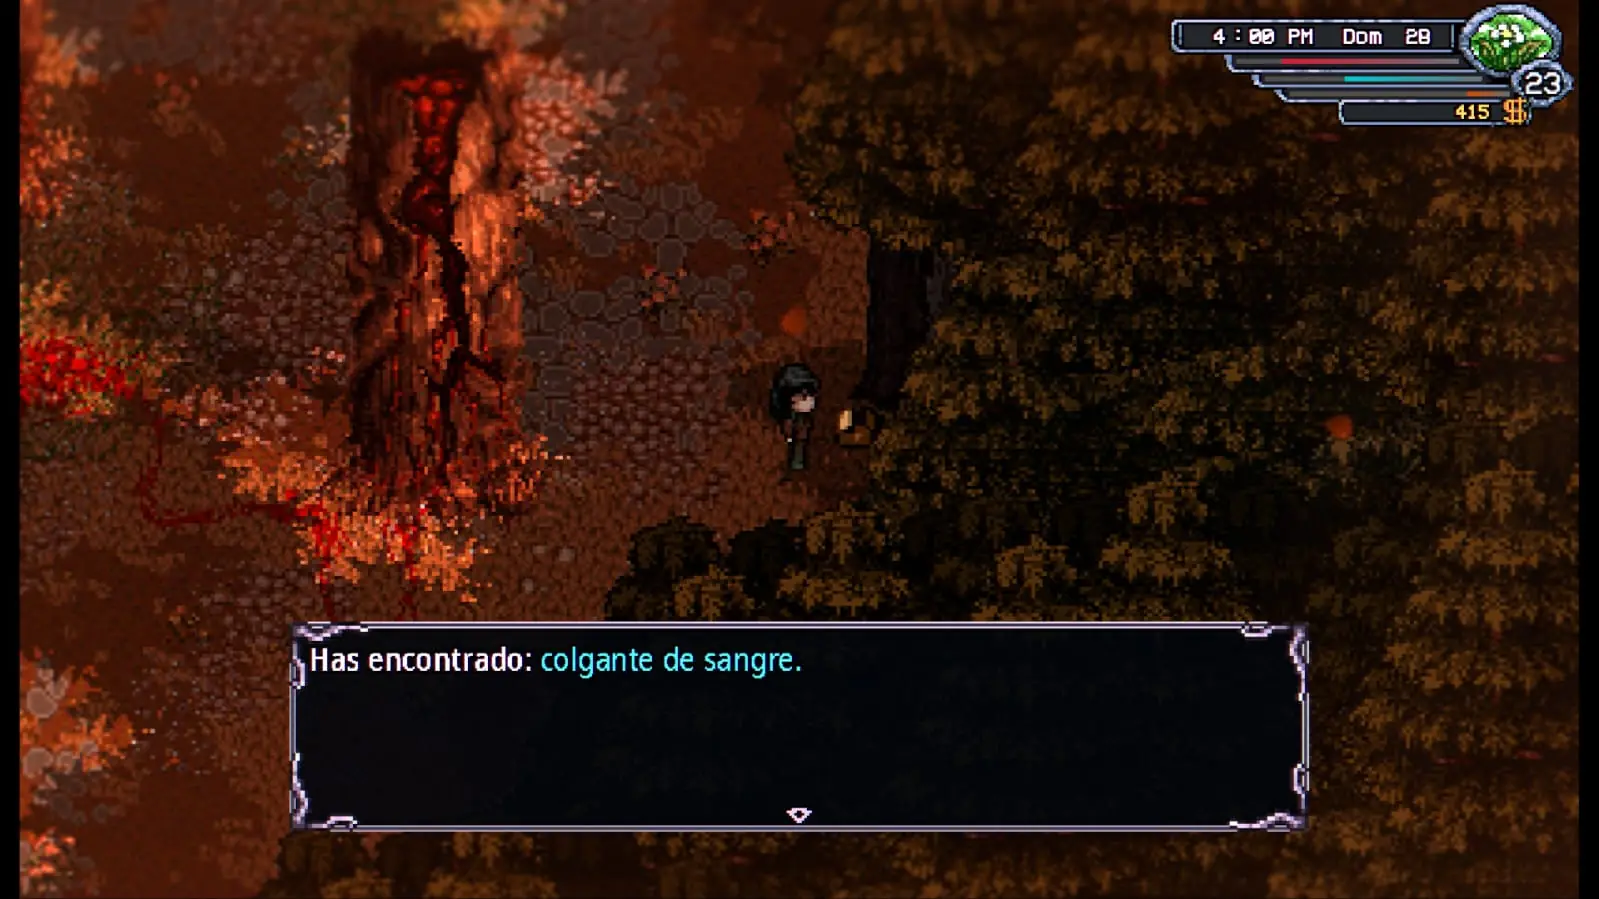
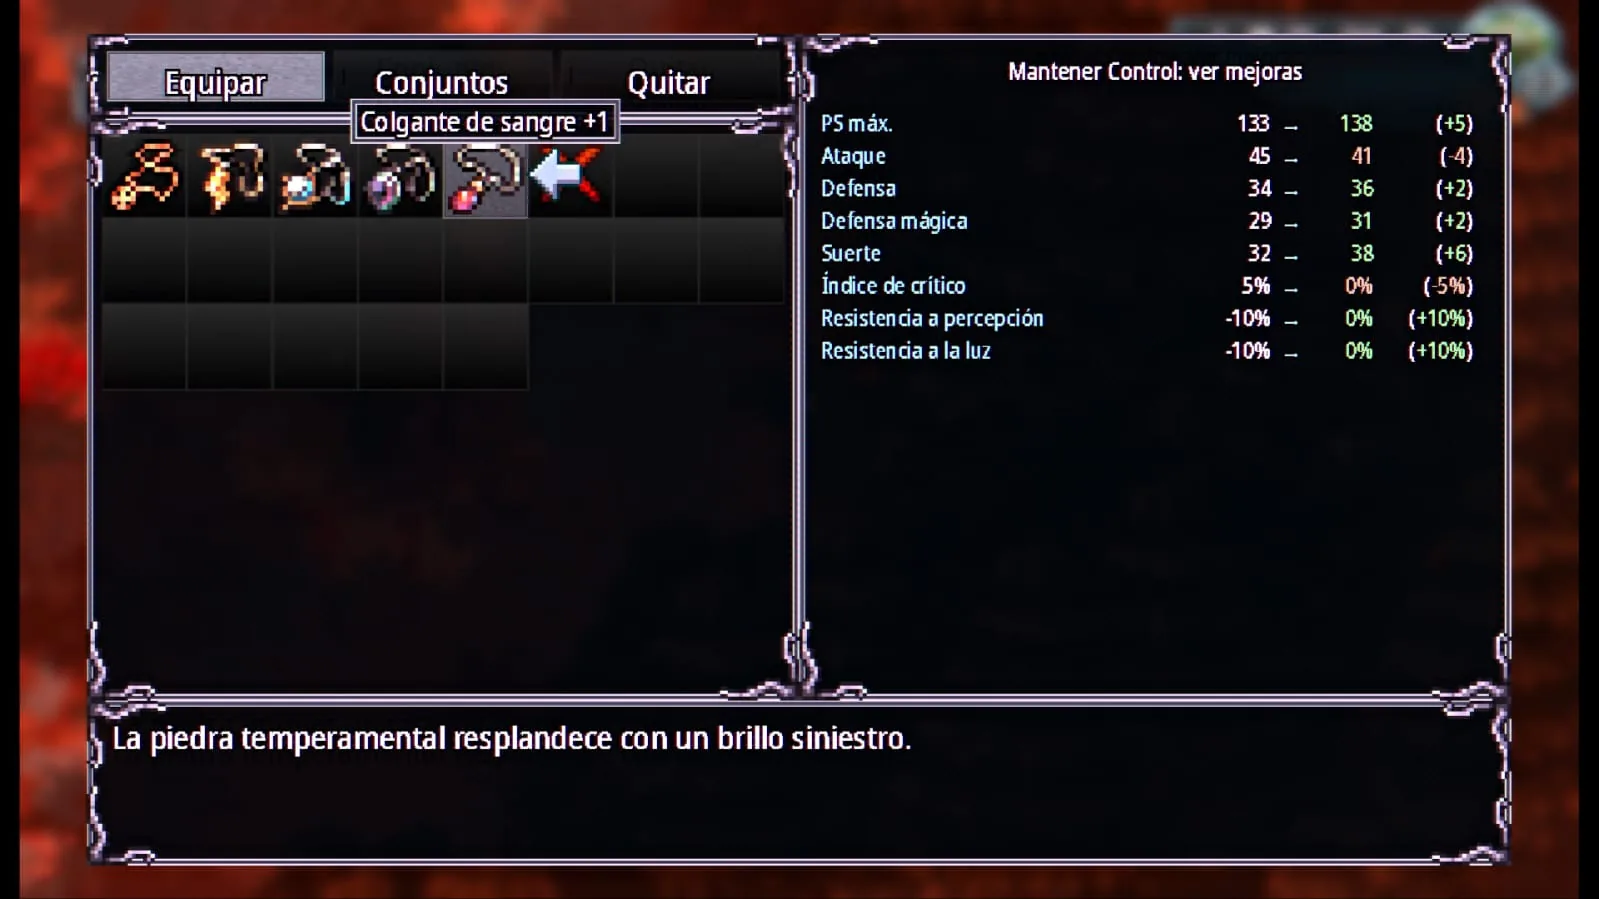
Blood Pendant found in the Old Woods in Welcome to Elderfield
The Blood Pendant +1 can be found while exploring the Old Woods.
Blood Pendant +1 stats in Welcome to Elderfield
Blood Pendant +1.

Ritual Dagger

Erwin · Random dialogue

Erwin can reward you with the Ritual Dagger, but the conversation you need does not appear every time you talk to him. He has several possible topics, so you need him to ask about the ancient numbers.
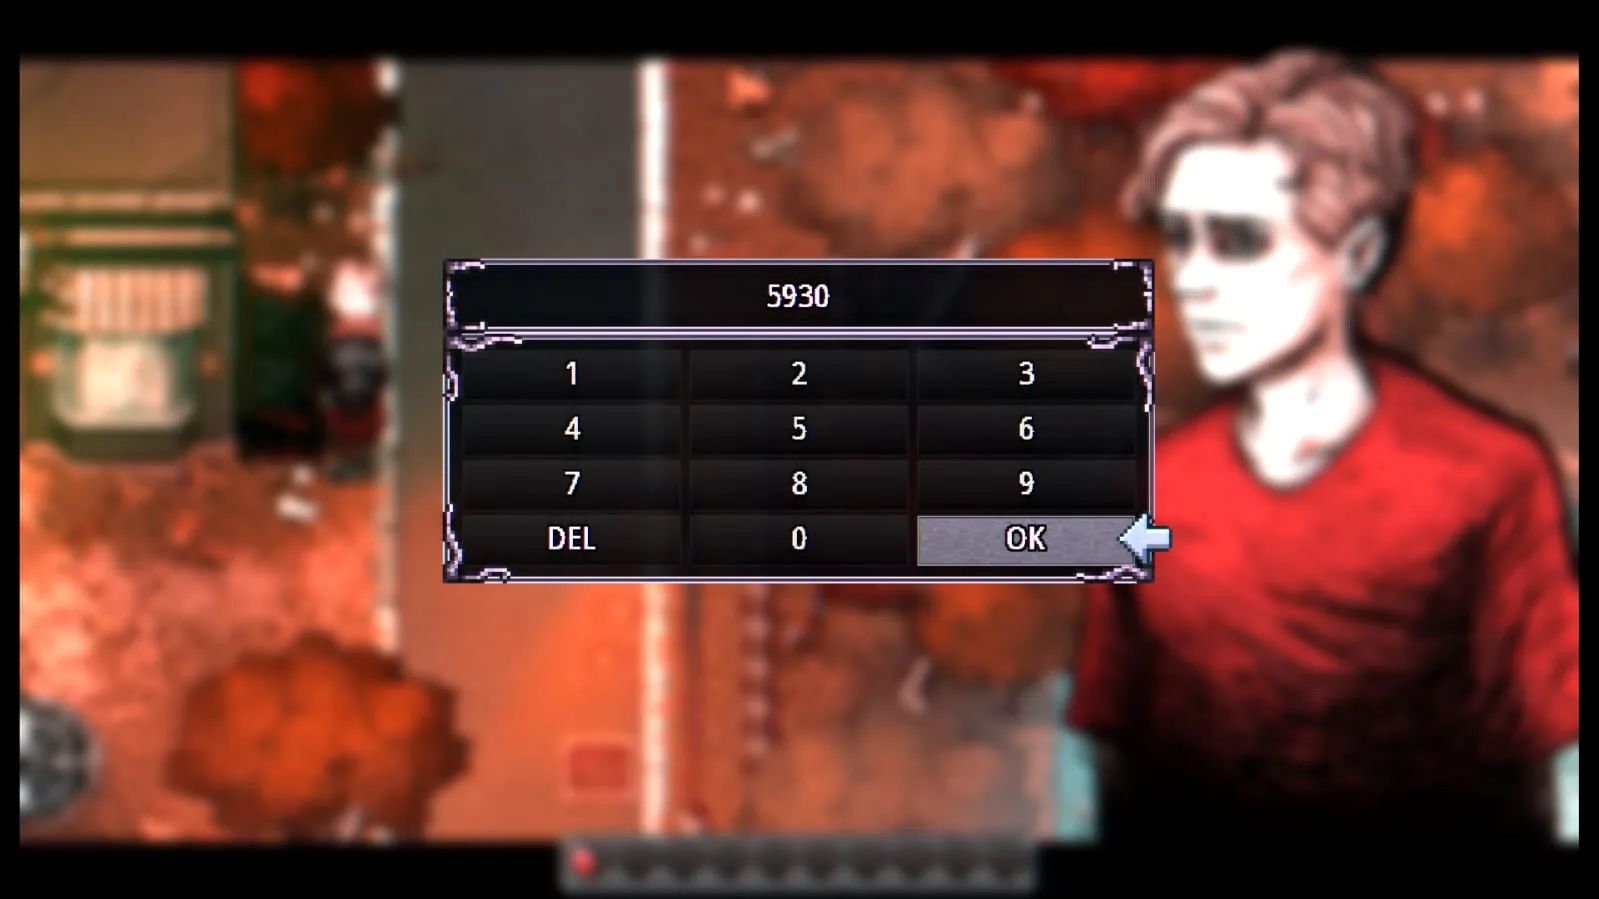
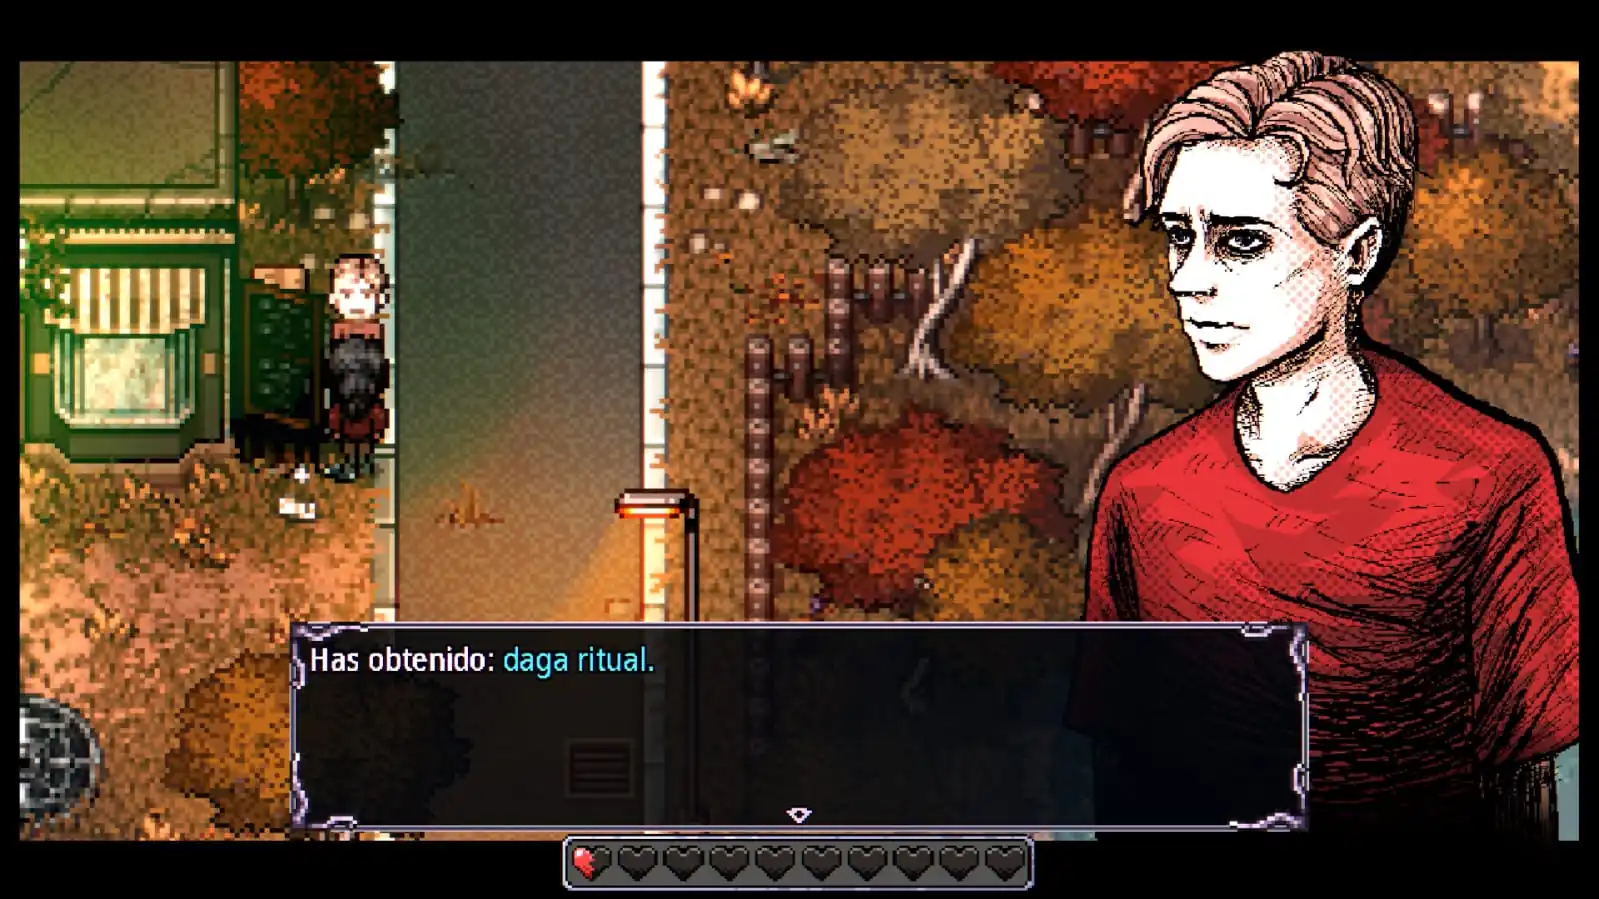
Correct answer: when Erwin asks about the ancient numbers, enter 5930. If you answer correctly, he gives you the Ritual Dagger.
The question itself is random: 5930 is the correct code, but typing it is only useful when Erwin actually asks you about the ancient numbers. In our run this interaction appeared with only half a heart of relationship, so you do not need to max out his friendship first.
Correct ancient numbers answer 5930 for Erwin in Welcome to Elderfield
Enter 5930 only when Erwin asks you about the ancient numbers.
Erwin gives the Ritual Dagger in Welcome to Elderfield
Answer correctly and Erwin rewards you with the Ritual Dagger.

Gold Coin

Old Woods Mine

The Gold Coin is inside the Old Woods Mine. If you are collecting the special items scattered through the forest area, make sure you also explore the mine rather than only the surface paths.

Best easy equipment for the early game

Early on, you do not need to open every house and wardrobe in Elderfield looking for one exact piece. Craft a decent weapon, use the useful gear you find naturally, and take advantage of combat rewards. If you already have something stronger, do not spend materials just to craft the next tier.

Free equipment when starting on Very Easy

Very Easy

If you start a new game on Very Easy, the single characters around town will give you a piece of equipment when you meet them for the first time.

Each character gives you a different type of equipment, so simply introducing yourself to them can quickly fill several of your slots with useful early-game gear, including pieces such as helmets, armor and shoes.

Very useful at the beginning: you do not need to farm enemies or spend crafting materials to get these pieces. If you are playing on Very Easy, meet the town’s single characters before investing too many resources into basic equipment.

Rusty Scissors

Mall · Sports store

The Rusty Scissors are one of the easiest weapons you can pick up early in the game. You can find them shortly after gaining access to the Mall, and their Piercing property makes them especially useful when fighting groups of enemies.
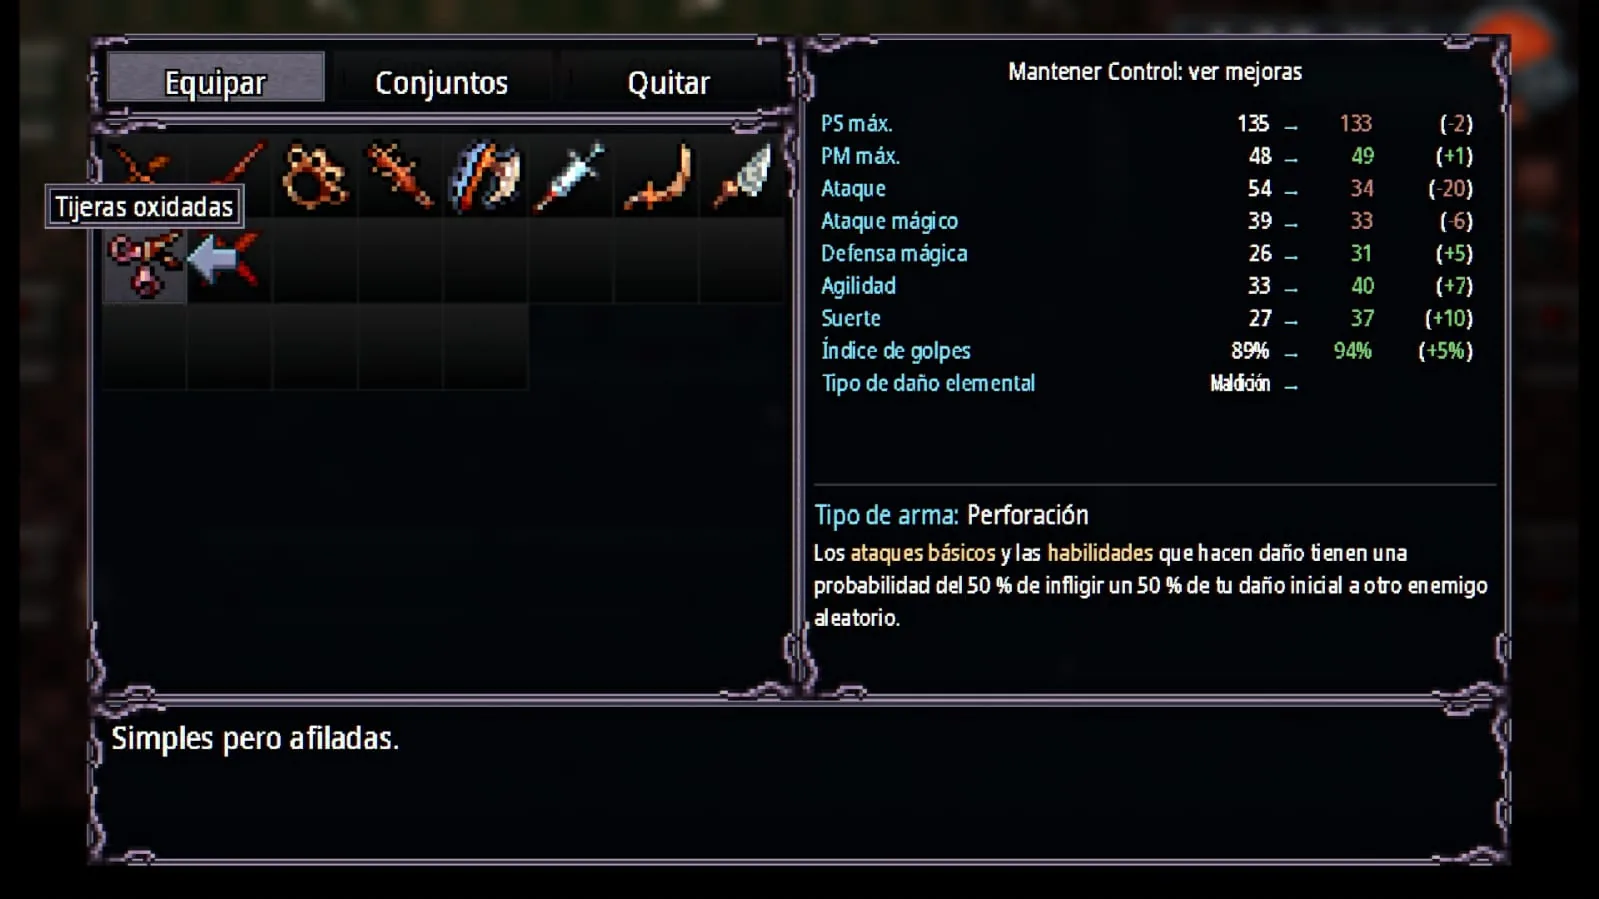
How to get the Rusty Scissors: enter the sports store in the Mall and head to the far-left corner of the store. Open the chest there to obtain the Rusty Scissors.
Weapon type: Piercing. Basic attacks and damaging abilities have a 50% chance to deal 50% of their initial damage to another random enemy.
Rusty Scissors location inside the Mall sports store in Welcome to Elderfield
The Rusty Scissors are inside a chest in the far-left corner of the Mall sports store.

Star Necklace +1

Mall · Luck roll

Before leaving the sports store, there is another useful piece of equipment you can try to obtain. Examine the counter and the game will trigger a dice roll.

If you get a favorable Luck result, you will receive the Star Necklace +1. Together with the Rusty Scissors, this makes the sports store one of the best places to visit for some quick equipment near the beginning of the game.
Luck roll: the Star Necklace +1 is not guaranteed. You only receive it if the dice roll is successful.
Star Necklace +1 obtained by examining the sports store counter in Welcome to Elderfield
Examine the sports store counter and succeed on the Luck roll to obtain the Star Necklace +1.

Unholy Ring +2

Very early if you are lucky

If RNG is on your side, you can get this ring fairly early. Go to the statue near the food stalls in the Mall and interact with it. A favorable Luck roll can reward the Unholy Ring +2.

Lucky Horseshoe

Very early if you are lucky

You can also get this fairly early at the shrine in the Sewers. You need a favorable Luck roll, so the reward is not guaranteed.

Spiked Bat +2

Excellent early

If this drops during the first few hours, try it before spending materials on another weapon. It hits hard for how early you can get it and can carry you through a lot of the opening fights.

How to get it: it can appear as a reward when you roll a 6 on the loot from certain early encounters. It is not guaranteed, but it is absolutely worth keeping if you get one early.
Watch the accuracy: that is its main weakness. If you are missing too often, compensate with accuracy equipment or a skill that helps you land the hit.

Priority #1: get a decent weapon

Early game

The weapon slot gives you one of the most noticeable early upgrades. A simple route is Stone Shortsword +1 → Copper → Iron, but do not force yourself through every step if you find something better first.

Do not sell crafted weapons too quickly: several chains reuse the previous weapon in the next recipe. Keep swords and staves that belong to a chain you may continue later.

Strange Skull +1

Easy magic option

Another piece you can get fairly early. Skelekid, the kid in the basement, gives it to you after the second task in his quest chain. First defeat 5 Sludgers, then 5 Pipe Cleaners. Its +8 Max MP is useful when you are starting to use Rites.

Police equipment +3

Basic Skeleton Key

The police pieces are useful once you can spare a Basic Skeleton Key. They are inside the locked rooms of the police station, so search those rooms rather than the open floor area.

Equipment materials: where to get them

If a recipe asks for something and you cannot remember where it came from, these are the materials that show up most often. We have taken each one back to its source rather than simply telling you that you need another processed bar.

Ores and bars

Copper: Copper Ore appears on every floor of the Mall and Old Woods mines, and in the Workshop mine. It is also sold at the Workshop. Smelt it in the Furnace for Copper Bars.
Iron: Iron Ore appears on every floor of the Mall and Old Woods mines and is sold at the Workshop. Smelt it in the Furnace for Iron Bars.
Verdite: Verdite Ore appears on every floor of the Old Woods Mine. Smelt it in the Furnace for Verdite Bars.
Platinum: Platinum Ore appears on floor 3 of the Old Woods Mine. Smelt it in the Furnace for Platinum Bars.
Void Crystal: raw Void Crystal appears on floor 3 of the Mall Mine and on every floor of the Old Woods Mine. Process it in the Furnace.
Green Crystal: appears on every floor of the Old Woods Mine.
Steel, Blacksteel and Gold Plate: the Catacombs mines contain Dense Iron Ore, Blackiron Ore and Dense Gold Ore. Process them in the Advanced Furnace for Steel Bars, Blacksteel Bars and Gold Plates.

Leather and other materials

Leather: get Bloody Skin from monsters. Mix 1 Bloody Skin, 2 Crushed Bones and 2 Salt in the Witchcraft Mortar to make Scraped Hide, then process it in the Furnace for Leather.
Crushed Bones: crush Bones in the Witchcraft Mortar, Mill or Windmill.
Ancientwood: found in resource nodes in the Catacombs mines.
Vile Relic: sold for 500 at the Lumberjack shop in the Deep Woods. Stock is limited.
Void Orb and Beating Heart: can appear as combat rewards. Several recipes use them and they are not guaranteed, so we would keep the first ones we find.

How to upgrade weapons and armor

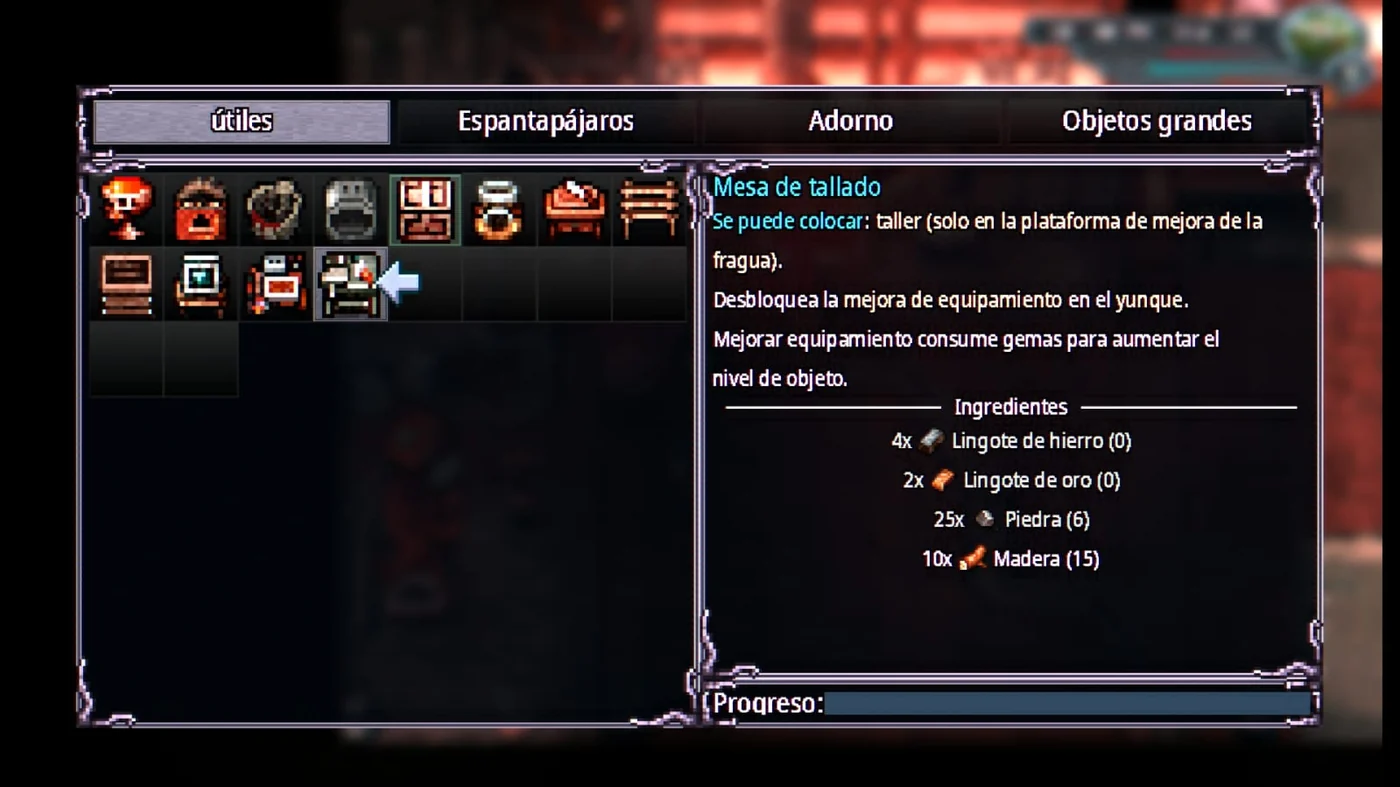
Crafting stronger gear is not your only option: you can also increase the level of equipment you already own by using gems. You cannot do this straight from the inventory. First you need to unlock and place the Carving Table at the Workshop.

Carving Table

Required for gems

The Carving Table is not where you select the upgrades. Its job is to unlock equipment upgrading at the Anvil.

How to unlock it: get the blueprint by completing Molly’s quest involving the gem. Craft the Carving Table and place it on the Forge upgrade platform at the Workshop. Once it is placed, return to the Anvil and the option to upgrade weapons and armor with gems will appear.
MaterialAmount
Iron Bar4
Gold Bar2
Stone25
Wood10
Swipe the table to see more →
Carving Table recipe in Welcome to Elderfield
The Carving Table costs 4 Iron Bars, 2 Gold Bars, 25 Stone and 10 Wood.

Where to get gems and which ones to use

Before you start slotting gems into everything, check their restrictions. Not every gem works on every piece, and some only work within specific upgrade-level ranges.

How to get gems

Gem Bags and Rare Gem Bags can appear among combat-shrine rewards and other combat rewards. In the Mall, this becomes relevant after defeating the Vigilante, when the game tells you that you can start using the shrines. Opening a bag gives you random gems, so it is not a way to choose one specific upgrade.
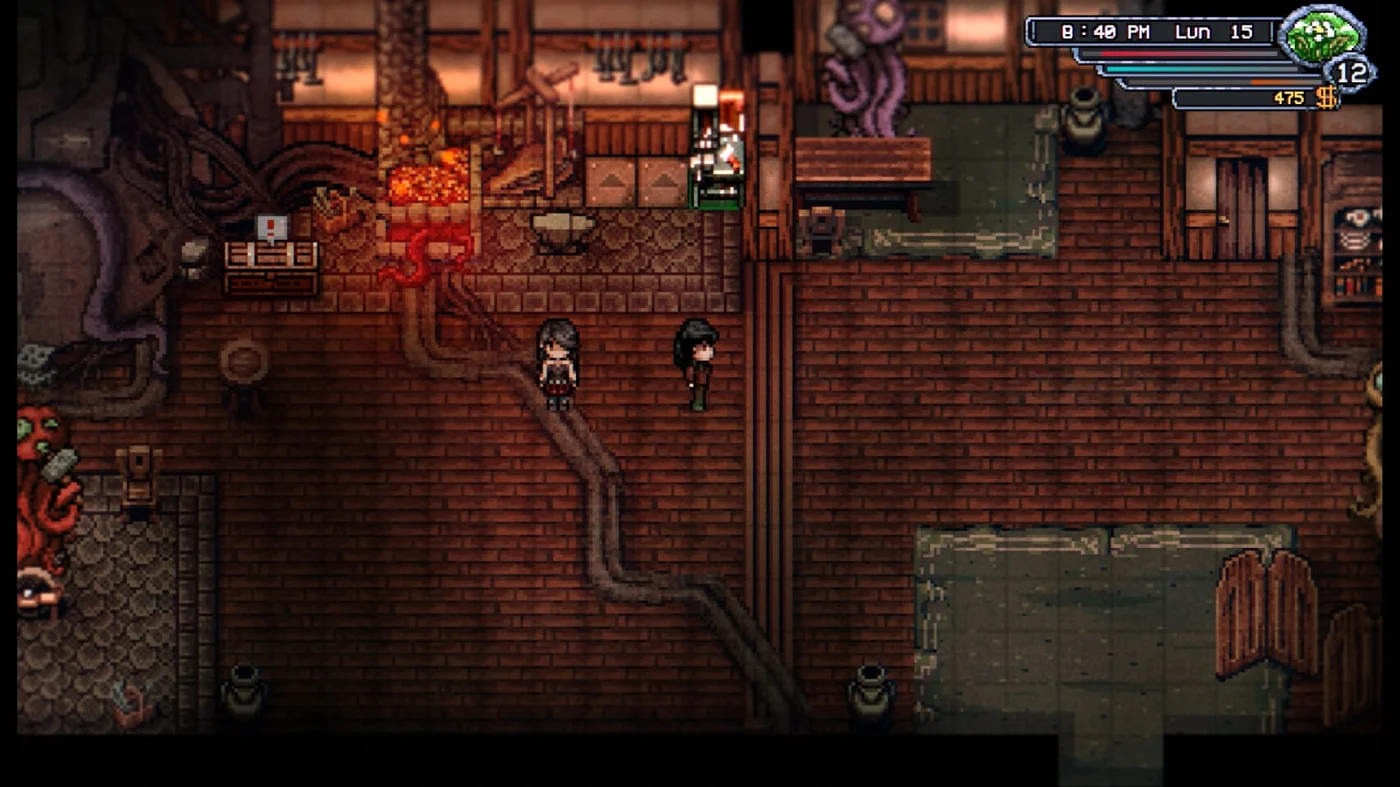
Carving Table placed at Molly's Workshop in Welcome to Elderfield
Place the Carving Table on the Forge upgrade platform at the Workshop. The Anvil will then gain the option to upgrade equipment with gems.
Do not spend a gem just because it fits. Physical swords usually benefit from Attack, accuracy or Agility. For a staff, prioritize Magic Attack and stats that help you sustain MP. HP and Defense are easy wins on armor.
GemUsed onLevelEffect
Chipped Sharp GemWeapons0–5+1 Attack
Chipped Magic GemWeapons0–5+1 Magic Attack
Chipped Focus GemWeapons0–5+2% accuracy
Chipped Swift GemWeapons0–5+2 Agility
Chipped Blood GemArmor0–5+2 Max HP
Chipped Mind GemArmor0–5+2 Max MP
Clear GemWeapons & armorAnyReduces the item by one level and reverses that level’s upgrade
Swipe the table to see more →
What is the best physical weapon?

The quick-sword branch is very comfortable because it combines Attack, Agility and accuracy, while greatswords sacrifice much more speed and reliability for raw damage. Pick quick swords if you value consistent hits; greatswords if you want much bigger numbers per hit.

How do I reach the deeper parts of the Old Woods?

First defeat the Mall Administrator. Adrian will then give you a basic axe. Take it to Molly to improve it, and the upgraded axe will let you progress deeper into the Old Woods.

How do I get the Traveler Shoes?

Defeat Living Logs in the Old Woods. Their corpse must remain intact so it is investigated automatically, and you then need a favorable dice roll. It is random, so it may take several kills.

Where do I get the Unholy Ring +2?

Interact with the statue near the food stalls in the Mall. A favorable Luck roll can reward the Unholy Ring +2.

Where do I get the Lucky Horseshoe?

Interact with the shrine in the Sewers. A favorable Luck roll can reward the Lucky Horseshoe.

What do I need to upgrade equipment?

First get the Carving Table blueprint by completing Molly’s gem-related quest. Craft it and place it on the Forge upgrade platform at the Workshop. You can then use gems to upgrade equipment from the Anvil.

Where do I get the Syringe?

Search the coat racks in the Mall Mine. The result is RNG, so finding the investigation point does not guarantee the weapon.

What is Erwin’s ancient-numbers code?

The answer is 5930, but Erwin does not always ask the same question. Wait until he specifically asks about the ancient numbers; answering correctly rewards the Ritual Dagger. We triggered it with only half a heart of relationship.

Where is the Opal Ring +2?

It is in a chest on the Greystone rooftop. You can conveniently pick it up while progressing through Childhood Fear.

Can I sell weapons and armor I no longer use?

Be careful. Many recipes use an earlier piece as an ingredient, so you can sell a weapon thinking you are done with it and discover hours later that the next recipe needs it. If it belongs to one of the chains in this guide, keep it.

Acknowledgements

We would like to thank Kwalee for providing us with a press key for Welcome to Elderfield, which we used while preparing this guide.